Last updated: August 14, 2026
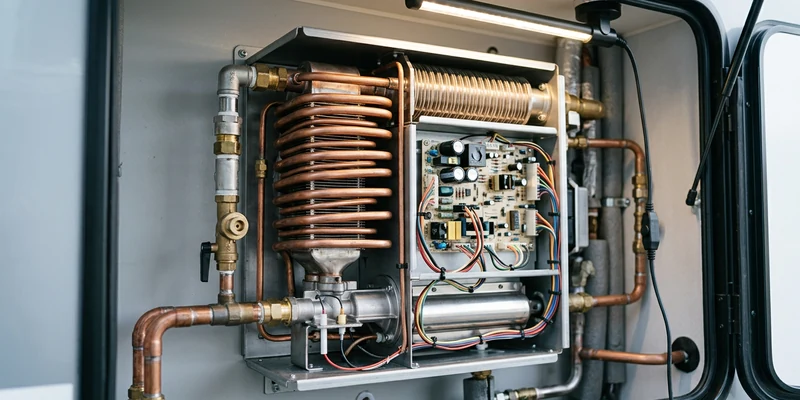
Most RV tankless water heater repair jobs come down to one thing: the unit never gets a good enough reason to fire. A tankless heater does not sit there holding hot water. It waits for a minimum amount of water to move through it, confirms that movement with a flow sensor, and only then starts an ignition sequence. Take away the flow, dirty the sensor that measures it, coat the heat exchanger in scale, block the outside vent, or let 12 volt voltage sag during ignition, and you get the same complaint every time: cold water, or hot water that quits after a minute.
That is good news for owners, because four of those five causes are water side or electrical, and they are yours to fix. The fifth, anything that happens after the gas valve, is not. This guide runs the diagnosis in the order a technician would run it, starts with the checks that cost nothing, and is honest about the line where the job stops being a driveway repair and becomes a call to a certified RV technician.
This article contains affiliate links. If you buy through them, we may earn a commission at no extra cost to you. Learn more.
Quick Answer
Why is my RV tankless water heater not making hot water?
- Nine times out of ten it is flow. Tankless units need a minimum amount of water moving through them before they will fire, and a weak pump, a clogged filter, a low regulator setting, or a partly open valve puts you under that threshold.
- If flow at the tap is fine, suspect the flow sensor in the cold inlet, scale on the heat exchanger, a vent screen packed with insects and debris, or 12 volt voltage dropping at the moment of ignition.
- Anything on the propane side, the gas valve, burner, orifices, or regulator, is certified technician work. Same for the 120 volt side on electric and hybrid units.
Symptoms, Causes, and Actions at a Glance
Find your symptom in the left column. The middle column is what it usually means on an RV tankless unit, and the right column is the first thing to do about it, ordered so the fastest fix comes first.
| What the heater does | What it usually means | What to do first |
|---|---|---|
| Never fires, no fan, no sound at all | No 12 volt power reaching the control board | Check the fuse, the on switch, and voltage at the unit |
| Fan runs, clicks, then quits without heating | Ignition attempted and locked out | Check propane supply and the outside vent, then stop and read the safety section |
| Never fires but the display is alive | The board is not seeing enough flow | Open the hot tap fully, check pump, filter, and valve positions |
| Fires at the shower but not at a sink | Sink flow is below the activation threshold | Normal behavior on most units, open the tap wider |
| Fires, then goes cold after a minute | Flow dropped, voltage sagged, or an overheat limit tripped | Watch the pump cycling, then check for scale |
| Hot, cold, hot, cold while showering | Pulsing flow from the water pump, or scale in the exchanger | Add an accumulator tank, then descale |
| Water is lukewarm and never gets hot | Flow too high for the unit, or heavy scale | Reduce flow slightly, then descale the exchanger |
| Weak hot water flow, cold side is fine | Scale or debris restricting the exchanger and inlet screen | Clean the inlet screen, then descale |
| Works on city water, not on the pump | Pump cannot sustain the minimum flow | Check pump, strainer, and filter, then consider a stronger pump |
| Intermittent, fires some days and not others | Dirty or sticking flow sensor, or a marginal 12 volt supply | Measure voltage at the unit while it tries to fire |
| Rumbling or kettling noise | Scale build up in the heat exchanger | Descale, and check your water hardness |
| Leaking from the body or fittings | Freeze damage, or a loosened connection | Shut off water and power, inspect for split fittings |
| Error code on the display | Manufacturer specific fault | Look it up in your own manual, codes are not shared between brands |
| Yellow flame, soot, or a gas smell | A combustion fault | Shut it down, close the cylinder valve, ventilate, call a certified technician |
Two of these symptoms have enough behind them to get their own walkthroughs: flow sensor problems and descaling the heat exchanger. If you are not sure whether your rig has a tankless unit or a conventional tank, start with RV water heaters explained.
Start With the Checks That Cost Nothing
Run these seven before you open a parts catalog or book a service appointment. On a tankless unit they resolve the complaint more often than any component replacement does, and they take about twenty minutes with a flashlight and a multimeter.
- The switch, and every switch. Most rigs have an interior control panel switch and sometimes a second switch or breaker at the unit itself. Winter mode, summer mode, or a bypass setting can also hold a unit off. All of them have to agree.
- The 12 volt fuse. RV tankless units draw their board, fan, and igniter from the 12 volt system, usually through a small fuse in the distribution panel. Pull it and look at the element rather than squinting through the plastic.
- Voltage at the unit, while it tries to fire. A healthy 12 volt battery reads roughly 12.6 to 12.8 volts at rest. What matters here is what the unit sees during the ignition sequence, when the fan and igniter both draw. A reading that dips well below the manufacturer’s stated minimum during that moment is your fault, not a coincidence.
- Propane supply and cylinder valves. Confirm you actually have gas, that the cylinder valve is fully open, and that you opened it slowly. Opening it fast can trip the excess flow device in the cylinder valve and leave every propane appliance starved. Close it, wait, and reopen slowly.
- Water flow at the tap. Open the hot side fully at the fixture nearest the heater. If the stream is weak, you have a flow problem, not a heater problem, and the rest of this article follows from that.
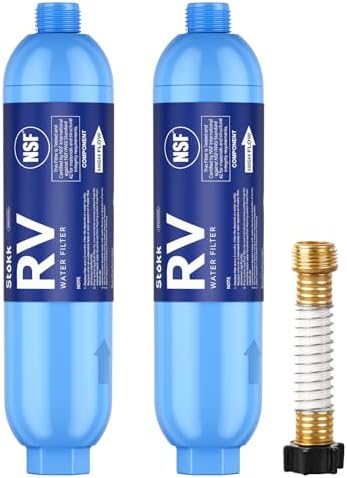
- The water filter and the pump strainer. An exhausted inline filter cartridge or a strainer packed with sediment is one of the most common reasons a unit that worked last season stops firing this season.
- The outside vent. Look at the exterior grille. Mud dauber nests, spider webs, leaves, and road grime block combustion air and exhaust, and a blocked vent causes lockouts that look exactly like an ignition failure. Clear the outside of the grille and screen only, and leave anything deeper alone.
If the pump is the weak link rather than the heater, our RV water pump repair guide is the place to go next, and the step by step pump sequence gives you the meter readings.
🧽 The cheapest part that protects a tankless unit
An inline sediment prefilter on the fresh water hose, ahead of everything else. Grit is what fouls a flow sensor and seeds scale on a heat exchanger, and a filter costs a fraction of either repair. Fit it at the spigot when you are on city water, and use it when filling the fresh tank too.
Flow Is the Single Biggest Cause
A tankless water heater will not fire until a minimum amount of water is moving through it. On RV units that threshold commonly sits somewhere in the neighborhood of half a gallon per minute, though the exact figure varies by model and is printed in your manual. Below it, the board simply never starts the sequence, and from inside the rig that is indistinguishable from a dead heater.
This is why so many owners report that the unit works fine at the shower but never at the bathroom sink. The shower moves enough water, the sink does not. It is also why a unit that behaved perfectly on city water suddenly fails once you are boondocking on the pump, since a tired pump on a partly clogged strainer may not sustain the flow the heater needs.
What actually robs you of flow
Work through these in order, because they are ranked by how often they turn out to be the answer. A water filter cartridge past its useful life. A pump strainer full of sediment. A pressure regulator at the city water inlet screwed down too far. A partly closed valve left over from winterizing. A clogged aerator at the fixture you are testing. A kinked hose behind the wet bay. And on older rigs, a pump that has simply lost output over the years.
Then there is the opposite problem, which surprises people. Too much flow gives you lukewarm water rather than no water, because the burner cannot add enough heat to that volume in the time it spends inside the exchanger. If your complaint is that the water is warm but never hot, and your incoming water is cold, try closing the tap slightly. If that fixes it, the unit is behaving normally and you are simply asking it for more than its rating.
🚿 When the pump cannot keep the unit lit
A 12 volt RV water pump rated somewhere around 3 to 5.5 gallons per minute with a built in pressure switch, which comfortably clears the activation threshold of a tankless heater with a fixture or two open. Match the flow rating to your fixture count and check the port thread and mounting footprint before ordering. Our comparison of the best RV water pumps covers the sizing.

The Flow Sensor: Small Part, Big Symptom
If the flow is genuinely there and the unit still never fires, the next suspect is the sensor that measures it. On most RV tankless units this is a small turbine or paddle wheel in the cold water inlet with a magnet in it, sitting next to a sensor that counts how fast it spins. No spin means no flow as far as the control board is concerned, and no ignition.
Sediment, mineral flakes, sanitizer residue, and biofilm all foul that turbine, and the failure is classically intermittent: it works after the rig has sat, then stops, then works again after a hard flush. Owners report the same pattern often enough that a fouled sensor should be near the top of your list whenever the symptom comes and goes without a clear trigger. The full walkthrough, including how to clean it without disturbing anything on the gas side, is in our guide to RV tankless flow sensor problems.
Scale on the Heat Exchanger
Scale is the slow failure. Hard water leaves mineral deposits inside the narrow waterways of the heat exchanger, and because those passages are deliberately small to transfer heat quickly, it does not take much to change the behavior of the unit. The symptoms build over a season or two rather than appearing overnight.
Watch for four of them together: hot water that fluctuates during a shower, reduced flow on the hot side only while the cold side stays strong, a rumbling or kettling sound while the burner runs, and overheat lockouts that clear after the unit cools. That combination is scale until proven otherwise, especially if you fill from wells, spend time in hard water regions, or leave the rig connected all season.
How often to descale
Manufacturers usually recommend a flush on an annual basis, with more frequent service on hard water. Rather than following the calendar blindly, judge by symptoms: when hot water starts swinging and the exchanger starts making noise, it is time regardless of the date. The procedure itself is a circulating vinegar or descaler flush on the water side only, with no gas components involved, which puts it firmly in owner territory. We walk through it in how to descale an RV tankless water heater.
🧪 For an exchanger that rumbles and swings
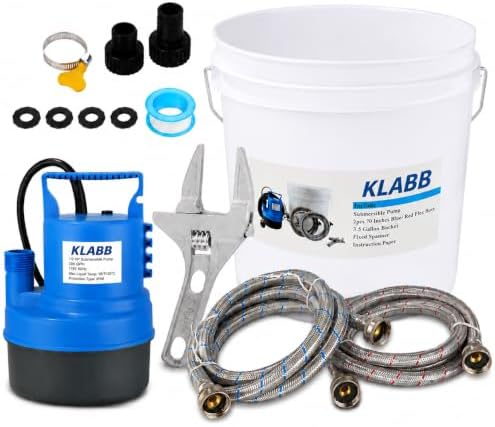
A tankless water heater flush kit with a small submersible pump, two hoses, and a bucket, which is the standard way to circulate descaling solution through the exchanger. Check what fittings your unit needs before ordering, since RV units often use smaller connections than residential tankless heaters.
The Intake and Exhaust Nobody Checks
A propane tankless unit vents through the sidewall of the rig, and that opening is a magnet for trouble. Mud daubers build in it, spiders web across it, leaves collect in it, road spray cakes it, and in cold weather it can partly ice over. Restrict the combustion air or the exhaust path and the unit will attempt ignition, fail to prove a stable flame, and lock out.
The owner level job here is limited and worth doing at the start of every season. Look at the exterior grille with a flashlight, vacuum or brush away nests, webs, and debris from the outside face, and confirm nothing is parked against the vent, including a slide topper, an awning arm, a bike rack, or a generator exhaust. Keep the area around the vent clear whenever the unit is running.
What you do not do is reach past the grille toward the burner assembly. Cleaning a burner, a flame sensor, or an orifice is combustion work, and we do not publish instructions for it. Get it wrong and you are not left with cold water, you are left with an appliance producing carbon monoxide inside a space you sleep in.
The 12 Volt Side and Voltage Drop
An RV tankless unit is fussier about voltage than a conventional tank heater, because the ignition sequence runs the combustion fan and the igniter at the same time. If the supply sags during that moment, the board sees a fault and shuts down, which reads to the owner as a random failure to light.
Test it properly: put your meter on the unit’s own 12 volt terminals, not on the battery, and watch the reading while somebody opens a hot tap. A supply that looks fine at rest and collapses during ignition is telling you about undersized wiring, a corroded ground, a tired battery, or a converter that is not doing its job. This gets worse in cold weather and worse again on a rig that has been sitting.
Where the fault usually lives
Start with the ground connection, since corroded grounds cause more 12 volt mysteries in RVs than anything else. Then check the battery under load, then the charging side. If the batteries never seem to come up while you are plugged in, work through an RV converter that is not charging the battery and RV converter repair, because a heater that will not light can be the first symptom of a charging problem you have not noticed yet.
About Error Codes
Every manufacturer uses its own code set, and the same two digits mean completely different things on a Girard, a Furrion, a Fogatti, a Truma, and a Suburban. We deliberately do not publish a cross brand code list, because a wrong lookup on a gas appliance sends people to the wrong repair, and on this particular appliance the wrong repair can be dangerous.
Do this instead. Write down the exact code and what the unit was doing when it appeared, then look it up in the manual for your specific model, which is almost always downloadable from the manufacturer. Note whether the code clears on a power cycle and whether it returns immediately or after a delay, because that pattern is the most useful thing you can hand a technician. Codes that point at ignition, flame sensing, or combustion belong to a certified technician, full stop.
Where This Stops Being a DIY Job
This is the most important section on the page. A tankless RV water heater is a gas fired combustion appliance in a small living space, and the boundary is not negotiable. The water side and the 12 volt side are yours. Everything downstream of the gas valve is not.
We do not publish instructions for any of the following, and you should be wary of any site that does: gas lines and fittings, regulators, gas valves, burner tubes, orifices, burner adjustment, flame sensor or thermocouple adjustment, and 120 volt wiring or breaker work on electric and hybrid units. These jobs need proper leak testing and combustion checks with instruments, and an error is not visible in the way a water leak is.
Stop immediately and call for help if you notice
- Any smell of gas. Shut the appliance off, close the cylinder valve, get everyone out, ventilate, and do not operate switches or flames.
- A carbon monoxide alarm sounding. Outside first, people first, questions later.
- Soot, black marks around the vent, or dark staining on the sidewall.
- A yellow, lazy, or lifting flame where you can see one, rather than a stable blue burn.
- Scorch marks, melted insulation, or heat damage anywhere near the unit or its vent.
Every rig with a combustion appliance needs a working carbon monoxide alarm, and most owners never check the date on the back. These units have a service life stamped on them and they expire whether or not the battery is fresh. If yours is past its date, or you cannot find a date, replace it before you troubleshoot anything else.
🚨 Check this before you check the heater
A combination propane and carbon monoxide alarm rated for RV use, mounted per the maker’s instructions. Look at the manufacture and expiry date on the back of the one you already have, because the sensor ages out on a fixed schedule regardless of battery condition. This is the least optional purchase on this page.

When Replacing Beats Repairing
Tankless units are less repairable at owner level than a conventional tank heater, because the serviceable parts are mostly water side and everything else is a board or a combustion component. Here is the honest dividing line.
| Situation | Repair or replace | Why |
|---|---|---|
| Fouled flow sensor, unit otherwise healthy | Repair | Cleaning or swapping the sensor is water side work and often solves it outright |
| Scaled heat exchanger, no leaks | Repair | A descaling flush restores most of the lost performance |
| Blocked vent screen | Repair | Cleaning the exterior grille costs nothing |
| 12 volt supply sagging at ignition | Repair | The fault is in the wiring, ground, or charging, not in the heater |
| Cracked exchanger or freeze split | Replace | Exchangers are not field repairable and freeze damage rarely stops at one part |
| Control board failure out of warranty | Usually replace | Board cost plus labor often approaches the cost of a current unit |
| Repeated combustion faults after service | Technician decides | This is a safety judgment, not a budget one |
| Old unit, poor parts availability | Replace | Waiting weeks for a discontinued part is its own cost |
If you land on replacement, the good news is that this is one of the more satisfying upgrades in an RV, and the fitment question is mostly about matching the wall opening. Our roundup of the best RV tankless water heaters covers sizing and fitment, with separate comparisons for propane units and electric units. If you are still deciding whether tankless is the right answer at all, read tankless versus tank first.
🔥 When the unit itself is finished
A propane RV tankless water heater sized to your rig’s existing wall opening, with on demand ignition and an adjustable temperature control. Measure the opening height and width before ordering, since replacing a conventional tank heater usually means a different cutout, and check the flow rating against how many fixtures you run at once.

Keeping It From Happening Again
Tankless units fail for boring reasons, and the same four habits prevent most of them. Filter your water, because grit is the common ancestor of both fouled sensors and scaled exchangers. Descale on a schedule that reflects your water rather than the calendar. Clear the exterior vent at the start of every season, before the mud daubers get comfortable. And winterize properly, because a tankless unit holds water in a place you cannot drain by opening a plug and walking away.
That last one deserves emphasis. A conventional tank heater gets drained through the anode rod port and forgotten about, but a tankless unit has no tank and its heat exchanger holds water in narrow passages that split when they freeze. The procedure is genuinely different, and getting it wrong writes off the most expensive part of the appliance. We cover it separately in winterizing an RV tankless water heater, alongside the general routine in keeping RV pipes from freezing.
Two more habits belong on the list. Keep a pressure regulator at the city water inlet, since high campground pressure stresses fittings and the internal water path alike, and our guide on how much RV water pressure is too much covers what to set it to. And run through the seasonal routine in RV tankless water heater maintenance once a year rather than waiting for a symptom.
Common Mistakes to Avoid
- Assuming the heater is broken when the flow is the problem. Test a hot tap wide open before you conclude anything, because a unit that cannot see flow behaves exactly like a dead one.
- Looking up an error code on another brand’s chart. The codes do not transfer, and acting on the wrong one wastes money at best.
- Reaching past the vent grille. Clearing the outside face is maintenance. Anything inside is combustion work.
- Measuring battery voltage instead of voltage at the unit. Voltage drop only shows up where the load actually is, during ignition.
- Skipping the descale because there is no visible symptom yet. By the time an exchanger rumbles, it has been scaling for a while.
- Winterizing a tankless unit like a tank unit. There is no tank to drain and the exchanger holds water. It needs its own procedure.
- Opening the propane cylinder valve fast. It trips the excess flow device and starves every appliance in the rig.
Where to Go From Here
If your symptom points at one specific thing, go straight to it: flow sensor problems for intermittent no fire faults, descaling for temperature swings and noise, winterizing for the fall job, and installing a tankless unit if you have decided to replace.
If your rig has a conventional tank heater rather than a tankless one, the diagnosis is different and starts with RV water heater not working, with specific paths for electric only failures and a unit that will not light on propane. A sulfur smell on the hot side is its own thing entirely, covered in why your RV hot water smells like sulfur.
Frequently Asked Questions
Why does my RV tankless water heater not fire at all? Usually because it is not seeing enough water flow to start the ignition sequence. Open a hot tap fully, check the pump, the strainer, the filter cartridge, and every valve position, then check the 12 volt supply at the unit while it attempts to fire.
Can I repair an RV tankless water heater myself? The water side and the 12 volt side, yes. That covers flow problems, the inlet screen, the flow sensor, descaling, the outside vent, fuses, grounds, and voltage. Anything involving the gas valve, burner, orifices, regulator, or 120 volt wiring belongs to a certified RV technician.
Why does my tankless heater go hot and cold in the shower? Most often because the water pump cycles on and off, which swings the flow the heater is trying to modulate against. An accumulator tank smooths that out. If it persists on city water too, suspect scale in the heat exchanger.
How often should an RV tankless water heater be descaled? Manufacturers commonly recommend an annual flush, more often on hard water. In practice, descale when hot water starts fluctuating, flow drops on the hot side only, or the unit begins to rumble.
Does an RV tankless water heater have an anode rod? No. Anode rods protect the steel tank in a conventional tank heater, and a tankless unit has no tank to protect. If you are looking for anode rod guidance, that applies to tank units and is covered separately.
What does the error code on my RV tankless heater mean? It depends entirely on the brand, since manufacturers use different code sets. Look it up in the manual for your exact model, note whether it clears on a power cycle, and treat any ignition or combustion related code as technician work.
Why does it work on city water but not on the pump? Because the pump cannot sustain the minimum flow the unit needs. Clean the strainer and the filter first, then consider whether the pump is simply too tired or too small for the job.
The Bottom Line
Work from free to expensive. Switches, fuse, propane supply and cylinder valve, water flow at a wide open hot tap, filter and strainer, and the exterior vent grille account for most complaints. Then look at the flow sensor for intermittent faults, scale for temperature swings and noise, and voltage at the unit during ignition for random lockouts. Replace the heater when the exchanger is cracked or frozen, or the board fails out of warranty. And hand over anything on the gas side, the burner side, or the 120 volt side to a certified RV technician, because the failure mode there is not cold water, it is carbon monoxide.