Last updated: August 14, 2026
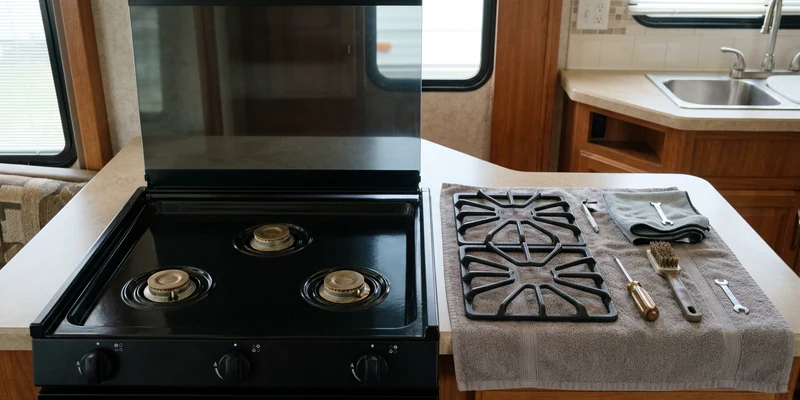
Most RV stove repair that an owner actually finishes has nothing to do with gas. It is a knob that spins without catching, a grate that rocks, a cracked glass lid, an igniter that stopped clicking, a cooktop that will not light because the tank valve is barely open, and an oven that scorches everything on the bottom rack because that is what RV ovens do. All of that is fixable in a driveway with hand tools and the right part.
The rest is not yours, and this guide is blunt about where the line sits. An RV cooktop is a propane appliance a few feet from where you sleep. Anything behind the burner face, meaning gas lines, the regulator, valve bodies, orifices, burner tubes, and burner adjustment, belongs to a certified RV technician with a manometer. We do not publish instructions for that work, on purpose. What follows is the diagnosis order that sorts the two apart, starting with the checks that cost nothing.
This article contains affiliate links. If you buy through them, we may earn a commission at no extra cost to you. Learn more.
Quick Answer
What can you actually fix on an RV stove yourself?
- Owner territory: confirming you have propane, lighting the appliance the way your own manual describes, cleaning the igniter button and the ceramic electrode, and replacing knobs, grates, burner caps, and the glass lid.
- Technician territory, without exception: gas lines, the regulator, gas valves, burner tubes, orifices, burner adjustment, and thermocouple adjustment. We do not publish steps for any of it, because a slightly wrong result is invisible carbon monoxide rather than an obvious failure.
- Stop and get out if you smell gas, a CO alarm sounds, you see soot or scorching, or a flame burns yellow or lifts off the burner. Shut the appliance off, close the tank valve, ventilate, and call a certified RV technician.
Symptoms, Causes, and What to Do
Find your symptom in the left column and work the action column. The rows are ordered the way the diagnosis should run, from free checks to the point where the job leaves your hands.
| What you see | What it usually means | What to do |
|---|---|---|
| No click at all when you turn a knob | Ignition circuit dead, or a fouled igniter button | Check the battery or 12V supply for the ignition, then clean the button, see the igniter guide |
| Clicks but you see no spark | Cracked, wet, or greasy ceramic electrode | Dry and clean around the electrode, then hand it to a technician if it stays dead |
| Sparks fine, no flame on any burner | No propane reaching the cooktop | Confirm tank level and valve, then test another gas appliance, see not getting gas |
| Lights with a match but never with the igniter | Gas supply is fine, ignition is the fault | Only match light if your own manual allows it, then work the ignition side |
| Lights, dies when you release the knob | Flame sensing or valve fault | Certified RV technician, no owner adjustment |
| One burner weak or dead, others fine | Burner or orifice restriction on that burner | Certified RV technician, do not clean or probe the burner |
| Yellow, sooty, or lifting flame | Incomplete combustion | Shut it off, close the tank valve, ventilate, call a technician |
| Knob spins freely or has split | Stripped knob or a broken D shaft collar | Replace the knob, see RV stove knobs |
| Grates rock, rust, or chip | Worn or wrong grate for the cooktop | Measure and order the matching grate set |
| Glass lid cracked or shattered | Road vibration or a hot lid closed too early | Replace the lid, see glass tops and grates |
| Oven burns the bottom, raw on top | Normal RV oven behavior without a diffuser | Add a diffuser and verify with a thermometer, see RV oven not working |
| Any smell of gas, ever | A leak somewhere in the system | Everyone outside, close the tank valve, ventilate, technician before you use it again |
What an RV Cooktop Needs Before It Will Light
Three things have to line up: propane arriving at the appliance at the right pressure, an ignition source that produces a spark at the burner, and a control valve that stays open once the flame is established. Take away any one of the three and the symptom looks roughly the same from the galley, which is why people replace the wrong thing.
Splitting those three apart is the whole job. If nothing gas powered in the coach works, the fault is upstream at supply. If the furnace and water heater run happily and only the cooktop refuses, the fault is at the appliance. If a burner lights by hand but never on the igniter, the gas side is proven and the ignition side is guilty.
Why the diagnosis order matters
Owners routinely buy an igniter assembly for a stove that was simply out of propane, and buy a whole cooktop for a stove that needed a nine dollar knob. Working from free to expensive costs you fifteen minutes and saves a lot of returned parts. It also gives a technician something useful to work from if it does end up being their job.
Start With the Checks That Cost Nothing
Run these six before you order anything. On a real service call they resolve the complaint more often than any part replacement does.
- Confirm you have propane. Check the gauge, or weigh a portable tank against its stamped tare weight. Tank gauges are approximate and monitors are worse, so confirm the level a second way before concluding anything.
- Open the tank valve fully, and slowly. A valve opened fast, especially right after a refill, can trip the excess flow protection and leave you with a trickle of gas. Close it, wait a minute, then reopen it slowly.
- Test the system with another appliance. If the furnace or water heater lights normally, propane is reaching the coach and the problem is at the stove. If nothing gas powered works, it is supply, and supply is covered in RV stove not getting gas.
- Read your own manual for the lighting procedure. Some cooktops are lit only by the igniter, some allow a match at the burner, and a few ovens use a pilot. The correct procedure for your appliance is the one printed for your appliance, not the one from a video about a different brand.
- Look at the ignition power source. Piezo igniters need nothing. Electronic ignition needs a battery in a holder under the cooktop or, on many models, a 12V feed with its own fuse in the distribution panel. A healthy house battery usually reads around 12.6 to 12.8 volts at rest.
- Clean the igniter button and the electrode area. Boil over residue, grease, and cleaning spray all end up around the ceramic tip. Cooled, dry, gas off, wipe the area and the button with a soft cloth and let it dry completely. That is the extent of owner cleaning near a burner.
🚨 Non negotiable in any coach with propane
A current carbon monoxide alarm, or a combined CO and propane gas detector, and a look at the expiration date printed on the housing. Combustion happens inside your living space and these alarms do expire, usually years before they look old.

🔥 For lighting an appliance your manual says may be lit by hand
A long reach refillable butane lighter with a flexible neck, which keeps your hand well away from the burner. Use it only where your own manual describes hand lighting, and never as a way around an ignition fault you have not diagnosed.

The Parts You Can Replace Yourself
Four categories of RV stove parts are genuinely owner replaceable, and they cover the large majority of complaints that are not gas faults: knobs, grates, burner caps, and the glass lid. None of them require touching a gas component, and all of them are ordered by measurement rather than by guesswork.
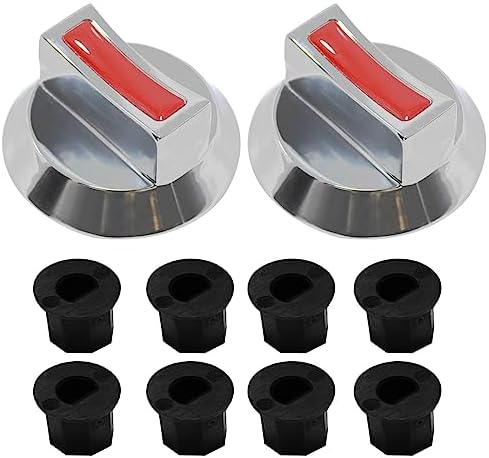
Knobs are the most common casualty. The plastic collar that grips the D shaped valve stem splits from heat and age, so the knob turns without moving the valve. They are sold in universal sets and in brand specific patterns, and the fit depends on the stem shape rather than the badge on the front. Grates crack, rust through, and warp, and a rocking grate is a spill waiting to happen. Burner caps corrode and warp, and one that does not sit flat will not burn evenly.
Ordering the right part the first time
Photograph the model and serial label before you shop. It usually sits under the cooktop lid, on the oven door frame, or on the back of the pull out drawer beneath the oven. With that label, a parts search takes minutes, and our overview of RV stove parts and what fits what walks through measuring knobs, grates, and lids. Owners of Suburban units have their own quirks, covered in Suburban RV stove parts, and the same is true for Magic Chef, Wedgewood Vision, and Greystone cooktops.
🎛️ The cheapest part that fixes the most complaints
A replacement RV range knob set sized to your valve stems. Check whether your stems are D shaped or splined and measure the stem width before ordering, because the front of the knob tells you nothing about fit.
🍳 For grates that rock, rust, or have chipped through
A porcelain coated replacement grate set matched to your cooktop’s burner spacing. Measure the outside dimensions of the old grate and the distance between burner centers before ordering, since two and three burner layouts vary between brands.

Ignition Faults Versus Gas Faults
These two get blamed for each other constantly, and one simple observation separates them. If the burner lights by the method your manual permits but never lights on the igniter, gas delivery is proven and the ignition system is the fault. If it will not light by any permitted method, gas delivery is the suspect.
Ignition faults are mostly owner friendly, because the parts involved are a spark module or piezo button, a wire, and a ceramic electrode. Cleaning, drying, and checking the power source for the module are all fair game. The full sequence, including how to tell a piezo system from an electronic one, is in RV stove igniter not clicking or sparking. If the burner sparks and still refuses to catch or hold a flame, go to RV stove will not light, which covers what that behavior actually means and where it stops.
When the Oven Is the Problem
An RV oven is a different animal from the cooktop above it, even though they share a gas supply. Most have a single burner at the bottom, no fan, thin insulation, and either a standing pilot or an electronic ignition with a safety valve that will not stay open unless it senses flame. That combination produces the classic complaint: burned bottoms, pale tops, and a temperature dial that is more of a suggestion.
Owner level work there is limited to lighting it correctly, keeping the vent slots clear, verifying the real temperature with an oven thermometer, and using a diffuser to spread the heat. Pilot assemblies, safety valves, and thermocouples are technician parts. The full walkthrough is in RV oven not working.
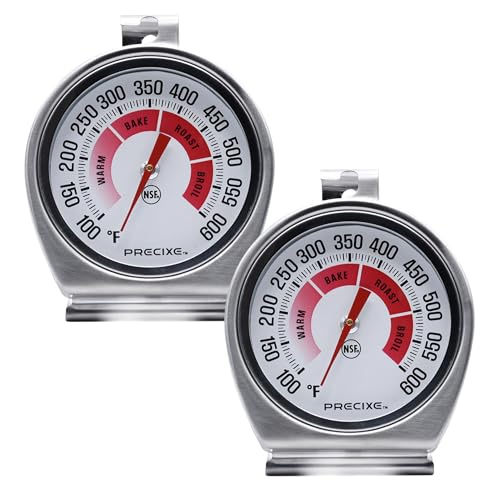
🌡️ Before you blame the oven, measure it
A standalone oven thermometer that hangs from a rack. RV oven dials are frequently off by a wide margin, and knowing the real number turns a vague complaint into a fact you can act on.
Where RV Stove Repair Stops Being Yours
This is the section that matters most. The components most often blamed for a stove that will not run correctly are exactly the ones we will not walk you through, and that is a deliberate editorial choice rather than caution for its own sake.
We do not publish instructions for cleaning or clearing burner tubes, drilling or reaming orifices, adjusting the air shutter or flame, adjusting or replacing a thermocouple, working on gas lines and flare fittings, or adjusting the regulator, and we would encourage you not to follow instructions that do. These are low pressure gas parts in a small, enclosed living space. Getting them slightly wrong does not usually produce a dead appliance, it produces incomplete combustion, which you cannot see or smell. A certified RV technician can test and set that assembly properly with a manometer, and a cooktop service call is rarely an expensive visit.
Stop immediately if
Shut the appliance off, close the tank valve at the bottle, open windows and roof vents, and get everyone outside if you smell gas at any point, if a CO or propane alarm sounds, if you see soot or scorch marks around a burner or the range hood, or if a flame burns yellow, lifts away from the burner, or roars. Do not use the appliance again until a certified RV technician has checked it, and never look for a leak with a flame. Every coach with a propane appliance needs a working CO alarm, and the date on the back of the housing is the part people forget to check.
When Replacing Beats Repairing
Some faults make a new appliance the cheaper answer, and the dividing line is condition rather than the price of a single part. Use these five signals.
| Situation | Repair or replace | Why |
|---|---|---|
| Broken knob, worn grate, cracked lid | Repair | All bolt on parts, no gas components involved |
| Igniter module or electrode failed | Repair | Sold as service parts for most common RV cooktops |
| Valve body or safety valve leaking | Technician decides | Never an owner repair, and often close to the value of the unit |
| Rust through in the burner box or oven floor | Replace | Structural corrosion around a burner is not patchable |
| Repeated combustion complaints after service | Replace | A stove that keeps burning badly is not worth chasing |
| You want an induction or electric cooktop instead | Replace | Removes propane from the galley entirely, at a real power cost |
If replacement is where you have landed, the swap itself is covered in how to replace an RV stove, and the shopping side splits by what you want to end up with: propane RV stoves, electric cooktops and ranges, cooktops by burner count, or a full stove and oven combo. Note that any appliance swap involving a gas connection ends with a certified technician making and leak testing that connection.
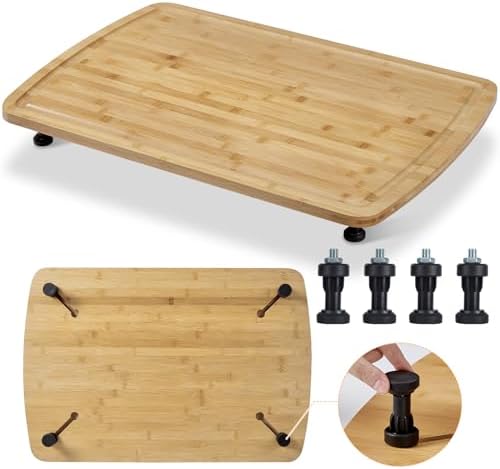
🧱 The upgrade most owners fit first
A hardwood or bamboo stove cover and cutting board sized to your cooktop, which protects the glass lid on travel days and buys back counter space at the campsite. Measure the lid, not the burner area, before ordering. Our full comparison of RV stove covers has the sizing detail.
Keeping It From Happening Again
RV cooktops fail for boring reasons, and the same habits prevent most of it. Wipe boil overs while they are fresh rather than letting sugar and grease bake around the burner face and igniter. Let the cooktop cool completely before you close the glass lid, since a hot lid closed early is the single most common cause of cracked glass.
Keep the galley ventilated when you cook, with the range hood running and a window cracked, because propane combustion puts moisture and combustion products into a small sealed box. That habit also keeps condensation down. If your hood fan is weak or the vent flap rattles on the highway, the fixes are in RV range hoods, vents and replacements.
Common Mistakes to Avoid
- Buying parts before confirming propane. An empty tank and a dead igniter look identical from the galley.
- Opening the tank valve fast. That trips the excess flow protection and mimics a stove fault for the rest of the weekend.
- Poking at the burner with a wire or a pin. That is technician work and a good way to change the flame without knowing it.
- Cycling the igniter over and over. Repeated attempts release unburned gas into a small space and fix nothing.
- Ordering a knob by brand name alone. Fit depends on the valve stem shape, so measure first.
- Closing the glass lid on a warm cooktop. Thermal shock cracks lids, and lids are the most expensive of the cosmetic parts.
- Running an expired CO alarm. Check the date on the housing before the next trip.
Frequently Asked Questions
Can I repair an RV stove myself? You can replace knobs, grates, burner caps, and the glass lid, clean the igniter button and electrode area, and confirm your propane supply. Gas lines, regulators, valves, orifices, burner tubes, and burner adjustment are certified technician work.
Why does my RV stove click but not light? The ignition system is working and the flame is not being established, which usually points at propane supply or the burner side. Confirm the tank and test another appliance, then hand the burner side over.
Is it safe to light an RV stove with a match? Only if your own appliance manual describes hand lighting for that model. Follow the printed procedure exactly, and treat a stove that only lights by hand as an ignition fault to be diagnosed, not a workaround to live with.
Why is my RV stove flame yellow? A yellow, sooty, or lifting flame means combustion is incomplete. Shut the appliance down, close the tank valve, ventilate, and have a certified RV technician check it before you cook on it again.
Do RV stoves need 12V power? Piezo ignition needs none. Electronic ignition systems need either a battery in a holder under the cooktop or a 12V feed with its own fuse, which is why some stoves quit when the house battery gets low.
How do I find the model number of my RV stove? Look for the data label under the cooktop lid, on the oven door frame, or on the back of the drawer below the oven. Photograph it before you shop for parts.
The Bottom Line
Work RV stove repair from free to expensive: propane level and valve position first, then another gas appliance as a reference, then the ignition source, then the bolt on parts. Knobs, grates, burner caps, and the glass lid are yours, and they solve most complaints that are not gas faults. Everything behind the burner face, meaning gas lines, regulators, valves, orifices, burner tubes, and adjustment, belongs to a certified RV technician with a manometer, and we deliberately do not publish steps for it. Keep a current CO alarm in the coach, and shut everything down and ventilate the moment you smell gas or see soot or a yellow flame.