Last updated: August 14, 2026
An RV stove glass top replacement is one of the very few propane appliance jobs that is fully an owner job, start to finish. The lid, the grates, and the burner caps are hardware, not gas components. Nothing behind them has to be opened, adjusted, or tested, which makes this the friendliest page in our stove cluster and the only one where the answer is simply measure, order, and fit.
The catch is measurement. RV cooktops come in several widths with different hinge spacings, different burner layouts, and lids in both tempered glass and painted steel, so the part that fits your neighbor’s rig probably will not fit yours. This guide covers what actually breaks, how to measure each part, and how to fit it without creating a new problem. It also draws the same line every gas appliance article on this site draws: the burner head under that cap is technician territory.
This article contains affiliate links. If you buy through them, we may earn a commission at no extra cost to you. Learn more.
Quick Answer
How do you replace an RV stove glass top?
- Measure before you shop: lid width and depth, hinge center spacing, and the cooktop cutout. Note whether your lid is tempered glass or painted steel, because the mounting hardware differs.
- Fitting is hand tool work. Remove the hinge screws with the cooktop cold and the gas off, transfer or replace the hinge hardware, and seat the new lid without forcing it. Do not overtighten anything against glass.
- While the grates and caps are off, wipe the surface and stop there. The burner head under the cap is a gas component, and cleaning, probing, or adjusting it is certified RV technician work.
What Breaks, Why, and What to Do
Find your part in the left column, then measure what the right column asks for before you order anything.
| Part and symptom | Why it happened | What to do |
|---|---|---|
| Glass lid cracked or shattered | Closed on a warm cooktop, or road vibration on a loose hinge | Replace the lid, measure width, depth, and hinge spacing first |
| Lid chipped at a corner | Impact while loading gear | Replace it, a chipped tempered lid fails without warning |
| Lid rattles on the highway | Loose hinge screws or missing bumpers | Snug the hinge hardware and fit new bumpers, do not overtighten |
| Lid will not close flat | Bent hinge or a grate sitting proud | Check grate seating first, then the hinge |
| Grate rocks under a pan | Warped grate or worn feet | Replace the grate, do not shim it |
| Grate rusting from underneath | Porcelain chipped and moisture got in | Replace, rust spreads under the coating |
| Burner cap warped or corroded | Heat cycles and spills | Replace with the matching size, do not flatten it |
| Cap sits crooked, ignition unreliable | Cap not seated square after cleaning | Reseat it fully, see the igniter guide |
| Drip tray stained or corroded | Boil overs left to sit | Replace or clean, purely cosmetic hardware |
| Burner head crusted or blocked | Spills baked into the burner | Certified RV technician, do not clean or probe it |
| Yellow flame or soot after any of this | Combustion problem | Shut it off, close the tank valve, ventilate, call a technician |
Why RV Glass Lids Crack
Almost every cracked lid comes from one of two causes, and both are avoidable. The first is thermal shock: the lid gets closed while the cooktop is still hot, usually because someone is tidying up quickly before a drive. Tempered glass tolerates heat but not a sharp temperature difference across its surface, and it lets go all at once rather than developing a crack you can watch.
The second is vibration. A hinge that has worked loose lets the lid move a fraction of an inch on every bump, and a few hundred highway miles of that finds any weak point. Missing rubber bumpers make it worse by letting glass meet steel directly. Both causes are cheap to prevent and expensive to ignore.
Never cook with a cracked lid up
A chipped or cracked tempered lid is not a cosmetic problem to live with until spring. It can fail suddenly, and it is directly above burners you are lighting. Take it off entirely and cook without it until the replacement arrives, which is safer than propping it up and hoping.
Measuring for a Replacement Lid
Take four measurements and you will order correctly the first time. Write them down rather than trusting your memory in a parts listing.
- Lid width and depth. Measure the glass itself, edge to edge, not the countertop opening. If the lid is already broken, measure the recess it sat in and note that glass usually sits a fraction inside it.
- Hinge center spacing. Measure between the centers of the two hinge points at the back. This is the number most people forget, and it is the one that decides whether a lid mounts at all.
- Cooktop cutout width. The overall opening in the countertop, which tells you which family of cooktops you are dealing with and narrows the options quickly.
- Material and mounting. Note whether your lid is tempered glass or painted steel, whether the hinges bolt through the glass with bushings or clamp to a frame, and photograph the hardware before you take anything apart.
Add the model and serial numbers from the appliance data label, usually under the lid on the back rail, on the oven door frame, or on the back wall of the drawer below the oven. Between the label and the four measurements, a parts search is quick. The wider fitment picture for the whole appliance is in RV stove parts and what fits what, and brand specific notes for Suburban and Greystone cooktops are worth a look before ordering.
🪟 When the lid itself is done
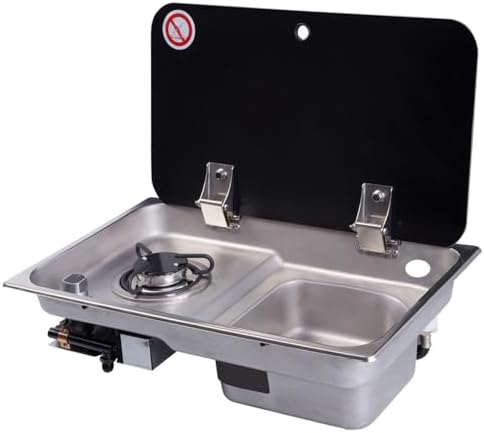
A replacement RV cooktop lid sized to your measurements, in tempered glass or steel depending on what your range uses. Check width, depth, and hinge center spacing against the listing rather than the brand name, and confirm whether hinge hardware is included or transfers from the old lid.
Fitting the New Lid
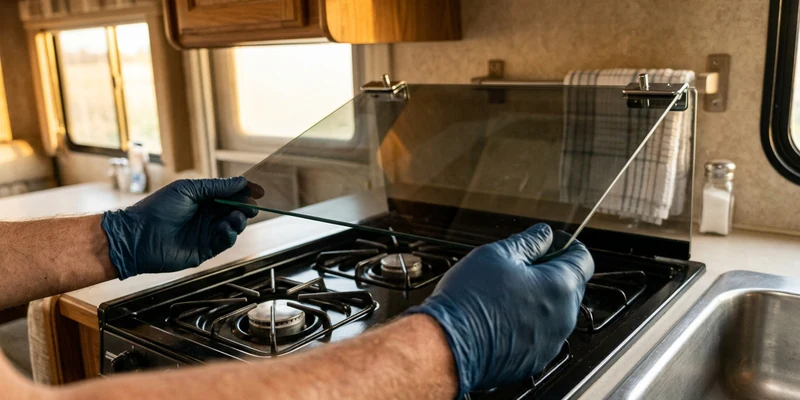
This is hand tool work and it goes quickly, as long as you treat glass like glass. Start with the cooktop completely cold, every knob off, and the tank valve closed, which costs nothing and removes any chance of a burner being nudged on while you work.
Clear the broken glass first if there is any, with gloves and a vacuum, and check the burner recesses and drip tray for fragments before anything else goes back. Then unscrew the hinge hardware, noting the order of any bushings or washers, since those spacers are what keep metal from bearing directly on glass. Fit the new lid, start every fastener by hand, and tighten only until snug. A hinge screw run down hard against glass is the most common way owners break the second lid within a month.
Check it before you drive
Close and open the lid several times, confirm it sits flat with the grates in place, and check that the bumpers make contact evenly. A lid that rocks on one corner will rattle its way to a crack on the first long day. If your range has a lid safety feature that cuts gas or requires the lid up, confirm it still works exactly as your manual describes.
Grates and Drip Trays
Grates are the workhorse part and they wear in predictable ways: porcelain chips at the corners, the exposed steel rusts from below, and heat cycling eventually warps them enough that pans rock. Any of those is a replacement rather than a repair, because a rocking pan in a vehicle is a spill you have already scheduled.
Measure the outside length and width of the old grate and the distance between burner centers, and note whether your layout is two or three burners. Universal grate sets cover the common RV patterns, but the spacing is what matters, not the badge. Drip trays are pure sheet metal and even simpler: clean them or replace them, and there is nothing behind them for you to worry about beyond keeping fragments and crumbs out of the burner area.
🍳 For grates that rock, chip, or rust
A porcelain coated replacement grate set matched to your cooktop layout. Measure the old grate’s outside dimensions and the burner center spacing before ordering, since two and three burner spacings differ between brands and model years.

Burner Caps, and Where They Stop
The burner cap is the removable disc that sits on top of a sealed burner. It is an owner part: lift it off cold, wipe it, and set it back flat and square. A cap that is warped, pitted, or corroded should be replaced with the matching diameter rather than persuaded to sit flat, because a cap that does not seat squarely changes where the ignition spark lands and how the flame spreads across the burner.
Under the cap is the burner head, and that is where owner work ends. We do not publish instructions for cleaning, scraping, or clearing burner heads and ports, reaming orifices, adjusting air shutters, or touching gas valves, thermocouples, supply lines, or the regulator, and we would encourage you not to follow instructions that do. Those parts determine how completely propane burns in a small living space, and the failure mode when they are slightly wrong is invisible rather than obvious. A certified RV technician can clean and verify a burner with a manometer, which is the part that makes it a repair rather than a hope.
Stop immediately if
Shut the appliance off, close the tank valve at the bottle, open windows and roof vents, and get everyone outside if you smell gas, if a CO or propane alarm sounds, if you see soot or scorching around a burner or the range hood, or if a flame burns yellow, lifts off the burner, or roars. Do not cook on it again until a certified RV technician has checked it, and never test for a leak with a flame.
🚨 Non negotiable in any coach with propane
A working carbon monoxide alarm, or a combined CO and propane gas detector, with the expiration date checked on the back of the housing. It is the cheapest part in this article and the only one that matters when something else has gone wrong.

Alternatives to a Glass Lid
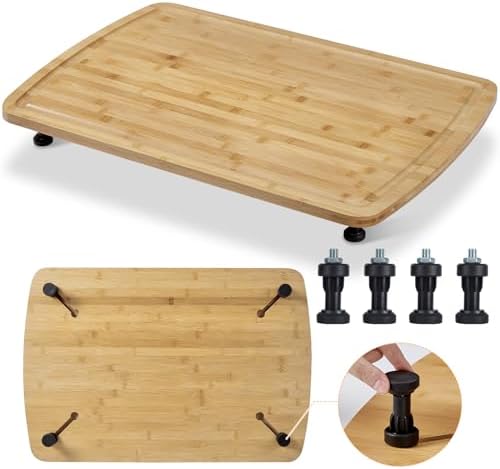
Not everyone replaces glass with glass. Plenty of owners fit a hardwood or bamboo cover that sits over the cooktop instead, which turns the stove into counter space at camp and takes the fragility out of the equation entirely. It also protects the burners from dust and crumbs during storage.
The trade off is that a cover is not a hinged lid, so it has to be stowed while you cook and it is not part of any lid safety feature your range may have. Many owners run both: the original lid for travel and a board on top at camp. Sizing and materials are compared in our guide to RV stove covers and cutting boards.
🧱 The upgrade that prevents the next broken lid
A hardwood or bamboo stove cover and cutting board sized to your cooktop, which protects the surface on travel days and gives you back counter space at camp. Measure the lid or the cooktop surface, not the burner area, before ordering.
Common Mistakes to Avoid
- Closing the lid on a warm cooktop. Thermal shock is the number one cause of cracked RV lids.
- Overtightening hinge screws. Snug is the target, and bushings exist so metal never bears on glass.
- Ordering by brand instead of measurement. Hinge center spacing decides fit more than the badge does.
- Cooking under a chipped lid. Remove it entirely until the replacement arrives.
- Shimming a warped grate. A rocking pan in a moving vehicle is not a problem to postpone.
- Cleaning the burner head while the cap is off. That is the exact line where the job becomes technician work.
- Skipping the fragment check. Glass gets everywhere, including into the burner recess and the drip tray.
Frequently Asked Questions
Can I replace an RV stove glass top myself? Yes. The lid, grates, caps, and trays are hardware rather than gas components, so it is hand tool work with the cooktop cold and the gas off. Measure width, depth, and hinge center spacing before ordering.
Why did my RV stove glass top shatter? Almost always thermal shock from closing the lid on a warm cooktop, or vibration through a loose hinge on the highway. Tempered glass fails all at once rather than cracking slowly.
Are RV stove glass tops universal? No. Width, depth, and hinge spacing vary between brands and model years, so a lid is ordered by measurement and confirmed against the appliance data label.
Can I use a wooden cover instead of a glass lid? Many owners do, and it doubles as counter space. It is not a hinged lid, so it has to be stowed while cooking, and it does not take part in any lid related safety feature your range may have.
How do I know if a burner cap needs replacing? Replace it if it is warped, pitted, or corroded, or if it will not sit flat and square. A cap that seats poorly changes where the spark lands and how the flame spreads.
Can I clean the burner under the cap? Wipe the cooktop surface and the cap only. The burner head and its ports are gas components, and cleaning or probing them is certified RV technician work.
The Bottom Line
Glass lids, grates, and burner caps are the parts of an RV stove you can genuinely fit yourself, and the whole job comes down to four measurements: lid width, lid depth, hinge center spacing, and burner center spacing. Work cold with the gas off, clear every fragment, and tighten hinge hardware only until snug so you do not break the replacement. Stop at the burner head under the cap, because cleaning, probing, and adjusting it is certified RV technician work with a manometer. Keep a live CO alarm in the coach, and shut everything down and ventilate if you ever smell gas or see soot or a yellow flame.