Last updated: August 14, 2026
If you want to replace an RV stove, the job splits cleanly into two halves, and being honest about that split is the whole point of this guide. The measuring, the choosing, the ordering, the emptying of the cabinet, the removal of trim screws and the final cosmetic work are all yours. Disconnecting the propane supply from the old appliance and connecting it to the new one is not. That part belongs to a certified RV technician, without exception and regardless of how straightforward the flare fitting looks.
Owners who accept that split get a smooth swap, because the technician arrives to an appliance that already fits the hole, a cleared cabinet and a coach that is ready to work in. Owners who do not usually discover the problem in the worst order: the new range is on the floor, the old one is out, and the cutout is a half inch too narrow. So this guide runs in the sequence that prevents that, starting with the tape measure and finishing with the checks you make after the technician leaves.
This article contains affiliate links. If you buy through them, we may earn a commission at no extra cost to you. Learn more.
Quick Answer
How do you replace an RV stove?
- Measure the cutout, the depth, the cabinet opening and the clearance to the hood before you buy anything, and decide between a drop in cooktop, a range with an oven, or a combo.
- Do the preparation yourself: close the propane at the cylinder, empty and clear the cabinet, remove trim screws and grates, protect the countertop, and plan disposal of the old unit.
- Book a certified RV technician for the gas connection. Disconnecting and reconnecting the propane supply and leak testing the result is not a driveway job, and it is the only step that can hurt you.
Who Does What, Step by Step
Read this table before you order anything. The left column is the step, the middle is what it involves, and the right column is the part that decides how you plan the day.
| Step | What it involves | Who does it |
|---|---|---|
| Decide cooktop, range or combo | Weigh galley space, how you actually cook, and whether you use an oven | Owner |
| Measure the cutout | Width, depth, corner radius and how much flange overlaps the counter | Owner |
| Measure the cabinet below | Opening height and width, toe kick, floor level, obstructions at the back | Owner |
| Check clearances above | Distance to the range hood or overhead cabinet, per the new unit’s manual | Owner |
| Locate the gas stub and the 12V feed | Note where they come through, do not disturb either one | Owner to note, technician to touch |
| Order the appliance | Match dimensions first, features second, finish third | Owner |
| Close propane and clear the space | Cylinder valve shut, cabinet emptied, countertop protected, path cleared | Owner |
| Remove trim screws and loose parts | Grates, caps, glass lid, oven racks, mounting screws and any sealant bead | Owner |
| Disconnect the gas supply | Break the union or flare fitting, cap or secure the line safely | Certified technician |
| Lift the old unit out | Two people, heavier than it looks, watch the countertop edge | Owner with help, after disconnection |
| Fit and connect the new unit | Correct connector, correct sealant, correct torque, regulator checked | Certified technician |
| Leak test | Proper pressure test of the connection, not a soapy water dab | Certified technician |
| Commission the burners and oven | Light every burner, confirm flame quality, verify the oven cycles | Certified technician |
| Final fitting and cosmetics | Mounting screws, trim, sealant bead, refit grates and lid | Owner |
| Check the alarm and the hood | Propane and carbon monoxide alarm in date, hood fan and vent working | Owner |
If you have not yet decided the appliance is beyond saving, check RV stove repair and what you can fix yourself first, since knobs, grates, glass lids and igniter cleaning solve a surprising share of complaints. Parts sourcing across brands is covered in RV stove parts and what fits what.
Measure Before You Shop, Not After
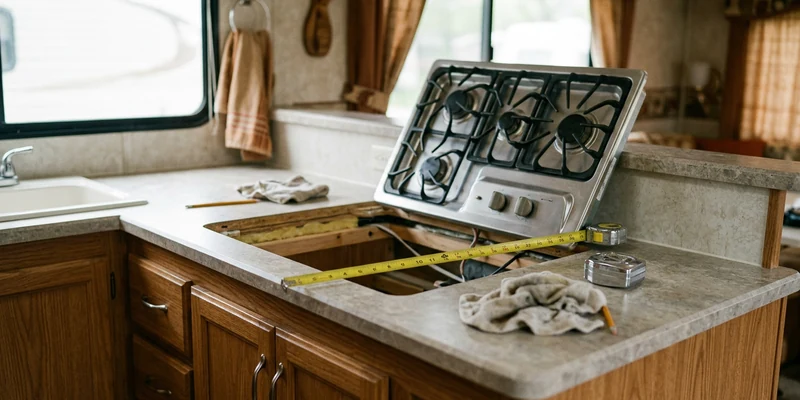
The single most common failed swap is a dimensional one, and it is entirely preventable with fifteen minutes and a tape measure. RV galley cutouts are not standardized the way household appliance openings are, so treat every dimension as specific to your coach until proven otherwise.
The measurements that decide fitment
- Cutout width and depth. Measure the hole in the countertop itself, not the old appliance. Check the width at the front and again at the back, because cutouts are not always square.
- Flange overlap. How far the old unit’s lip sits on the counter all the way around. A replacement with a narrower flange will expose raw cutout edge.
- Countertop thickness. Drop in cooktops clamp to the counter and there is a thickness range they will grip.
- Cabinet opening for a range. Height from the floor to the underside of the counter, plus the width between the cabinet sides at the narrowest point, plus the depth to the back wall.
- Clearance above. The distance from the cooktop surface to the range hood or the overhead cabinet. The new appliance’s manual states a minimum, and that number is not negotiable.
- The route in. Doorway width, corner turns and step height. A range that fits the hole but not the doorway is a memorable afternoon.
Note the services, do not touch them
While you have your head in the cabinet, photograph where the propane line enters and where the 12V wire for the igniter and oven light runs. Note whether the gas stub comes up through the floor or in from the side wall, and roughly how much slack the line has. Send those photos to the technician when you book, because a line with no slack sometimes needs a different connector, and that is far better known in advance. Do not loosen, bend or reroute anything on the gas side yourself.
Cooktop, Range or Combo
Answer one question before you compare products: do you actually use the oven? A large share of RV owners use theirs as a bread drawer, and dropping the oven frees a full cabinet and lowers the weight in the galley. Others bake constantly and would not give it up.
Drop in cooktop
A cooktop only unit clamps into the countertop and leaves the whole cabinet below free for storage or a trash slide. It is the lightest option and the simplest install, and it is the natural upgrade if the oven was never earning its space. Our comparison by burner count is in RV cooktops by burner count, and if you are moving off propane entirely, electric RV cooktops and ranges covers what that costs in power draw.
Range or stove and oven combo
A full range drops into the cabinet opening and gives you cooktop and oven in one body, which is what most coaches leave the factory with. Combos that add a microwave or a convection function exist too and change the cabinet layout again. The shortlists are in propane RV stoves and RV stove and oven combos.
🔥 If you are freeing up the cabinet
A drop in propane RV cooktop in two or three burner form, sized to your existing cutout. Match the cutout dimensions first and the burner count second, and confirm the countertop thickness sits inside the clamp range. Check whether the model uses piezo or electronic ignition, since electronic ignition needs a 12V feed at the appliance.

🍳 If you want to keep the oven
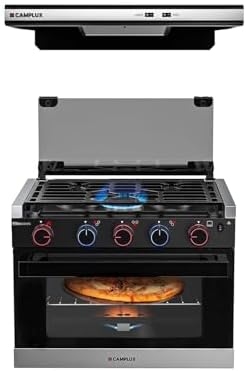
An RV range with a propane oven below, sized to your cabinet opening rather than to a household spec. Measure the opening height, width and depth before ordering, and check the stated clearance to the hood above. Our comparison is in RV stove and oven combos.
What You Prepare Before the Technician Arrives
Preparation is where you save money and time, because a technician charging by the hour should be spending that hour on the gas connection rather than on emptying your cabinet. None of this touches the propane side.
The day before
Close the valve at the propane cylinder and leave it closed. Empty the cabinet below the range and the drawers beside it, and clear a path from the door to the galley wide enough to carry an appliance through. Lay a moving blanket or cardboard over the countertop and the floor at the cutout edge, because the old unit will scrape something on its way out if you let it.
The morning of
Remove the grates, burner caps, glass lid and oven racks, and put them somewhere they will not be stepped on. Take out the mounting or trim screws that hold the appliance to the counter or cabinet, and run a utility knife around any sealant bead where the flange meets the countertop so the unit is not glued in place. Then stop. Leave the appliance sitting in its hole, still connected, for the technician to disconnect. Have the new unit unboxed, inspected for shipping damage and standing nearby, along with its manual, because the installer will want the clearance and connection specifications from it.
The Part That Is Not Yours
We do not publish do it yourself instructions for disconnecting or connecting an RV propane supply line, for gas valves, regulators, burner tubes, orifices, burner adjustment or thermocouples. That is a deliberate editorial position, not caution for its own sake.
The reason is specific. A propane connection inside a coach has to be made with the correct connector and sealant for gas service, tightened correctly, and then pressure tested properly, which is a test with gauges rather than a wipe of soapy water. A joint that passes the soap test can still leak at a rate that fills a closed coach overnight, and propane is heavier than air, so it collects at floor level where you sleep. The technician will also confirm the regulator is delivering correct pressure to the new appliance and will commission every burner and the oven before signing off. That commissioning is the part owners most often skip, and it is where a bad orifice match or a wrong pressure shows up.
Stop Work Immediately If Any of This Happens
At any point, before, during or after, these signs mean the same response: shut the appliance off, close the valve at the propane cylinder, open windows and roof vents, get everyone out of the coach, and call a certified RV technician before anything is used again.
- You smell propane. No switches, no lighters, no phone use inside the coach. Leave first, then call from outside.
- A carbon monoxide alarm sounds. Treat every activation as genuine, including the ones that seem obviously false.
- Soot appears. Black deposits on the burner box, pan bottoms, the lid or the cabinetry above the range.
- The flame is yellow, lazy or lifting off the ports. Correctly burning propane is mostly blue and sits steady.
- Scorch marks or heat damage. Discolored trim, blistered finish or a warped surround near the new appliance.
- A burner keeps burning with the knob at OFF. That is a valve fault and it is urgent.
🚨 Replace this at the same time as the stove
A combination propane and carbon monoxide alarm rated for RV use. Turn over the one in your coach and read the date on the back, because these expire after a set number of years in service and an expired alarm looks identical to a working one. A new appliance is the natural moment to reset that clock.

Finishing the Job Yourself
Once the technician has connected, leak tested and commissioned the appliance, the cosmetic work comes back to you. Fit the mounting or clamp screws evenly so the flange sits flat without twisting the body, and do not overtighten against a countertop that may be a thin laminate over particle board.
Run a fresh bead of appropriate high temperature sealant where the flange meets the countertop if the original had one, tooled smooth so water and crumbs cannot get under the edge. Refit the grates, burner caps and glass lid, check the lid opens and closes without touching the backsplash, and confirm the range hood fan and vent actually move air, which is the other half of managing combustion byproducts in a small space. Our guide to RV range hoods, vents and fans covers what to check there.
🧴 For the flange bead and the backsplash edge
A high temperature silicone sealant suitable for appliance edges, in a color that matches your countertop. Check the stated temperature rating and confirm it is intended for use around appliances before applying it near a cooktop flange.

Common Mistakes to Avoid
- Measuring the old appliance instead of the cutout. The hole is what the new unit has to fit, and the two are rarely identical.
- Forgetting the doorway. A range that clears the cabinet but not the entry step is a return shipment.
- Ignoring the clearance to the hood. Every appliance manual specifies a minimum above the cooktop, and it is a fire safety figure.
- Disconnecting the gas line yourself. This is the one step in the whole job that can genuinely hurt you, and it is the one step you are paying a technician for.
- Skipping the commissioning. Every burner and the oven should be lit and observed before the technician leaves.
- Leaving an expired alarm in place. A new stove behind a dead propane and carbon monoxide alarm is a worse setup than the old stove was.
Where to Go From Here
If you are still deciding whether replacement is the right call, work through an RV stove that will not light, an igniter that is not sparking and an oven that is not working first. If gas does not seem to reach the burners at all, what to check when an RV stove is not getting gas covers the causes that sit outside the appliance.
If it is really only the top that is finished, glass tops, grates and burners is a far cheaper afternoon. And once the new unit is in, protect it: a stove top cover or cutting board stops travel damage to the glass and buys you counter space in a galley that never has enough.
Frequently Asked Questions
Can I replace an RV stove myself? You can do the measuring, ordering, cabinet preparation, removal of trim screws and all the finishing work. Disconnecting and reconnecting the propane supply and leak testing it is certified RV technician work.
What do I measure before ordering? Countertop cutout width and depth, flange overlap, countertop thickness, the cabinet opening height, width and depth for a range, the clearance to the hood above, and the route through the door.
Are RV stove cutouts standardized? No. RV galley cutouts vary between manufacturers and floor plans, so measure your own rather than assuming a common size.
Can I swap a range for a cooktop only unit? Often yes, and it frees the cabinet below. The cutout, the flange overlap and the gas connection point all still need to work, so confirm those before ordering and discuss the connection with your technician.
Does the new stove need 12V power? Models with electronic ignition and an oven light do. Piezo ignition models do not. Check the manual and note whether a 12V feed already runs to the appliance location.
What should I check after the installation? That every burner lights with a steady blue flame, the oven cycles, the range hood moves air, the appliance is mounted level and secure, and the propane and carbon monoxide alarm is in date.
The Bottom Line
Replacing an RV stove is a measuring job with a gas job attached. Measure the cutout, the cabinet, the clearance above and the route in before you order anything, then decide between a drop in cooktop, a full range and a combo based on whether you actually use the oven. Do the preparation yourself: propane closed at the cylinder, cabinet emptied, trim screws out, sealant bead cut, new unit unboxed and inspected. Hand the propane disconnection, reconnection, leak test and commissioning to a certified RV technician, take the cosmetic finishing back afterward, and replace the propane and carbon monoxide alarm while you are at it.