Last updated: August 14, 2026
Troubleshooting an RV water pump goes wrong when people start in the middle. The pump is the visible part, so it gets blamed, while the actual fault is usually one link earlier in the chain: no power reaching it, no water available to it, or air entering the line before it. Work the chain in order and you will find the fault in about twenty minutes, usually without buying anything.
The sequence below is the one a technician follows, condensed into six steps you can run with a multimeter, a flashlight, and a wrench. Each step ends with a clear result that either clears that link or stops you there. Everything here is 12 volt work with the standard precautions, and the points where the job should be handed over are flagged as they come up.
This article contains affiliate links. If you buy through them, we may earn a commission at no extra cost to you. Learn more.
Quick Answer
How do you troubleshoot an RV water pump?
- Test in this order: power at the pump, water available to the pump, prime and air, suction side leaks, pressure switch behavior, then the pump itself.
- The one measurement that saves the most time is voltage at the pump’s own terminals with the switch on, which should read close to battery voltage.
- If power and water are both confirmed and the pump still will not build pressure, the fault is inside the pump or in a check valve, not in the wiring.
Start Here: Match the Behavior to the Step
You do not always have to run all six steps. Find what your pump is doing, and start where the table sends you. If in doubt, start at step one anyway, because it takes two minutes.
| What the pump does | Most likely link in the chain | Start at |
|---|---|---|
| Completely silent | No power reaching the pump | Step 1 |
| Clicks once, then nothing | Low voltage or a stalled motor | Step 1, then step 6 |
| Runs continuously, no water | No water available, or lost prime | Step 2 |
| Sputters air and water | Air entering on the suction side | Step 4 |
| Runs, then shuts off too early | Pressure switch drifting, or a restriction | Step 5 |
| Never shuts off | System not reaching cutoff pressure, or a leak | Step 5 |
| Cycles with all taps closed | Leak or a failing check valve | Step 6 |
| Weak flow everywhere | Restriction at the strainer or filter | Step 2 |
For the wider reference version of this, including which parts are worth replacing individually, see our main guide to RV water pump repair.
Step 1: Confirm the Pump Has Power
Three things break here, and all three are free to check. Start with the fuse in the 12 volt distribution panel, commonly in the 10 to 15 amp range and often labeled for the pump. Pull it and inspect the element rather than judging it through the plastic, because a hairline break is easy to miss.
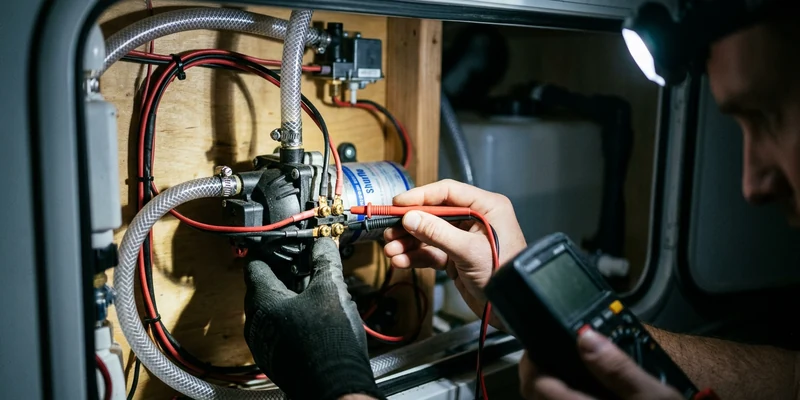
Next, find every switch. Many rigs have a panel switch inside and a second one in the wet bay, and some have a controller with its own power button. All of them have to be on. Then take the measurement that matters: set the meter to DC volts, put the probes on the pump’s own terminals with the switch on and a faucet open, and read. Close to battery voltage, meaning roughly 12.6 volts at rest or higher while charging, means power is fine and you move to step two. A reading well below that, or zero, points at the switch, the wiring, or a corroded ground connection rather than at the pump.
If the voltage is low but not zero
Check the ground first. Water pumps are usually grounded to a nearby chassis point that collects corrosion, and a poor ground drops voltage under load while reading fine with the pump off. Clean the connection to bare metal, reassemble it tight, and measure again with the pump running.
🔎 The tool this whole procedure depends on
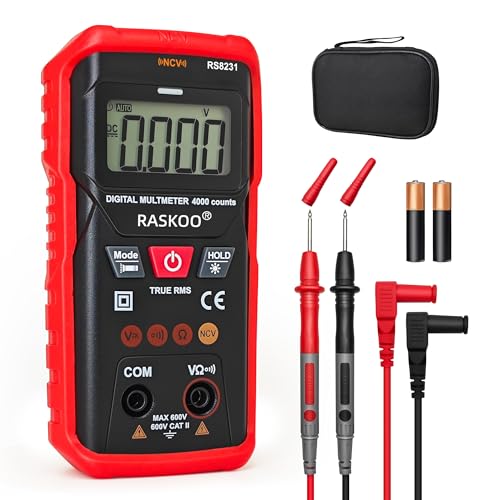
A basic digital multimeter that reads DC volts and continuity is enough for every test in this guide, and it is the difference between diagnosing a pump and guessing at one. Any automotive grade meter with a clear display and decent leads does the job.
Step 2: Confirm It Has Water to Pull
A pump with power and nothing to move sounds identical to a failing pump. Confirm the fresh tank actually has water in it, and do not trust the monitor panel, since RV tank sensors foul with residue and read wrong for years at a time.
Then walk the valves. The fresh tank valve has to be open, the winterizing or bypass valve has to be in normal operating position rather than pointed at the antifreeze siphon, and the city water inlet should not be feeding the system while you test. A bypass valve left over from spring de winterizing is one of the most common no water complaints of the season. Finally, shut the pump off, close the tank valve, and unscrew the clear inlet strainer to rinse its screen, because sediment and sanitizer flakes collect there and starve the pump.
🧽 If the strainer is cracked, cloudy, or missing
A clear inline strainer with a removable screen at the pump inlet, which lets you see debris before it becomes a symptom. Match the thread and swivel fitting to your pump’s inlet port, commonly 1/2 inch NPT on standard RV pumps.

Step 3: Prime It and Purge the Air
An RV pump is self priming, but only within limits, and a system that has been drained or opened up needs to move a slug of air before it can move water. Open the faucet nearest the pump, on cold, and let the pump run. Expect coughing and spitting for a while, then a steady stream, and work through the other fixtures one at a time.
If two minutes of running produces nothing but air, stop, since running dry is hard on the diaphragm. That result is meaningful: the pump cannot pull water at all, which sends you to step four. The full procedure is in how to prime an RV water pump, and the symptom itself in when the pump runs but no water comes out.
Step 4: Test the Suction Side for Air Leaks
Everything between the fresh tank and the pump inlet is under vacuum while the pump runs, which means a loose joint there pulls air in instead of leaking water out. That is why this fault is so often missed: there is nothing to see on the floor.
With the pump off, hand tighten every threaded fitting on that run, check that hose clamps are seated on the barb rather than slipped past it, and look for white mineral trails that mark a slow weep. Pay particular attention to the swivel fitting at the pump inlet, which contains a small O ring that flattens with age. Then run the pump again with a faucet open. Flow that starts sputtering and steadily improves suggests you fixed it; flow that keeps ingesting air means there is still a gap on that run.
Step 5: Watch the Pressure Behavior
With water flowing, the question becomes whether the pump stops when it should. RV pumps commonly cut off somewhere in the 40 to 55 psi range, and the pressure switch is what makes that happen.
| What you observe | What it points to | Next move |
|---|---|---|
| Runs, builds pressure, shuts off cleanly | Pump and switch are healthy | Move to step 6 only if it restarts on its own |
| Runs on for a long time after taps close | Switch drifting, or system not reaching cutoff | Look for an open fixture or leak, then the switch |
| Shuts off early, pressure feels weak | Restriction, or a worn switch cutting out low | Clean the strainer and filter, then test the switch |
| Hunts on and off in short bursts | Pressure hovering at the switch threshold | An accumulator tank usually settles this |
| Never shuts off at all | System cannot build pressure | Check for an open low point drain or a large leak first |
Most switches have an adjustment screw, and turning it can buy a little time, but a switch that has drifted is a switch that is wearing out. Our guide on the RV water pump pressure switch covers adjusting versus replacing, and if the pump simply never stops, this walkthrough is dedicated to that symptom.
⚙️ If the switch is the fault
A replacement pressure switch, or the combined switch and diaphragm service kit for your pump model. On a pump with some years on it the kit is the better value, since the diaphragm is the other wear item and both are reached through the same disassembly.

Step 6: Decide Whether the Fault Is the Pump or the Plumbing
By this point power and water are confirmed, so the remaining question is which side of the pump the problem sits on. Two tests separate them.
First, the cycling test. If the pump restarts every few minutes with every faucet closed, the system is losing pressure. Dry every fitting you can reach, run the pump up to pressure, switch it off, and check back in an hour for anything wet. A dry system that still bleeds down points at the check valve rather than at the plumbing, and our guide to the RV water pump check valve covers testing and replacing it. Second, the city water test. Hook up to a hose with the pump switched off. If the faucets deliver good pressure that way, the plumbing downstream is fine and the fault is the pump or its immediate fittings. If the pump also runs while you are on city water, the check valve is letting supply pressure push backward through it.
What a failing pump looks like at this stage
A pump that has power, water, a tight suction side, a working switch, and still delivers weak or uneven pressure has an internal fault, usually a worn diaphragm or valve set. On an older pump, that is the point where a replacement makes more sense than a rebuild kit, since the remaining parts are the same age as the one that failed.
🚿 When the pump itself is finished
A 12V RV water pump in the 3 to 5.5 gallon per minute range with a built in pressure switch and standard 1/2 inch NPT ports. Match the flow rating to the number of fixtures you run rather than buying the largest available, and check the port spacing against your existing mount. Sizing is covered in our roundup of the best RV water pumps.

Where This Stops Being a DIY Job
Twelve volt pump work is owner territory, with the usual precautions: pump switch off, fuse pulled or the negative battery cable disconnected, and pressure released at a faucet before you open a fitting. These situations are different.
- Any 120 volt component. Residential style pumps and anything wired into shore power belong to a certified RV technician or licensed electrician.
- Signs of water inside the structure. Soft flooring, stained ceilings, swollen trim, or a musty smell need professional assessment before they become subfloor replacement.
- A leak you cannot locate. Constant cycling with nothing visibly wet means water is moving inside a wall or under the floor.
- A fuse that keeps blowing. That is a short or a seized motor, and a larger fuse is never the answer.
- Anything touching the water heater’s gas side. Burner, gas valve, and regulator work is for a certified RV technician, without exception.
Common Mistakes to Avoid
- Starting at the pump. It is the last link in the chain and the first thing people replace.
- Trusting the tank monitor. Fouled sensors read wrong for years. Confirm the water level another way.
- Running it dry while testing. Two minutes of air is enough information. Longer than that damages the diaphragm.
- Looking for a suction leak with your eyes. Air leaks before the pump do not drip. Tighten and inspect by hand instead.
- Adjusting the pressure switch as a fix. It masks wear rather than correcting it.
- Skipping the city water test. It separates pump faults from plumbing faults in about a minute.
Where to Go From Here
If you now know which part failed, the repair details live in our main guide to RV water pump repair, which covers the swap procedure and the honest test for when replacing beats rebuilding. If you want the symptom by symptom reference instead, read common RV water pump issues and what they mean.
And if the pump came through this sequence healthy, spend ten minutes on prevention: strainer rinses, freeze protection, and a pressure regulator at the city inlet are what keep the next failure years away. Our guide to RV water pump maintenance covers the routine.
Frequently Asked Questions
How do I know if my RV water pump is bad? Confirm power at its terminals, water in the tank, correct valve positions, and a tight suction side first. If all four check out and the pump still cannot build steady pressure, the fault is internal.
What voltage should I see at the water pump? Close to battery voltage with the switch on and a faucet open, meaning roughly 12.6 volts at rest and higher while charging. A significantly lower reading points at wiring, a switch, or a corroded ground.
Why does my pump run but produce no water? It has lost prime, is pulling air on the suction side, or a valve is shut. Check the tank level and valve positions, then inspect every fitting between the tank and the pump inlet.
Should the pump run when I am on city water? No. Switch it off when hooked up. If it runs anyway, a failed check valve is letting city pressure push backward through the pump.
Can I test the pump without water in the tank? Only for a few seconds to confirm it spins. Running dry damages the diaphragm, so add water before doing any real testing.
How long should the pump take to build pressure? A primed system usually reaches cutoff within seconds after the taps close. Extended running means either a leak, an open fixture, or a pressure switch that is not cutting out.
The Bottom Line
Follow the chain rather than the symptom: power at the terminals, water in the tank with the valves right, prime and air purged, suction fittings tight, then pressure switch behavior, then the pump itself. Five of those six steps cost nothing but time, and they resolve most pump complaints. Hand the job over when you find water in the structure, a leak you cannot locate, a fuse that keeps blowing, or anything on the 120 volt or propane side.
Find your symptom and start there