Last updated: August 14, 2026
Most RV pumps are self priming, which is true right up until the day yours is not. Learning how to prime an RV water pump matters after three moments in particular: de-winterizing in spring, running the fresh tank dry on the road, and installing a new pump. In all three the pump has a column of air where it expects water, and it needs a little help to push that air out.
The core method is simple and takes about ten minutes: put water in the tank, open the highest faucet on the cold side, and let the pump run in short bursts until it grabs. Everything else in this guide is about what to do when that does not work, and about the one rule that protects your pump, which is never letting it churn dry for minutes on end.
This article contains affiliate links. If you buy through them, we may earn a commission at no extra cost to you. Learn more.
Quick Answer
How do you prime an RV water pump?
- Put water in the fresh tank, open the nearest cold faucet, and run the pump in bursts of roughly 20 to 30 seconds until water arrives, then bleed the rest of the fixtures.
- If it will not grab, the pump is drawing air. Check the strainer O ring, the inlet fittings, and any valve still set for winterizing.
- Never let the pump run dry for minutes at a time. That is what kills diaphragms.
Priming an RV Water Pump Step by Step
This is the standard procedure and it covers the large majority of situations. Have a towel and a bucket handy, and work with the coach roughly level so the tank pickup sits where it should.
- Put real water in the fresh tank. A pump cannot prime on a monitor reading. Add enough that the pickup is well submerged, since a nearly empty tank lets the pump gulp air with every slosh.
- Reset every winterizing valve. Move the antifreeze siphon valve back to tank position, close the siphon line, and return the water heater bypass to normal service. A pump sucking on an empty antifreeze jug will never prime.
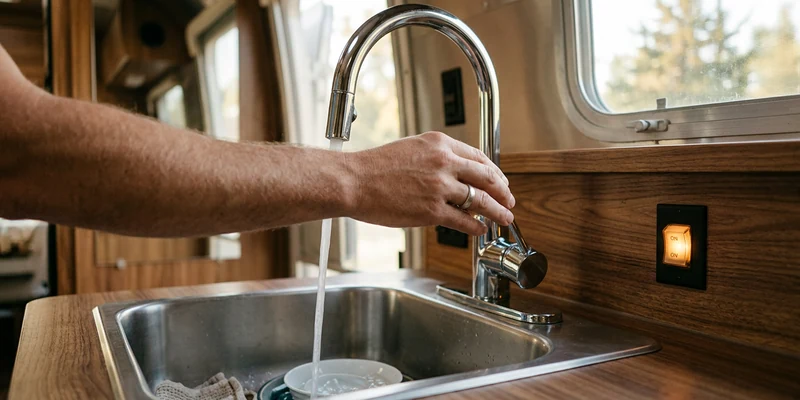
- Open the closest cold water faucet, all the way. Start with the fixture nearest the pump on the cold side so the air has the shortest path out. Leave it fully open, since a trickle traps air.
- Switch the pump on for 20 to 30 seconds. Listen. A pump moving air runs fast and light. A pump that has caught water changes to a heavier, slower note.
- Pause, then repeat. If nothing arrives, switch off for a few seconds and try again. Two or three bursts is normal after storage. If you are past four or five with no change, stop and go to the troubleshooting section below.
- Bleed the rest of the system. Once water flows steadily, work through every fixture, cold then hot, including the shower, the toilet, and the outside shower, until each one runs without spitting.
- Let it reach pressure and shut off. Close everything and confirm the pump builds pressure and cuts out cleanly, usually within about half a minute. If it never stops, that is a separate fault worth chasing.
Air in the hot lines takes the longest, especially with a full water heater, so give that side extra time before you decide the prime failed.
When You Need to Prime, and Why
Priming is not a routine chore. It is a response to a specific event, and knowing which event you are dealing with tells you how much fuss to expect.
| Situation | Why the prime is lost | What usually works |
|---|---|---|
| De-winterizing in spring | Lines are full of air and antifreeze, valves may still be set for storage | Reset valves, fill tank, prime with the nearest cold faucet open |
| Fresh tank ran dry | Pump pulled air into the inlet line | Refill, then a burst or two with a faucet open |
| New pump installed | Pump and lines start completely dry | Prime as above, expect it to take a few bursts |
| After long storage | Strainer O ring has dried and shrunk, letting air in | Reseat or replace the O ring, then prime |
| After switching off city water | Air trapped where the pump line joins the system | Open a faucet and let the pump push the air out |
| Repeatedly, for no clear reason | Air leak on the suction side, or a failing check valve | Fix the leak, do not keep repriming |
That last row is the important one. Priming is a one time fix after an event, not a daily ritual. If you are priming every morning, you have an air leak or a component problem to solve.
When the Pump Will Not Prime
If several bursts produce nothing, stop cycling the pump and start looking at the inlet side. Every fix below is on the suction line between tank and pump, because that is where a self priming pump loses the ability to pull.
Check the strainer and its seal
Switch the pump off, unscrew the strainer bowl, rinse the screen, and inspect the O ring. A dried, flattened, or twisted seal is the single most common reason a pump cannot pull a vacuum, and it is easy to miss because it does not drip water. Reseat by hand only, since a wrench cracks the plastic bowl and creates a worse leak.
Check every inlet fitting and the hose
Hand tighten the barbs and swivel nuts on the inlet side, and look for hose that has gone stiff, cracked, or oval where a clamp bit into it. A clear inline strainer helps enormously here, because you can watch whether the pump is drawing water or foam and stop guessing.

Try the bucket test
Disconnect the inlet hose and drop it into a bucket of clean water set at pump height. If the pump primes from the bucket, the fault is in the tank line, the tank valve, or the pickup tube. If it still will not prime with the shortest possible suction path, the pump has lost its priming ability internally.
Consider the check valve
A one way valve that sticks open lets water fall back toward the tank between uses, so the pump starts every session with an air column and needs repriming. That pattern, primes fine but loses it overnight, points straight at the valve. Our guide to the RV water pump check valve covers testing and replacement.
When Repriming Is Not the Answer
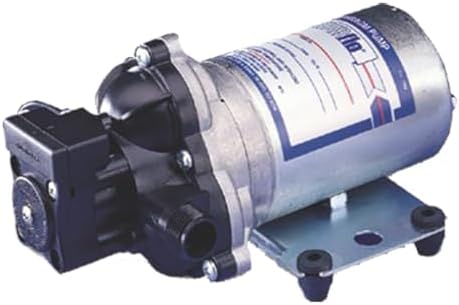
A pump that will not prime from a bucket, runs hot, or has already spent long stretches running dry is usually done. Diaphragm pumps lose their sealing surfaces gradually, and once suction is gone no amount of technique brings it back. Replacement is straightforward: two fittings, two wires, and four mounting screws in most coaches.
Pull the pump fuse or disconnect the negative battery lead before touching the wiring, match the flow rating and port size to the old pump, most RV units run around 3 to 5.5 gallons per minute on 12 volts with 1/2 inch ports, and mount it on the factory rubber feet so it does not drum against the floor. Our roundup of the best RV water pumps compares flow, noise, and current draw.
Where the DIY Line Sits
Priming, strainer service, and a 12 volt pump swap are all comfortable owner jobs. Call a certified RV technician when the pump wiring runs into the converter or a 120 volt panel, when you suspect a split line inside a wall or the underbelly after a freeze, or when the water heater needs more than a bypass valve moved. Leave anything on the propane side of the water heater, including the burner and the gas fittings, to a certified tech.
Common Mistakes to Avoid
- Running the pump for minutes hoping it catches. Bursts, not marathons. Dry running is the main way owners destroy a working pump.
- Priming with a nearly empty tank. The pickup needs to stay submerged or the pump keeps swallowing air.
- Starting at the farthest fixture. Begin at the closest cold faucet, then work outward.
- Forgetting the winterizing valves. This is the number one spring failure and it costs nothing to check.
- Repriming daily instead of fixing the leak. A prime that vanishes overnight is a symptom, not a routine.
Frequently Asked Questions
How long does it take to prime an RV water pump? Usually under a minute of actual run time, spread over two or three bursts. If it is still dry after four or five tries, something is drawing air.
Can you prime a pump by pouring water into it? On many pumps you can wet the inlet side by disconnecting the hose and filling it, which helps the pump grab. It is a workaround, not a fix, so find the air leak afterward.
Why does my pump lose prime overnight? Water is draining back toward the tank, usually through a check valve that no longer seals, or air is entering at the strainer O ring.
Do I need to prime after every fill? No. A healthy system holds its prime, so repeated priming means there is an air leak or a valve issue to solve.
Should the water heater be full before priming? Fill it as part of the same session, with the bypass returned to normal service, and expect the hot side to take longer to bleed than the cold side.
The Bottom Line
Priming is mostly patience and sequence: real water in the tank, winterizing valves reset, the nearest cold faucet wide open, and the pump run in short bursts until the note changes. If it will not catch after a few tries, stop and look at the strainer O ring and the inlet fittings, because a pump that cannot pull a vacuum will never prime. Repriming every day is a symptom, so fix the air leak or the check valve instead.