Last updated: August 14, 2026
Learning how to install a trailer sway bar is mostly an exercise in getting three things right: mounting the sway control ball on the ball mount, mounting the bracket on the trailer A-frame at the position the maker specifies, and setting the friction tension so the bar resists movement without fighting your turns. The bolts take minutes. The measuring is what people rush, and rushed measuring is why some installs never feel quite right on the highway.
This walkthrough covers the add-on friction bar that bolts alongside an existing hitch, since that is what most people mean by a sway bar. Every torque figure, clearance dimension, and tension setting here points back to one place on purpose: the instruction sheet in your box. Bar designs differ enough that a generic number would be worse than no number.
This article contains affiliate links. If you buy through them, we may earn a commission at no extra cost to you. Learn more.
Quick Answer
How do you install a trailer sway bar?
- Park level and chocked, hitch the trailer, then bolt the sway control ball to the ball mount and the mounting bracket to the trailer A-frame at the spacing the manufacturer specifies.
- Slide the friction bar onto both balls, secure the retaining hardware, then set tension per the manufacturer specification, usually starting light and increasing until sway is controlled.
- Torque every fastener to the manufacturer specification and recheck after the first short drive, since fresh hardware settles.
Installing a Friction Sway Bar, Step by Step
Work through these in order on a level surface with the trailer coupled and the wheels chocked. Plan on an hour for a first install, most of which is measuring and rechecking rather than turning wrenches.
- Confirm the bar suits your setup. Read the fitment notes before anything comes out of the box. Friction sway control is generally not used with surge brake couplers, and some A-frame shapes and battery box or propane tank locations leave no room for the bracket. Manufacturers list both restrictions clearly.
- Park level, chock, and couple up. The bar mounts across the gap between the tow vehicle and the trailer, so both have to be in their normal towing relationship. Chock the trailer wheels front and back before you get near the hitch.
- Mount the sway control ball to the ball mount. Most ball mounts and shanks have a hole for exactly this. If yours does not, a drilled hole has to go where the manufacturer says it can, never wherever it fits. Torque the nut to the manufacturer specification.
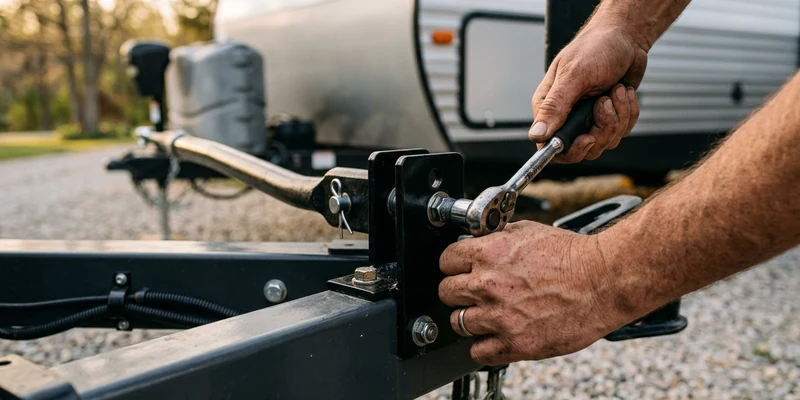
- Position the trailer bracket on the A-frame. This is the step that decides how the bar behaves. The instructions give a required distance from the coupler and a required clearance from the ground and from the propane tanks. Clamp it loosely, hold the bar in place, and confirm the angle looks right before you tighten anything.
- Check the swing. With the bracket loose, swing the bar through the range of motion it will see in a turn. Nothing should touch the propane tank cover, the battery box, the jack, or the safety chains.
- Tighten the bracket to the manufacturer specification. Use the hardware supplied. Substituted bolts are a common shortcut and a bad one, since grade and length were chosen for this joint.
- Install the bar and its retaining hardware. Slide the sockets onto both balls, then fit the clips, pins, or nuts that keep the bar seated. A bar that can lift off a ball under load is worse than no bar at all.
- Set the friction tension. Turn the tension handle or nut to the setting the manufacturer specifies, then adjust from there. Start on the lighter side and increase until highway sway settles, rather than cranking it down on day one.
- Drive short, then recheck. Take a few miles of ordinary road, pull over, and recheck every fastener with a torque wrench. Fresh hardware seats and loosens, which is why makers ask for this and why owners who skip it find loose brackets later.
The bracket clamping step is much easier with a second pair of hands, since someone has to hold the bar while you check clearance.
Friction Bar, Dual Cam, or Integrated Sway Control?
Not everything sold as sway control installs the same way. Knowing which family your hardware belongs to tells you whether this is a bolt-on afternoon or a full hitch setup with ride height measurements.
| Type | How it installs | Best suited to |
|---|---|---|
| Friction sway control bar | Two balls and a bracket, bolts to an existing ball mount and A-frame | Adding sway resistance to a setup that already tows acceptably |
| Dual friction bars | Same idea, mirrored on both sides of the A-frame | Heavier or longer trailers where one bar is not enough |
| Integrated sway control on a weight distribution hitch | Full hitch setup: shank height, spring bars, ride height measurement | Trailers heavy enough to need weight distribution anyway |
| Cam-style sway control | Cams and brackets that work with the weight distribution spring bars | Owners who want sway resistance that self-centers after a turn |
If you are still deciding which of these you actually need, the mechanics behind each one are covered in our explainer on how a trailer sway bar works, and the underlying causes are in our guide to what causes trailer sway.
What to Confirm Before the First Bolt
Three numbers decide whether this install will help: your trailer weight, your tongue weight, and the ratings printed on your tow vehicle and hitch. A sway bar is a stabilizer, not a way around a rating.
Start with the weight label on the trailer and the placards on the tow vehicle door jamb and hitch receiver. Sway control hardware carries its own trailer weight and tongue weight range, and a bar installed outside that range does not make the setup safer. Tongue weight in particular does more to prevent sway than any bar does, which is why it is worth understanding how tongue weight and sway interact first.
Tools worth having ready
A torque wrench is not optional here, because every published figure in your instructions assumes one. Beyond that you need standard sockets and wrenches, a tape measure, wheel chocks, and something to kneel on. Thread locking compound is required on some brackets and prohibited on others, so follow the sheet rather than habit.
The Hardware This Install Needs
How we chose: we looked at widely available sway control hardware from established towing brands, weighted toward kits that ship with the mounting hardware rather than assuming you already own it. Our assessment rests on manufacturer information and the themes that repeat in owner feedback, not on any hands on trial of our own.
🔧 The Add-On Bar Itself
A friction sway control kit is the direct answer if your hitch works fine and you just want the trailer to stop reacting to passing trucks. Kits from established towing brands normally include the bar, the A-frame bracket, and the sway control ball, which saves a second trip for hardware. Check the trailer weight range on the box against your trailer’s weight label before ordering, and see our roundup of sway bars and control kits for the comparison.

⚖️ If Weight Distribution Comes First
When the tow vehicle squats noticeably or the trailer is heavy for the truck, a weight distribution hitch with integrated sway control solves the cause and the symptom in one install. It is a longer setup with ride height measurements, but it replaces the guesswork rather than adding a bar to it. Our guide to weight distribution hitches with sway control covers how the ratings line up.

Setting and Living With the Friction Tension
Tension is the one setting you will keep touching, and the right amount is the least that does the job. Too little and the bar is decoration. Too much and the trailer resists the turn instead of resisting sway, which makes low speed maneuvering heavy and can stress the bracket. Start at the manufacturer specification, adjust in small steps between drives rather than mid trip, and note where you ended up. Owners commonly report that the setting changes with load, so a lightly packed trailer and a fully loaded one may want different tension.
When to release or remove the bar
Most friction sway control makers ask you to release tension or remove the bar in wet, icy, or snowy conditions, because a bar that resists rotation can work against you when a wheel loses grip. Many also ask you to disconnect before backing at sharp angles. These are instructions in the manual rather than suggestions, and ignoring them is how brackets get bent.
Where This Stops Being a Driveway Job
Bolting on a friction bar is a reasonable home project. Several neighboring jobs are not, and the difference matters because towing hardware fails at highway speed.
Drilling a new hole in a hitch shank, ball mount, or trailer frame changes a load bearing part, and it belongs at a hitch shop unless the manufacturer explicitly permits it. Welding a bracket to a trailer frame is shop work, not driveway work. Cracked welds, elongated bolt holes, a bent A-frame, or a coupler that shows play all mean the trailer goes to a qualified RV or trailer technician before it goes back on the road. And if your setup only feels stable at the top of the tension range, that is a loading or ratings problem talking, so recheck weights before adding friction.
Common Mistakes to Avoid
- Eyeballing the bracket position. The distance from the coupler is specified for a reason. A bracket placed by eye changes the geometry and the effort you feel in turns.
- Skipping the torque wrench. Hand tight is not a specification. Under-torqued brackets loosen, over-torqued ones distort the clamp.
- Fitting a bar to fix a loading problem. Sway that comes from too little tongue weight or a badly packed trailer does not go away with friction. Fix the load first, covered in how to prevent trailer sway.
- Ignoring the surge brake warning. Friction sway control and surge brake couplers are generally not combined. Check the fitment notes rather than assuming.
- Leaving tension on in the rain. If your manual says release it in wet or icy conditions, that instruction is part of the product working correctly.
- Never rechecking hardware. Bolts settle after the first heat cycle and the first few miles. A quick recheck after the shakedown drive prevents the failure most owners describe.
Where to Go From Here
With the bar installed, the load in the trailer is what decides how much work it has to do. Our guide to stopping trailer sway while towing covers what to do when it happens at speed, trailer sway at highway speed explains why the same setup can feel fine at 50 and nervous at 65, and light single axle rigs have their own hardware answer in sway bars for light travel trailers.
Frequently Asked Questions
Which side of the trailer does a sway bar go on? A single friction bar normally mounts on the driver side, but the instructions for your kit are the authority, because bracket clearance around propane tanks and battery boxes decides the answer on some trailers.
Do I need one sway bar or two? One is common on lighter trailers, and dual bars are used as trailer length and weight increase. Follow the trailer weight range printed on the kit rather than a rule of thumb, and see how a sway bar works for why the second bar helps.
How tight should the friction bar be? Set it to the manufacturer specification, then increase only until highway sway settles. More friction is not better, since a heavily loaded bar resists steering input as well as sway.
Can I install a sway bar on a weight distribution hitch? Often yes, if the hitch maker allows it and the ball mount has a mounting point. Some weight distribution systems already include sway control and specifically prohibit adding friction bars, so check first.
Do I have to remove the sway bar to back up? Many makers ask you to disconnect it before sharp backing maneuvers, and to release tension in wet or icy conditions. Gentle straight backing is usually fine, but the manual for your kit decides.
What torque should the bolts be? Use the manufacturer specification in your instruction sheet. Sway control brackets and sway control balls vary between makers, so a generic number would be a guess rather than an answer.
The Bottom Line
A friction sway bar install is three careful measurements followed by a torque wrench: sway control ball on the mount, bracket on the A-frame exactly where the maker says, then tension set light and raised only as needed. Confirm your trailer and tongue weights first, because sway that comes from loading will not be fixed with friction. Recheck every fastener after the first short drive, and leave drilling, welding, and frame repairs to a qualified trailer shop.