Last updated: August 14, 2026
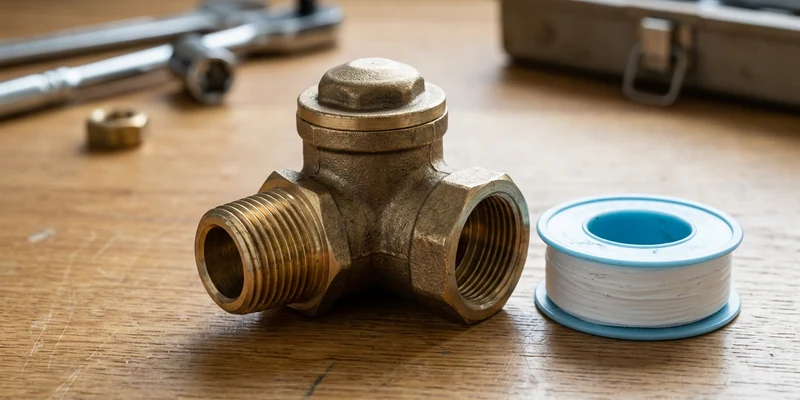
An RV water pump check valve is a one way door. It lets water move toward your faucets and refuses to let it move back, and when it stops sealing you get a very specific set of complaints: the fresh tank fills itself while you are hooked to city water, the pump loses prime overnight, or the pump wakes up every few minutes with every tap closed.
The confusing part is that an RV usually has more than one of these valves. There is one built into the pump head, there is often an inline valve on the pump outlet, and there is one inside the city water inlet fitting on the side of the coach. Fixing the wrong one is the most common wasted afternoon in this repair, so this guide starts by telling you which valve your symptom belongs to.
This article contains affiliate links. If you buy through them, we may earn a commission at no extra cost to you. Learn more.
Quick Answer
When should you replace an RV water pump check valve?
- Replace it when the fresh tank gains water on city hookup, when the pump loses prime between uses, or when pressure bleeds back only while the pump is powered.
- Identify which valve first: the one in the pump head, the inline valve on the outlet, or the one in the city water inlet fitting.
- Debris under the seat is common, so a clean and inspect is always worth trying before you buy a part.
Which Check Valve Is Causing Your Symptom?
Match the behavior to the valve before you pick up a wrench. Each of the three valves fails in its own recognizable way, and the tests below separate them without disassembly.
| Symptom | Likely valve | How to confirm |
|---|---|---|
| Fresh tank level rises while on city water | City water inlet valve, or the pump head valve | Disconnect the hose, close the tank valve, watch for the rise to stop |
| Water trickles into the tank after the pump shuts off | Pump head one way valve | Listen at the tank with the pump powered and the taps closed |
| Pump loses prime between uses | Pump head valve, or an inline valve stuck open | Prime, use water, wait overnight, then test again |
| Pressure holds with pump off, drops with pump powered | Pump head valve leaking back | Pressurize, switch the pump off at the panel, compare |
| Water pushes back out of the city inlet | City water inlet valve stuck open | Run the pump with the hose off and watch the inlet |
| Pump runs, no flow, no suction at all | Valve stuck closed, or a dead pump | Bucket test at pump height, then inspect the head |
| New pump, same problem | Inline outlet valve or plumbing, not the pump | Trace and inspect every inline valve on the outlet side |
What the Valve Does and Where It Lives
The check valve exists to hold your system pressurized between pump cycles and to keep city water from running backward into the fresh tank. Without a valve that seals, pressure escapes through the path of least resistance, which is usually back toward an open tank.
The pump head valve
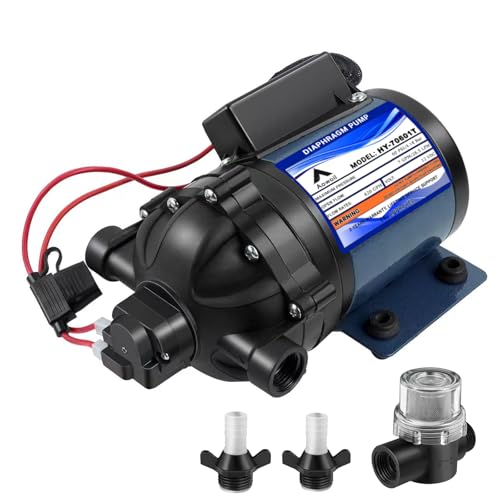
Most 12 volt diaphragm pumps have a one way valve inside the outlet side of the head. On many models it is part of the upper housing assembly and comes out with a few screws, with a small rubber flapper or a poppet and spring inside. Debris from the fresh tank is the usual reason it stops seating, and a mineral crust in hard water areas is a close second.
The inline and city inlet valves
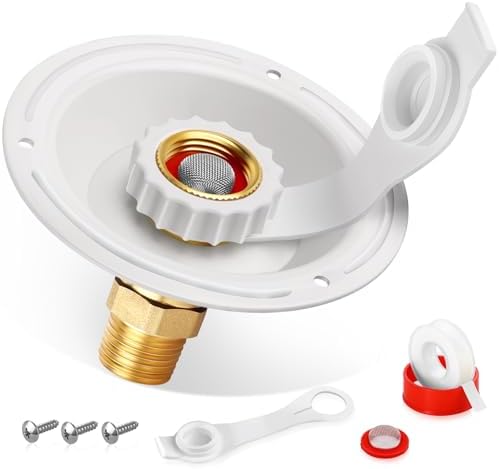
Many coaches also carry a separate inline check valve on the pump outlet, sometimes tucked near the manifold, marked with a flow arrow. Separately, the city water inlet fitting on the exterior wall has its own small valve, and that one is what stops hose pressure from filling your fresh tank. When your tank fills itself on hookup, that fitting is a prime suspect and it is one of the easiest parts on the coach to change.
Testing Without Guessing
Three tests separate a leaking check valve from a leaking system, and none of them require parts. Run them in order and write down what you see.
- The pump off test. Pressurize the system, close every tap, then switch the pump off at the panel. If pressure holds for a long time, the plumbing is sound. If it fades, you have a leak in the lines rather than a valve issue, and our guide to a pump that keeps running covers that hunt.
- The tank isolation test. With the pump powered and everything closed, close the fresh tank outlet valve. If the cycling or the trickling into the tank stops, water was going backward through the pump.
- The city inlet test. Hook up city water, close the tank valve, and watch the tank level. If it still rises, the city inlet valve is passing water in a direction it should not.
Owners often skip straight to a new pump on these symptoms. Technicians commonly recommend the opposite order, because a valve that is held open by a grain of tank grit behaves exactly like a failed pump and costs nothing to clean.
Clean It First, Then Replace It
Switch the pump off, pull the fuse or disconnect the negative battery lead, and relieve system pressure by opening a faucet before you open anything. Then work carefully, since the small internal parts like to disappear into a dark bay.
Cleaning the pump head valve
Remove the outlet fitting or the upper housing screws depending on your model, lift out the poppet or flapper, and rinse it and the seat. Look for grit, a nick in the rubber, a flattened O ring, or a spring that has lost its tension. Reassemble in the same orientation, snug the screws evenly, and test again before you put the bay back together.
When a replacement is the right call
Replace the valve when the sealing face is torn, deformed, or crusted beyond cleaning, or when cleaning buys you only a few days. Inline valves are simple parts with a flow arrow on the body, and installing one backward is the classic mistake, so check the arrow twice against the direction water travels away from the pump.

If your pump uses a sealed head where the valve is not sold separately, or the head is cracked, the pump itself is the part. That is also the moment to consider whether the current pump is the right one for the coach. Most RV pumps are 12 volt and rated around 3 to 5.5 gallons per minute, and our roundup of the best RV water pumps compares flow, noise, and current draw.
Where the DIY Line Sits
Cleaning or swapping a check valve, changing a city water inlet fitting, and replacing a 12 volt pump are all owner level work with the fuse pulled and the system depressurized. Call a certified RV technician when the valve you need sits behind sealed panels or in the underbelly, when a backflow problem has already put fresh water somewhere it should not be inside the coach, or when any part of the job touches 120 volt wiring. Keep the propane side of the water heater out of scope entirely.
Common Mistakes to Avoid
- Installing an inline valve backward. The arrow points in the direction of flow, away from the pump. Backward means no water at all.
- Replacing the pump before testing the valves. A grain of grit under a seat mimics a dead pump perfectly.
- Working on a pressurized system. Open a faucet first, or you will wear the contents of the line.
- Overtightening plastic fittings. Hand snug plus a small turn is plenty. Cracked housings leak worse than the valve ever did.
- Ignoring the city inlet. If your tank fills on hookup, that fitting is often the whole story.
Frequently Asked Questions
What does a check valve do in an RV water system? It allows water to move one way and blocks it from returning, which holds system pressure between pump cycles and keeps city water from backfilling the fresh tank.
Why does my fresh tank fill up on city water? Water is getting backward through the city water inlet valve or through the pump. Close the tank valve, then test each path to identify which one is passing.
Can a check valve stop water flow completely? Yes, if it sticks closed or is installed against the flow direction. That produces a pump that runs with no delivery, covered in our guide to a pump that runs with no water.
Is the check valve part of the pump or separate? Both exist. Most pumps have one in the head, and many coaches add an inline valve on the outlet plus one inside the city water inlet fitting.
How long do RV check valves last? There is no fixed interval. Debris and mineral scale decide it, so owners in hard water areas and those with older fresh tanks tend to see them fail sooner.
The Bottom Line
Name the valve before you replace anything: a tank that fills on city water points at the inlet fitting or the pump head, a prime that vanishes overnight points at the pump head, and a valve stuck closed stops flow entirely. Clean the seat first, because grit under a poppet mimics an expensive failure. Replace when the sealing face is damaged, and always check the flow arrow on an inline valve before you tighten it.