Last updated: August 14, 2026
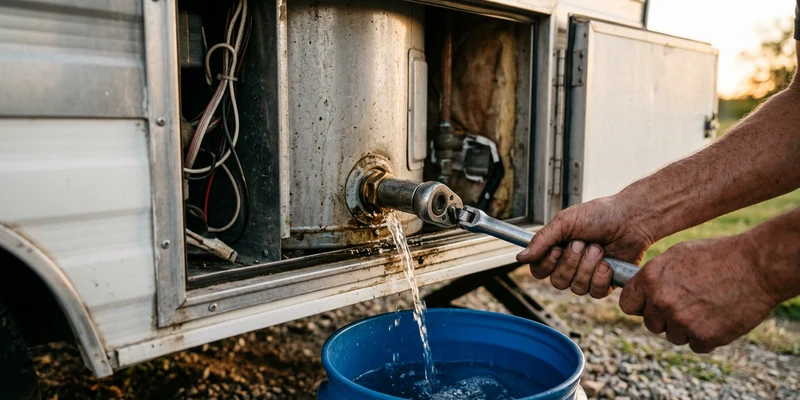
RV water heater anode rod replacement is a straightforward job with one non negotiable rule: the heater has to be off, fully cooled, and completely depressurized before the rod moves a single turn. On a Suburban style steel tank the rod is also the drain plug, so unscrewing it empties the tank. Get the sequence right and the whole thing takes about half an hour of actual work, plus several hours of waiting for the tank to cool.
What follows is the procedure in the order a technician runs it, from shutting the appliance down to purging the air out of the hot line afterward. If you are still deciding whether your rod needs replacing at all, read when to replace an RV water heater anode rod first, and check Suburban anode rod size and fit before you order the part.
This article contains affiliate links. If you buy through them, we may earn a commission at no extra cost to you. Learn more.
Quick Answer
How do you replace an RV water heater anode rod?
- Turn the heater off on gas and electric, let it cool for several hours, shut off the water supply, open a hot faucet inside, and lift the pressure relief valve lever.
- Unscrew the rod with a socket, commonly 1 and 1/16 inches on Suburban tanks, and stand clear while the tank drains.
- Flush the tank with a rinse wand until the water runs clear, then fit the new rod with fresh thread seal tape, snug rather than brutal.
- Close the relief valve, refill, and run a hot tap until the air is purged and the flow is steady before you restore any heat.
The Job at a Glance
Six stages, in this order, every time. The middle column is what you are actually doing, and the right column is the mistake people make at that stage, which is more useful than a repeat of the instruction.
| Stage | What you do | What goes wrong here |
|---|---|---|
| 1. Shut down | Heater off on both gas and electric, at the panel and at the appliance | Leaving the electric element switch on, which cooks a dry element later |
| 2. Cool down | Wait several hours, or leave it overnight | Rushing it, then taking scalding water across your forearm |
| 3. Depressurize | Water off, hot faucet open inside, relief valve lever lifted | Skipping the relief valve, so the tank gurgles instead of draining |
| 4. Drain and flush | Remove the rod, then rinse the tank until the water runs clear | Draining by gravity only and leaving the sediment behind |
| 5. Fit the new rod | Clean threads, fresh tape, tighten snug | Reusing old tape, or leaning on the wrench to stop a weep |
| 6. Refill and purge | Close the valve, refill, run a hot tap until the air is gone | Switching the heat back on before the tank is full |
Set aside a morning rather than an hour. Almost all of the elapsed time is the tank cooling, and that is the part that cannot be shortened safely.
Before You Touch Anything: Off, Cool, Depressurized
This is the part of the job that actually carries risk, so it gets its own section. A water heater at operating temperature holds several gallons of water well above the point where it scalds instantly, and it holds that water under system pressure. Opening the rod port on a hot, pressurized tank sprays it out sideways at chest height.
Work through all five of these before the socket goes anywhere near the rod. Switch the heater off on the electric element and on the gas, both at the interior control panel and at the appliance itself. Give it several hours to cool, ideally overnight. Turn off the water pump and disconnect the city water hose so nothing can repressurize the system. Open a hot faucet inside and leave it open until the flow stops. Then lift the lever on the pressure relief valve at the water heater, which vents any remaining pressure and lets air into the tank so it will drain properly instead of glugging.
The check that tells you it is safe
Before you commit, put a hand on the outside of the tank through the access door, and run the hot faucet one more time. Cool water and no pressure at the tap means you are clear. If hot water still comes out, the tank has not cooled, and there is nothing to gain by starting early.
What Socket Size Fits an RV Anode Rod
On Suburban style RV water heaters, the anode rod head takes a socket that is commonly 1 and 1/16 inches. That is the size to have ready, and it is the tool most owners discover they do not own halfway through the job, usually in fading daylight with the tank already cooled.
A few practical notes on the tool. Use a six point socket rather than a twelve point if you have the choice, because a rod that has been in for years can be tight and a twelve point is more likely to round the head. You will want a breaker bar or a long ratchet for leverage, since the compartment gives you almost no swing. And check your own rod before assuming: some heaters use a different head size, and measuring the flats on the old rod takes ten seconds.
🔧 The tool this job actually requires
A 1 and 1/16 inch socket, ideally six point, with enough drive length to clear the water heater access opening. Confirm the size against your own rod head before ordering, since not every heater uses the common size.

Step by Step: Draining the Tank
With the heater off, cool, and depressurized, the drain is quick. Everything below assumes a Suburban style steel tank where the anode is the drain plug.
- Set up for water. The tank empties onto the ground under the access door. Move anything you do not want soaked, and be aware that the first flow can carry rust flakes and scale with it.
- Bypass the water heater if your rig has valves for it. Not required, but it stops water from the fresh system feeding back into the tank while you work.
- Break the rod loose. Fit the socket squarely on the head and turn counterclockwise. Expect it to be tight. Steady pressure works better than a jerk, and a longer bar beats a harder shove.
- Back it out slowly and stand to one side. As the last threads release, the water comes out with force. Let the tank empty before you pull the rod fully clear.
- Confirm the relief valve lever is open. If the flow slows to a trickle and the tank gurgles, air is not getting in. Lifting the lever fixes it immediately.
- Let it run dry. Wait until it stops rather than until it slows, because the last of the water carries most of the sediment.
Step by Step: Flushing and Inspecting
Gravity alone leaves a layer of scale and grit sitting in the bottom of the tank, and that layer is a large part of why the next rod will wear faster than this one did. A rinse wand is what turns a drain into an actual flush.
- Feed the rinse wand through the rod port. Connect it to a garden hose, turn the water on, and sweep it around the inside of the tank, angling it up, down, and to both sides.
- Keep going until the water runs clear. Sediment comes out in bursts rather than steadily, so a tank that ran clear thirty seconds ago can still produce another cloud.
- Fish out any broken pieces. If the old rod came apart, the fragments are inside. Get them out now, since they will otherwise sit in the bottom of the tank for the rest of its life.
- Inspect the old rod against a new one. Compare thickness directly. Down to about a quarter of the original diameter, exposed core wire, or heavy pitting all mean it was due. Our guide on reading a used anode rod covers what each pattern tells you about your water.
- Look at the threads in the port. They should be clean metal. Wire brush away any scale before the new rod goes in, and do not force a rod into a port that resists by hand for the first turn or two.
💦 What makes the flush actually work
A water heater tank rinse wand with a garden hose fitting and a shutoff at the handle, long enough to reach the far end of the tank. Without one, you are draining rather than flushing, and the sediment stays where it is.

Thread Tape and Fitting the New Rod
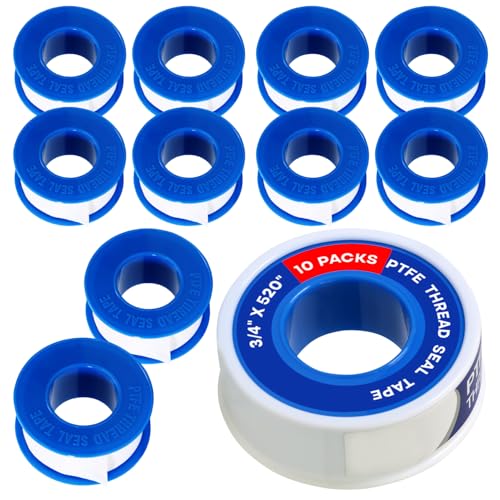
Fresh thread seal tape on clean threads is what keeps the compartment dry. Wrap the new rod’s threads in the direction the rod will turn as it goes in, which is clockwise when you look at the threaded end, so the tape tightens rather than unravels. Several wraps is normal, and covering the very first thread is not necessary.
Thread the rod in by hand first. It should turn easily for the first couple of turns, and if it does not, back it out and check for cross threading rather than driving it home with the socket. Then tighten with the socket until it is firmly snug. Leaks at the rod are almost always a sealing problem rather than a torque problem, so the answer to a weep is fresh tape, not another quarter turn. Overtightening damages the port, and a damaged port on a water heater tank is not something you fix in a driveway.
🎗️ The consumable people forget
PTFE thread seal tape rated for potable water, on a roll wide enough for a 3/4 inch NPT thread. Old tape never gets reused on this job, and a roll costs less than the towel you would need without it.
If the old rod will not budge
A rod that has been in for many seasons can be seized in the port. Give a penetrating fluid time to work rather than escalating force, use the longest bar the compartment allows, and apply steady pressure rather than sharp shocks so you do not round the head. If it still will not move, stop. Twisting a stuck rod hard enough eventually damages the tank port or the tank fitting itself, and at that point a certified RV technician with the right tools is a much cheaper outcome than a replacement appliance.
Refilling and Purging the Air
Refilling in the right order is what keeps you from destroying an electric element. Close the pressure relief valve lever first, set any water heater bypass valves back to normal operation, then restore water either from the pump or from city water.
Open a hot faucet inside and leave it open. Air comes out first, then a sputtering mix, then a steady flow. Once the flow is smooth and quiet at every hot tap, the tank is full. Only then do you switch the heater back on. Never energize an electric element in an empty or partly filled tank, because a dry element burns out in seconds, and that turns a maintenance job into a parts order.
Check for leaks twice
With the system pressurized and the heat still off, wipe around the rod and the relief valve with a dry paper towel. Damp means the tape did not seal. Then look again the next morning, because slow weeps announce themselves overnight rather than in the first five minutes. If you find one, drain enough to get below the rod, remove it, re tape, and refit.
Where This Stops Being a DIY Job
Everything above is owner level work on the water side. The rest of this appliance is not, and that boundary is what keeps a maintenance task from turning into an incident.
- The propane side, without exception. We do not publish instructions for gas lines, regulators, gas valves, burner tubes, orifices, or burner adjustment. Those components fail in ways that produce fire and carbon monoxide rather than a puddle, and correct setup requires test equipment and certification. Describe the symptom to a certified RV technician.
- The 120 volt side. Heating elements, thermostats, high limit switches, wiring, and breaker work belong to a certified technician in most rigs.
- A tank that seeps from the body. If water appears from the tank itself rather than from a fitting, the tank has failed. RV water heater tanks are not repairable and the appliance gets replaced.
- A damaged or cross threaded rod port. Do not improvise a seal on a threaded port that no longer holds. That is a pressure vessel fitting.
- A relief valve that will not reseat. If it drips continuously after you close the lever, have it looked at rather than plugged or blocked.
Stop the job and get out if you smell gas, if a carbon monoxide alarm sounds, or if you see soot, scorch marks, or a yellow or floating flame at the burner. Turn the appliance off, close the valve at the propane cylinder, ventilate, get everyone outside, and call a certified RV technician. Keep a working carbon monoxide alarm in the coach and check the expiration date printed on the back of it every season.
Common Mistakes to Avoid
- Starting while the tank is still hot. The only real hazard in this job, and the only one that is entirely avoidable by waiting.
- Forgetting the pressure relief valve. A tank that will not drain properly is almost always a tank that cannot get air in.
- Not owning the socket. Check the size and have the tool in hand before you drain anything.
- Draining without flushing. The sediment that stays behind is what shortens the life of the rod you just fitted.
- Buying a rod for an aluminum tank. Atwood and Dometic aluminum tanks use a plastic drain plug and are designed without an anode.
- Restoring power to an empty tank. Purge the air and confirm steady flow at a hot tap first.
Where to Go From Here
If the rod you pulled out was worn far faster than you expected, water chemistry is usually the reason, and the anode rod guide explains what to change. If your hot water also smells of sulfur, the rod is only half the story and the sulfur smell walkthrough covers sanitizing the whole system.
Since the tank is already drained, this is the natural moment to handle the rest of the water system: winterizing the water pump and keeping the pipes from freezing use the same shutdown. And if the pump has been misbehaving while you were in there, start with RV water pump repair.
Frequently Asked Questions
What size socket do I need for an RV anode rod? Suburban style heaters commonly use a 1 and 1/16 inch socket on the rod head. A six point socket and a long ratchet or breaker bar make a seized rod much easier. Measure your own rod head if you are unsure.
Do I have to drain the water heater to change the anode rod? Yes. On a Suburban style tank the rod is the drain plug, so removing it drains the tank. Always turn the heater off, let it cool for several hours, shut off the water, open a hot faucet, and lift the relief valve lever first.
Do I need thread tape on a new anode rod? Yes, fresh PTFE thread seal tape on clean threads. Wrap it in the direction the rod turns as it threads in, and never reuse old tape.
How tight should the anode rod be? Firmly snug, not brutal. Sealing comes from the tape, not from torque, and overtightening can damage the tank port, which is not a repair you can make yourself.
What if the anode rod is stuck? Give a penetrating fluid time to work, use a longer bar with steady pressure, and avoid sharp shocks that round the head. If it still will not move, hand it to a certified RV technician rather than risking the tank port.
How long does replacing an RV anode rod take? The work itself is around thirty minutes. Cooling the tank beforehand takes several hours, so plan the job around a morning rather than a coffee break.
The Bottom Line
Off, cool, depressurized, then drain. Break the rod loose with the correct socket, commonly 1 and 1/16 inches, stand clear of the outflow, and flush the tank with a rinse wand until the water runs clear. Fit the new rod with fresh thread tape and tighten it snug rather than hard, close the relief valve, refill, and purge the air at a hot tap before you restore any heat. Check for weeping the next morning, and leave everything on the propane and 120 volt side to a certified RV technician.