Last updated: August 14, 2026
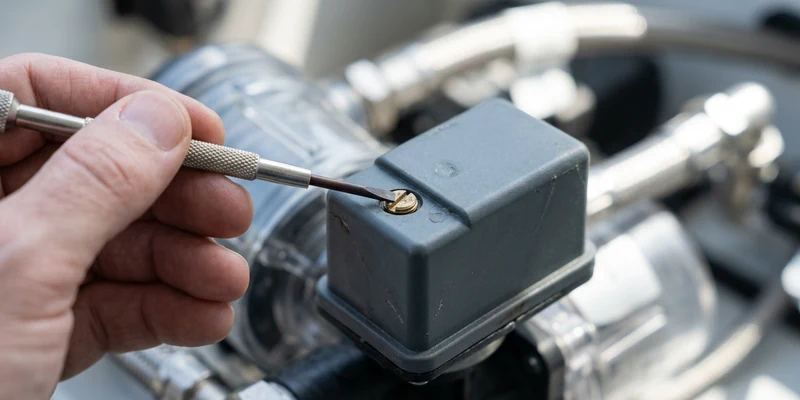
The RV water pump pressure switch is the small assembly bolted to the pump head that decides when the motor runs. It closes a 12 volt circuit when system pressure falls to the cut-in point and opens it again at the cut-out point. Everything owners describe as a pump with a mind of its own, running forever, cutting out too early, hunting up and down, traces back to that switch or to the pressure it is reading.
The practical question is whether to turn the adjustment screw or replace the part. The short version: adjusting is legitimate when a healthy switch has drifted slightly and the pump still cuts out cleanly, just at the wrong point. It is a waste of an afternoon when the diaphragm is torn, the contacts are welded, or the terminals have corroded. This guide gives you a test that tells the two apart before you touch the screw.
This article contains affiliate links. If you buy through them, we may earn a commission at no extra cost to you. Learn more.
Quick Answer
Should you adjust or replace an RV water pump pressure switch?
- Adjust when the pump still cuts in and out cleanly but at the wrong pressure, and only in small increments, roughly a quarter turn at a time.
- Replace when the pump never cuts out, cuts out with no pressure, or the switch is corroded, wet inside, or has a torn diaphragm.
- Most RV pumps cut out somewhere around 40 to 55 psi and cut back in roughly 10 to 20 psi lower. Check the label on your pump before changing anything.
Adjust, Replace, or Look Elsewhere
Use this table to place your symptom before you open anything. The right hand column is deliberately blunt, because the most expensive mistake here is adjusting a switch that has already failed.
| Symptom | What it usually means | Verdict |
|---|---|---|
| Pump never shuts off, water flows fine | Contacts not opening, or torn switch diaphragm | Replace the switch |
| Pump shuts off too early, weak flow at the tap | Cut-out set low, or a restricted line raising pressure at the pump | Clear restrictions first, then adjust in small steps |
| Pump cuts out very late, fittings groan | Cut-out set high | Adjust down, stay within the pump rating |
| Pump hunts on and off rapidly with a tap open | Narrow pressure band, restricted flow, or no accumulator | Clean the strainer, then consider an accumulator |
| Pump cycles with everything closed | Pressure is leaking out of the system | Not a switch problem, hunt the leak |
| Pump does not start at all | Fuse, wiring, low voltage, or dead switch | Test power at the switch before condemning it |
| Water weeping from the switch body | Ruptured switch diaphragm | Replace the switch, do not adjust |
How the Switch Actually Works
Inside the housing sits a small diaphragm exposed to system pressure, a spring, and a set of electrical contacts. Rising pressure pushes the diaphragm against the spring until the contacts open and the motor stops. Falling pressure lets the spring win again and the contacts close, restarting the pump.
Cut-in, cut-out, and the band between them
The gap between those two points is the pressure band, and it is what keeps your pump from starting every time someone rinses a spoon. A wide band means fewer starts and a bit more pressure variation at the tap. A narrow band feels steadier but makes the pump work more often. The adjustment screw changes spring tension, which moves both points together rather than setting them independently.
What the switch cannot know
The switch reads pressure at the pump, not at your shower head. A clogged strainer, a tired filter, or a kinked line can make pressure at the pump reach cut-out while the fixture still trickles. That is why owners who chase weak flow with the adjustment screw often end up with a high pressure system that still trickles. Clear the restriction first.
Testing the Switch Before You Decide
Two tests, ten minutes, no parts. Pull the pump fuse or disconnect the negative battery lead whenever you are handling terminals, and open a faucet to relieve pressure before you loosen anything on the head.
- Confirm power arrives. With the pump switch on at the panel and the system depressurized, check voltage at the switch input. Around 12 to 13 volts means the fuse and wiring are doing their job, and the fault is downstream.
- Check continuity across the switch. Depressurized, the switch should be closed. Pressurize the system and it should open at cut-out. A switch that never opens is a replacement, not an adjustment.
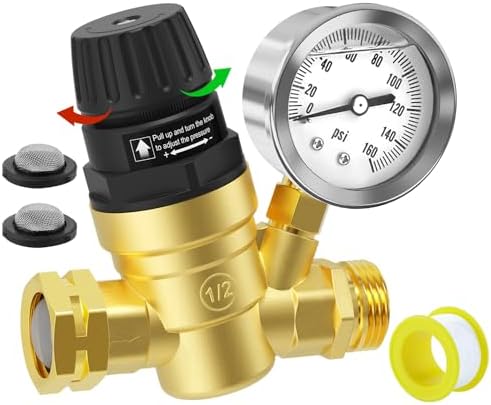
- Watch the actual pressure. A gauge on a faucet or on the city water inlet tells you where cut-out really happens, which turns guesswork into numbers. Many owners keep an inline regulator with a gauge on hand for exactly this.
- Inspect for water and corrosion. Moisture inside the switch cover, green terminals, or a damp trail down the pump body all mean the diaphragm has failed. Replace it.
Adjusting It Without Making Things Worse
If the switch tests healthy and the plumbing is clear, adjustment is fair game. The screw usually sits under a small cap on top of the switch housing, and on most designs clockwise raises the pressure while counterclockwise lowers it, though you should verify with a gauge rather than assume.
Work in small steps
Turn no more than about a quarter turn, pressurize, and observe. Repeat until the pump cuts out at a point that is comfortable and within the pump rating. Resist the urge to chase a stronger shower by winding it up, since RV plumbing, fittings, and the water heater all live easier at moderate pressure, and campground regulators typically sit around 40 to 50 psi for the same reason. Our guide to RV water pressure limits covers what the rest of the system is comfortable with.
Know when to stop turning
If the pump still will not cut out at any setting, if adjustment holds for a day and drifts back, or if you had to wind the screw far past its normal range to get any response, the switch is finished. That is also true of a switch that cuts out immediately with almost no pressure, which usually means the diaphragm has lost its shape.
Replacing the Switch
On most common RV pumps the pressure switch is a separate assembly held by two screws with two spade or ring terminals. Pull the fuse or the negative battery lead, open a faucet to relieve pressure, note which wire goes where, and swap it. Get the small gasket or O ring seated correctly, since a pinched seal produces a leak that looks exactly like the failure you just replaced.
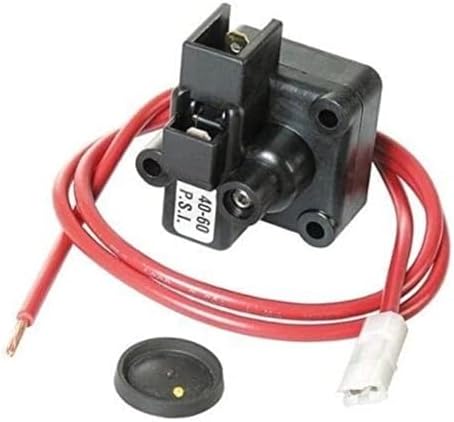
Buy the switch that matches your pump family and pressure rating rather than a generic part, because pressure ranges differ between models. If the pump is old, noisy, and drawing more current than it should on top of the switch failure, replacing the whole unit is usually the better value, and our roundup of the best RV water pumps compares flow, noise, and draw.

Where the DIY Line Sits
Testing, adjusting, and replacing a pressure switch on a 12 volt pump is squarely owner territory with the fuse pulled and the system depressurized. Call a certified RV technician if the pump circuit runs back into the converter or a 120 volt panel and you cannot identify the source, if you find scorched wiring or a melted connector after a pump ran continuously, or if raising system pressure has already produced leaks inside walls or the underbelly. Never troubleshoot around propane lines or a water heater burner by feel.
Common Mistakes to Avoid
- Adjusting to fix weak flow. Weak flow at one fixture is a restriction. Raising pressure hides it briefly and stresses the plumbing.
- Big turns of the screw. A quarter turn at a time, with a gauge, or you will overshoot and never find your way back.
- Adjusting a wet switch. Moisture inside means a failed diaphragm, and no setting will hold.
- Reconnecting wires from memory. Photograph the terminals before you unplug them.
- Ignoring battery voltage. A sagging battery can keep the pump from reaching cut-out and imitates a switch fault perfectly.
Frequently Asked Questions
Which way do I turn the adjustment screw? On most designs clockwise raises the cut-out pressure and counterclockwise lowers it, but verify with a gauge and move in small increments rather than trusting the direction alone.
What pressure should my RV pump cut out at? Most models land somewhere around 40 to 55 psi, with cut-in roughly 10 to 20 psi below. The pump label is the authority for your specific unit.
Can I bypass the pressure switch? No. Without it the pump runs continuously and can damage itself and your plumbing. If it has failed, replace it.
Why does my pump run nonstop after I adjusted the switch? You likely raised cut-out past what the pump can reach. Back the screw off, and if that does not restore a clean cutoff see our guide to a pump that will not shut off.
Is the switch sold separately from the pump? On most common RV pumps, yes, it is a small assembly on the head. Match it to your pump family and pressure rating.
The Bottom Line
Test before you turn. A switch that still opens and closes cleanly but at the wrong pressure is an adjustment job, a quarter turn at a time with a gauge to confirm. A switch that never opens, weeps water, or shows corrosion is a replacement, and no amount of screw turning will change that. Clear restrictions in the plumbing first, because weak flow is almost never solved by asking the pump for more pressure.
See the adjust or replace table