Last updated: August 14, 2026
Ask what RV water pressure regulator psi setting you should use and you get a range rather than a number, but the range is narrow and it is worth knowing. RV plumbing is generally built around supply pressure somewhere in the 40 to 60 psi region, and most manufacturers publish a maximum in that neighborhood. Campground pedestals are under no such obligation. Owners regularly report finding pressure well above that at the spigot, sometimes far above it, and the fittings behind your walls have no way to tell you before they let go.
That is the whole argument for a regulator, and it is why a regulator is the cheapest insurance on the rig. This guide covers what pressure your system is actually built for, how to find out what a given pedestal is delivering, what setting to run, and what to do when the problem is the opposite one and the shower is disappointing everywhere you go.
This article contains affiliate links. If you buy through them, we may earn a commission at no extra cost to you. Learn more.
Quick Answer
How much water pressure is too much for an RV?
- Most RV plumbing is designed around roughly 40 to 60 psi, and manufacturers commonly publish a maximum somewhere in that band. Check your own owner’s manual, since the figure varies by rig.
- Set an adjustable regulator around 40 to 50 psi for a comfortable shower with a healthy margin, and lower it further in an older rig or one with a history of leaks.
- Never connect to a campground spigot without a regulator, even for one night. Pedestal pressure varies enormously and gives no warning.
What Each Pressure Range Feels Like
The table below is a practical guide rather than a specification. Use it to interpret what a gauge is telling you, and treat your rig’s own published maximum as the number that matters most.
| Pressure range | What you notice | What to do |
|---|---|---|
| Below about 30 psi | Weak shower, slow fill, appliances struggle | Open the regulator up, or run off the tank and pump instead |
| Roughly 40 to 50 psi | Comfortable shower, quick fill, nothing strained | The setting most owners land on and stay at |
| Roughly 50 to 60 psi | Strong flow, fittings working near their design range | Fine on a modern rig in good condition, tighter margin on an older one |
| Above your rig’s published maximum | Nothing obvious, which is the danger | Regulate it down before you connect anything |
| Pedestal pressure, unknown | No way to judge by feel at all | Gauge it, or simply regulate every time as a habit |
| Pressure spikes and water hammer | A bang in the walls when a valve closes | Regulate, then look at flexible connections and an accumulator |
Note what is not on the list: your pump. On the tank side, the pump sets its own pressure and cuts off in the 40 to 55 psi range on most models, so the pump side of the system is self limiting. The risk lives entirely on the city water connection.
Why High Pressure Is Worse in an RV Than at Home
A house is plumbed in copper or heavy wall PEX with soldered or crimped joints, and it sits on a foundation that does not move. An RV is plumbed in lightweight PEX and flexible line with push fit and barbed connections, and the whole assembly is shaken down a highway several times a season. The joints are the weak point, and pressure is the load that finds them.
The second difference is where the water goes when a joint gives up. In a house it lands on a floor and you notice. In an RV, a large share of the plumbing runs behind panels, above the ceiling, and through the underbelly, so a slow weep can soak a wall or a subfloor for weeks before anything appears. That is why the cost of a failure is out of all proportion to the cost of the part.
Where high pressure shows up first
Toilet valves, faucet cartridges, the water heater relief valve, and the fittings at the pump are the usual first casualties, because they combine small seals with frequent cycling. A toilet that weeps at the base or a relief valve that drips after a pressure change is often a pressure story rather than a part story, and why your RV toilet is leaking covers telling the two apart.
Fixed Regulators Versus Adjustable Ones
Both formats do the essential job, and the difference is control rather than protection. A basic brass inline regulator is preset by the manufacturer, typically somewhere in the 40 to 50 psi region, and it screws onto the spigot and is forgotten. It is small, cheap, hard to break, and lives in a drawer.
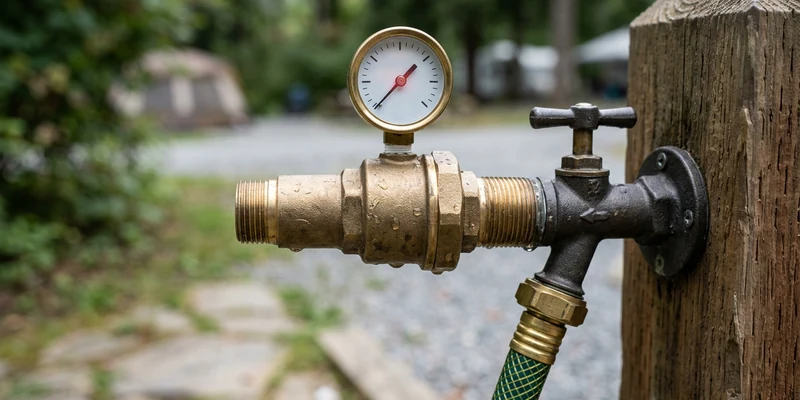
An adjustable regulator has a gauge and a screw, so you can set the outlet pressure to what you want and see what the system is getting. That matters in two situations: when you want a stronger shower than a preset unit gives you, and when you want to know whether a bad shower is the park’s fault or yours. Most owners who camp regularly end up with an adjustable one and never go back.
🛡️ The one to buy if you only buy one
An adjustable brass water pressure regulator with a gauge, lead free and rated for drinking water, fitted at the spigot ahead of everything else. Set it once, read it at every hookup, and you have both the protection and the diagnosis in a single fitting. Look for a model with a large enough flow path that it does not choke the shower on its own.

🎒 The spare that lives in the bay
A compact fixed inline brass regulator, kept as a backup and for the trips where you want one less thing hanging off the spigot. It costs little, takes no space, and means a lost or damaged main regulator never turns into a night connected without one.

How to Find Out What a Pedestal Is Really Giving You
You cannot judge supply pressure by feel, because flow and pressure are not the same thing, and a restriction anywhere in the chain changes what reaches the faucet. A gauge settles it in about ten seconds and costs less than one damaged fitting.
- Screw a gauge onto the spigot before anything else. Nothing else connected, valve fully open. That reading is the static supply pressure the park is delivering.
- Note whether it moves. Some parks vary considerably through the day as the loop fills and empties, so a reading at nine in the morning is not a promise for eight at night.
- Then build the chain. Regulator first, then any sediment prefilter, then the carbon filter, then the drinking water hose to the rig. Everything downstream of the regulator is now protected.
- Read the regulator gauge with a tap open. Static pressure with everything closed is not what your plumbing sees in use. Open a faucet and see what it settles at, then adjust from there.
- Write the number down. Owners who keep a note of pressure by park build a surprisingly useful picture over a season.
📊 For settling the argument at the spigot
A simple water pressure test gauge with a garden hose thread connection. It is the fastest way to learn what your regulator is doing, whether the park is the reason the shower is weak, and whether that new filter is restricting more than it should.

When the Problem Is Too Little Pressure
Weak flow gets blamed on the regulator more than anything else, and the regulator is usually innocent. Work through the chain in order before you adjust or replace anything, because each stage restricts a little and the effects add up.
Start at the spigot with the gauge. If supply is genuinely low, no amount of adjusting helps and running off the fresh tank with the pump will often give you a better shower than the park can. If supply is fine, the restriction is downstream: a clogged carbon filter, a kinked or undersized hose, a partially closed valve, a screen in the city water inlet, or a fixture aerator full of grit. Clean the aerator first, since it takes a minute and solves it more often than it should.
If it is weak on the pump too
When flow is poor on both city water and the pump, the common element is inside the rig rather than at the spigot. That points at the inlet strainer, the plumbing, or the pump itself, and our water pump repair guide walks through separating those. A pump that will not reach its cutoff pressure at all is usually a pressure switch story.
Where This Stops Being a DIY Job
Fitting a regulator and reading a gauge is about as safe as RV work gets. These four situations are different.
- Signs that water has been in the structure. Soft floor, stained ceiling, swollen paneling, or a musty smell means a leak has been running for a while. Find the source, then have the damage assessed properly rather than drying it and hoping.
- A leak you cannot locate. If the pump cycles with every tap closed and nothing is visibly dripping, water is going somewhere inside a wall or under the floor. That is a diagnosis job with proper tools.
- The water heater relief valve. A relief valve that keeps opening is telling you something about pressure or temperature, and the temperature side of that story sits next to gas components. Water heater burner, valve, and regulator work belongs to a certified RV technician.
- Anything tied into 120 volt wiring. If your rig has a residential style pump or a booster tied into shore power, that installation is not driveway work.
Common Mistakes to Avoid
- Skipping the regulator for one night. Pressure damage does not schedule itself around your plans, and one pedestal is all it takes.
- Fitting the regulator at the rig instead of the spigot. At the rig end, the hose itself spends the night at full pedestal pressure.
- Assuming a preset regulator is exact. Preset units hold a range, not a number. If you want to know, you need a gauge.
- Turning an adjustable regulator up to fix weak flow. If supply is the limit, you are only raising the ceiling, not the water.
- Blaming the regulator for a clogged filter. Check the filter, the aerators, and the hose before touching the setting.
- Using a wrench on plastic threads. Hand tight is the spec at the spigot, and split threads make their own kind of pressure problem.
Where to Go From Here
If you are assembling the whole city water chain from scratch, the order and the parts matter more than the brands. Our comparison of inline RV water filters covers the filtering stage and repeats the point that a regulator does more for the rig than any filter upgrade, and RV water filter systems covers the step up to canister setups for anyone hooked up for months.
If the pressure question came up because something is already leaking or cycling, start with the symptom instead. RV water pump repair is the hub for the pump side, and keeping RV pipes from freezing covers the other common cause of a split fitting that only shows itself under pressure.
Frequently Asked Questions
What psi should I set my RV water pressure regulator to? Somewhere around 40 to 50 psi suits most rigs and gives a comfortable shower with margin to spare. Check your owner’s manual for your rig’s published maximum and stay comfortably under it.
Is 60 psi too high for an RV? It sits at the top of the range most RV plumbing is designed around, so it is not automatically dangerous but it leaves little margin. Older rigs, or ones with a history of leaks, are better off lower.
Do I need a regulator if I only use my fresh tank? Not while you are on the pump, since the pump limits its own pressure. You still want one in the bay for the moments you connect to a spigot to fill the tank.
Where should the regulator go, at the spigot or at the RV? At the spigot, ahead of the filter and the hose. That way the hose and everything downstream of it stays within the pressure you chose.
Why is my water pressure low even with the regulator wide open? The restriction is elsewhere: a clogged filter, a kinked hose, a screen at the city water inlet, or a dirty aerator. Gauge the spigot first to see whether the park is simply low.
Can a regulator cause water hammer? Not by itself. Hammer comes from fast closing valves and rigid plumbing, and it is usually improved by flexible connections at the fixtures and an accumulator tank on the pump side.
The Bottom Line
RV plumbing is built around roughly 40 to 60 psi and campground pedestals routinely exceed that with no warning, so a regulator at the spigot is not optional. Set an adjustable one around 40 to 50 psi, fit it ahead of the filter and hose, and use a gauge so you know what both the park and your regulator are delivering. When flow is weak instead, check the filter, hose, and aerators before you touch the setting, and treat any sign of water inside the structure as a job for a professional.