Last updated: August 14, 2026
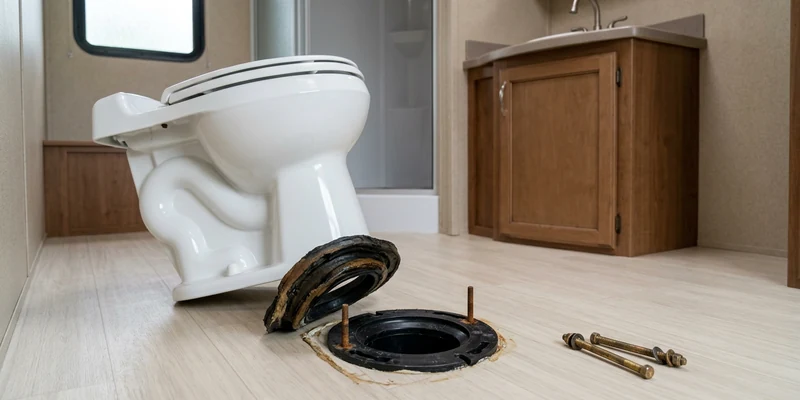
A wet ring on the bathroom floor is the leak owners dread, because it looks like the whole toilet has to come out. Usually it does, and that is far less dramatic than it sounds. An RV toilet leaking at the base is normally the flat rubber flange seal between the toilet and the floor, or mounting nuts that road vibration has worked loose, and both are fixed with hand tools in about an hour.
The one thing worth doing before you lift anything: prove the leak is actually coming from the base. Water seeping past the flush ball seal inside the bowl runs down the outside of the porcelain or plastic and collects in exactly the same ring, and that misdiagnosis sends plenty of people through a messy job for nothing. This guide covers the five minute test that tells the two apart, then the full seal replacement, step by step.
This article contains affiliate links. If you buy through them, we may earn a commission at no extra cost to you. Learn more.
Quick Answer
What causes an RV toilet to leak at the base?
- Most often a compressed or torn flange seal between the toilet and the floor flange, or mounting nuts that vibrated loose on the road.
- Confirm first: if the bowl also fails to hold water overnight, you have a flush ball seal problem running down the outside, not a base leak.
- The repair is lift the toilet, scrape the old seal, inspect the flange, set a new seal, and snug the nuts by hand in an alternating pattern.
Symptoms, Causes, and Actions at a Glance
Read the pattern before you buy the part. Dry the floor completely, then watch what makes it wet again.
| What you see | What it usually means | What to do |
|---|---|---|
| Ring of water at the base, bowl holds water fine | Flange seal or loose mounting nuts | Snug the nuts by hand first, then replace the seal |
| Wet base and the bowl empties overnight | Flush ball seal seeping down the outside | Start with the bowl seal, not the base |
| Water only right after a flush | Seal compressed unevenly or toilet sitting crooked | Pull, clean the mating faces, reseat square |
| Toilet rocks slightly when you sit | Loose nuts, worn seal, or a tired floor flange | Tighten by hand; if it still rocks, pull and inspect the flange |
| Floor feels soft or spongy nearby | Water already in the subfloor | Stop and get the floor assessed before resealing |
| Flange spins, lifts, or has broken ears | Failed floor flange, not a gasket problem | Shop or mobile technician job |
| Leak started after a hard freeze | Cracked base, valve body, or fitting | Inspect for hairline cracks; replace cracked parts |
Prove It Is the Base Before You Lift Anything
This test takes five minutes and saves an unnecessary job. Turn the water pump off, disconnect from city water, and dry the bowl, the base, and the floor with paper towels. Fill the bowl with clean water using a pitcher, then leave it alone for a few hours or overnight.
If the bowl level drops, the flush ball seal is leaking and the water on your floor came from inside the bowl. If the bowl still holds water but the floor is wet again, the leak is at the base or on the supply side. Lay dry paper towels in a ring around the base to catch the first drops, since the exact clock position of the wet spot often points at the low side of a seal that is no longer compressed evenly.
Check the easy things first
With the toilet dry, put a hand on the bowl and rock it gently. Movement means the mounting nuts are loose, and on a fair number of rigs, snugging those nuts by hand in an alternating pattern stops the leak without any parts at all. Use hand tools, not power tools, and stop as soon as the toilet sits firm. Plastic bases crack easily, and a cracked base turns a gasket job into a new toilet.
Replacing the Flange Seal, Step by Step
This is a genuine owner level repair. Set aside an hour, wear disposable gloves, and have a trash bag, a plastic scraper, and old towels ready before you start.
- Empty the black tank first. Dump and rinse the tank so nothing is sitting under the flange while you work, and close the valve afterward.
- Cut the water. Switch off the water pump, disconnect city water, and open a faucet to release pressure. Confirm the pedal produces no water at all.
- Drain the bowl. Hold the pedal to empty the bowl into the tank, then sponge out whatever is left so nothing spills when you tip the toilet.
- Disconnect the supply line. Put a towel under the fitting, back it off, and let the short length of line drain into a cup.
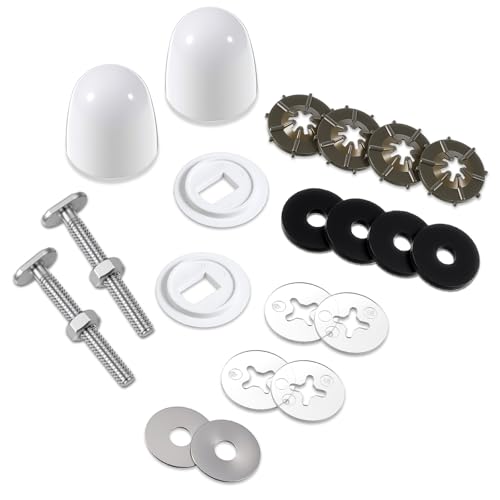
- Remove the bolt caps and nuts. Pop the plastic caps at the base, then remove the two nuts and washers. Keep the hardware together in a bag.
- Lift straight up. Rock the toilet slightly to break the old seal loose and lift it clear, then set it on towels in the shower or outside, base up.
- Scrape both faces clean. Remove all of the old seal from the toilet base and the floor flange with a plastic scraper. Leftover rubber is a leak path.
- Inspect the flange and bolts. Look for cracks, broken ears, or bolts that spin. Corroded or bent bolts get replaced now, not later.
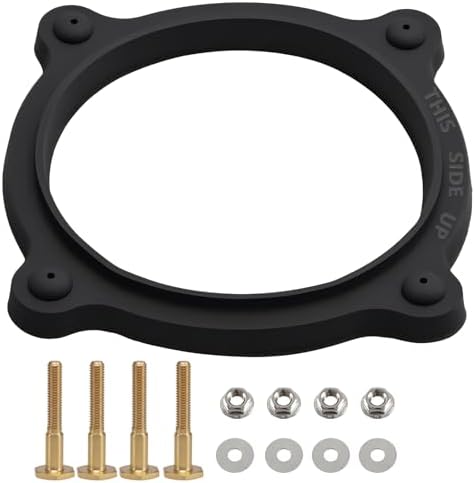
- Set the new seal. Fit the replacement seal to the toilet base or the flange as the kit instructs, and do not stack two seals to make up for a wobble.
- Lower it square. Guide both bolts through the base and set the toilet straight down without twisting it, since twisting rolls the new seal.
- Tighten alternating and by feel. Add washers and nuts, then snug them a little at a time, side to side, until the toilet no longer moves. Firm, not forced.
- Reconnect and test. Attach the supply line, restore water, and run the pedal several times while you watch the base with a dry paper towel. Check again the next morning.
Seal kits are model specific, so match the brand and model number printed on the back of the toilet or inside the bowl rather than buying a generic ring.
If the old mounting bolts, washers, or plastic caps came out corroded, replace them while the toilet is off the floor.
When the Seal Is Not the Problem
Two failures look like a base leak and do not respond to a new gasket. The first is a cracked toilet base, which is what usually happens after someone overtightened the nuts or after water froze inside the fixture. A hairline crack in the plastic weeps under load and is not repairable with sealant; the toilet gets replaced.
The second is a failed floor flange. If the flange lifts with the toilet, spins in place, or has broken mounting ears, the problem is below the floor and involves the drain pipe into the tank. Reseating a toilet on a broken flange guarantees a repeat leak.
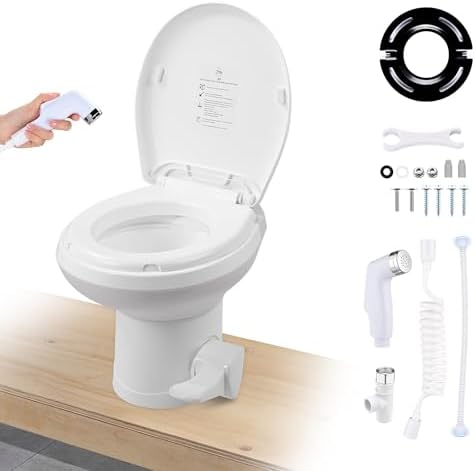
When the fixture itself is done, replacing it is a similar job to the seal swap, and most owners stay with the same brand and footprint so the flange and supply line still line up.
Where the Line Is: Stop and Call a Technician
Pulling and resetting a toilet is owner work. These are not.
- A soft, spongy, or discolored floor. That is subfloor damage, and it needs to be opened and assessed. A fresh gasket over rotten plywood just hides the meter running.
- A cracked, spinning, or broken floor flange. The repair reaches the drain pipe and often the tank fitting under the coach.
- Anything wet below the floor. Leaks at the tank flange, elbows, or the tank itself are usually glued or welded assemblies. A mobile RV technician is faster and cheaper than a second attempt.
- Persistent odor after a correct reseal. That points at the vent or the tank side rather than the seal, and chasing it with more gaskets goes nowhere.
Basic hygiene applies throughout: disposable gloves, a dedicated set of tools for the waste side, and a proper wash up afterward.
Making the New Seal Last
Seals fail from drying out, from uneven clamping, and from vibration. Leave water in the bowl during storage so the rubber stays supple, and check the mounting nuts by hand once a season, especially after a long stretch of rough road.
Keep the tank from sitting full against the flange, which means dumping on a sensible rhythm rather than running to the brim, and keep the toilet flushing freely; a backed up tank pushes water and pressure at every seal in the system. If drainage is already slow, clear the black tank clog before you blame the new gasket.
Common Mistakes to Avoid
- Skipping the bowl test. Half of these leaks are a flush ball seal running down the outside of the bowl.
- Stacking two seals. Doubling up to fix a wobble creates a soft joint that squeezes out sideways.
- Reusing the old gasket. Once compressed, it will not seal the same way again. Replace it whenever the toilet comes off.
- Cranking the nuts down. Snug, alternating, by hand. Overtightening cracks the base.
- Twisting the toilet into place. Set it straight down. Twisting rolls the seal and creates the leak you just fixed.
- Working with a full black tank. Dump and rinse first, for obvious reasons.
Frequently Asked Questions
How do I know if the base seal or the bowl seal is leaking? Fill the bowl with the pump off and leave it for a few hours. A dropping level means the flush ball seal; a stable level with a wet floor means the base or the supply side. Our guide to a leaking RV toilet covers the bowl side.
Can I just tighten the bolts instead of replacing the seal? Sometimes, yes. If the toilet rocks, snug the nuts by hand in an alternating pattern and retest. If it still leaks with the toilet firm, the seal is done.
Do I need to empty the black tank before pulling the toilet? Yes. Dump and rinse first so the flange area is not sitting over a full tank while the toilet is off.
Is an RV toilet seal the same as a household wax ring? No. RV toilets use a molded rubber flange seal, not wax. Wax rings are not designed for the vibration and temperature swings of a moving vehicle.
How tight should the mounting nuts be? Firm enough that the toilet does not move, and no more. These bases are plastic and crack under torque that a household toilet would shrug off.
The floor feels soft near the toilet. Can I still reseal it? You can, but you are covering a bigger problem. Soft flooring means water reached the subfloor, and that needs to be opened up and assessed before it spreads.
The Bottom Line
Confirm the base is really the source by filling the bowl with the pump off, then start with the free fix: snug the mounting nuts by hand and see if the leak stops. If it does not, the flange seal replacement is an hour of straightforward work, as long as you empty the tank, scrape both faces clean, set the toilet square, and tighten by feel. A cracked flange or a soft floor is where the job stops being yours.