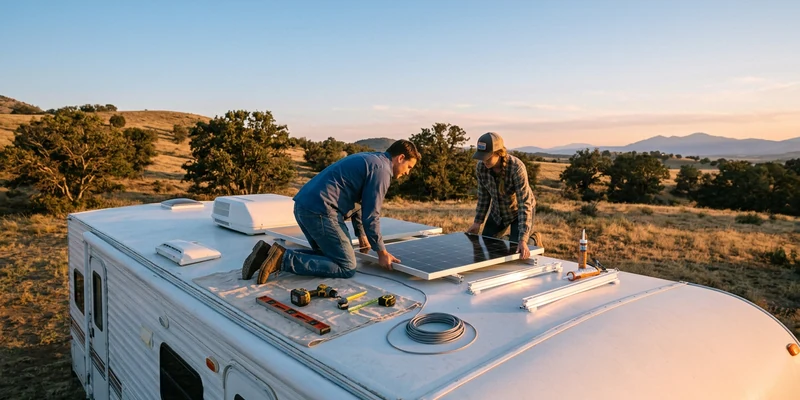
Last updated: August 14, 2026
An RV solar panel installation is one of the few big upgrades that is genuinely within reach for an owner with basic tools and some patience. The electrical work sits entirely on the 12 volt side, the components are designed to bolt together, and nothing about it requires touching the coach’s 120 volt wiring. What trips people up is not the wiring. It is the roof.
Drilling and sealing penetrations on an RV roof, working safely on a surface that may not be rated to walk on, and routing cable through a membrane without creating a leak two winters later is where the real skill lives. This walkthrough treats those parts with the weight they deserve, lays out the sequence in the order that keeps everything safe, and is clear about which steps are worth handing to someone else.
This article contains affiliate links. If you buy through them, we may earn a commission at no extra cost to you. Learn more.
Quick Answer
How do you install solar panels on an RV?
- Plan the roof layout first, then mount the panels, run the cable through a sealed entry gland, and wire the charge controller close to the battery.
- Connect in this order: controller to battery first, panels last. Keep the panels covered while you work, because they make voltage in any daylight.
- All of it is 12 volt work, so it is DIY-friendly. The roof penetrations and sealing are the part worth taking slowly or paying for.
The Install, Stage by Stage
A solar install is five distinct jobs, not one. Reading them as separate stages makes the weekend far less intimidating, and shows immediately which parts you might want help with.
| Stage | What happens | Difficulty and notes |
|---|---|---|
| 1. Sizing and planning | Decide array wattage, panel count, and roof layout around vents and the air conditioner | Desk work, and the stage most people rush |
| 2. Roof mounting | Brackets bolted or bonded to the roof, panels attached, hardware sealed | The demanding part. Roof access and sealant technique decide the outcome |
| 3. Cable entry | Panel cable routed into the coach through a sealed entry gland | One penetration, done properly, beats several done casually |
| 4. Charge controller | Controller mounted near the battery, fused on the battery side | Straightforward 12 volt work with hand tools |
| 5. Commissioning | Battery connected first, panels last, settings matched to battery chemistry | Ten minutes, and the step where wrong settings quietly cost you capacity |
If your sizing is not settled yet, do that before buying anything. Our guide to how much solar an RV actually needs works from your real daily consumption rather than a round number, and the solar wiring diagram explainer shows how the pieces connect before you commit to a layout.
Stage 1: Planning the Roof Layout
Roof space, not budget, is usually the real limit. Measure the clear areas between the air conditioner, roof vents, antennas, plumbing vents, and the awning rail, then lay out panel footprints on paper before you order.
Watch the shade, not just the space
Solar panels behave badly under partial shade, and an RV roof is full of things that cast shadows. A vent cover shading one corner of a panel in the afternoon costs far more output than its size suggests. Leave clearance around raised obstacles, and prefer a layout where each panel sits in open sky rather than tucked tight against the air conditioner shroud. Rigid panels dominate for good reason: owners report longer service life than flexible panels, which sit flat against the roof, run hotter, and have a track record of shorter lifespans. Flexible panels make sense on curved or weight-limited roofs and are a compromise everywhere else.
Check what is under the roof
Before any hole gets drilled, find out where the rafters, wiring runs, and air conditioner ducting sit. Manufacturers can sometimes supply a roof layout, and the interior ceiling gives clues. Drilling blind into an RV roof is how people find their 12 volt harness the hard way.
Stage 2: Mounting on the Roof, Safely
Two safety facts come first. Many RV roofs are not rated to walk on, and the ones that are still need weight spread across rafters rather than concentrated in one spot. Check your owner’s manual, use a stable ladder rated for the load, work with a helper, and do not attempt this on a windy day with a panel in your hands.
Mounting is either bolted or bonded. Bolted brackets go through the roof into structure and are sealed with a lap sealant compatible with your roof material, typically a self-leveling product for rubber roofs. Bonded installs use industrial double-sided tape on the brackets and avoid penetrations entirely, which appeals to owners nervous about leaks, though surface prep becomes critical and the roof material has to be suitable. Either way the sealing routine is the same discipline: clean the surface thoroughly, prime if the sealant calls for it, bed the bracket, and cover every fastener head. Then put roof sealant inspection on your annual list, because sealant is maintenance, not a one-time job.
A mounting kit designed for RV roofs, with corner brackets and the right sealant, saves a lot of improvisation at the point where improvisation is least welcome.

Stage 3: Getting the Cable Inside
Every install needs one clean route from the roof into the coach, and the correct answer is a purpose-made cable entry gland rather than a hole and a blob of sealant. A gland gives the cable a strain-relieved, sealed passage and looks like factory work when it is done.
Pick the entry point above the space where the charge controller will live, ideally a closet, a cabinet, or the battery compartment, so the run inside is short and hidden. Leave a service loop on the roof so a panel can be lifted later without straining the cable. Use solar cable rated for outdoor use and sunlight exposure, with the standard weatherproof connectors, and support it along the roof so it cannot flap at highway speed.

Stage 4: The Charge Controller
The charge controller is the brain of the system, and it needs to be mounted near the battery, not near the panels. The reason is simple: the controller regulates at battery voltage, so the short, fat cable belongs between controller and battery, while the longer run from the roof can be thinner because it carries lower current at higher voltage.
MPPT or PWM
PWM controllers are simple and inexpensive and work acceptably when panel voltage is close to battery voltage. MPPT controllers convert excess panel voltage into usable current and typically harvest meaningfully more from the same array, especially in cold weather, in weak light, and with higher voltage panels. For any array beyond a single small panel, MPPT is the normal recommendation from installers and owners alike. Size the controller in amps by dividing array watts by battery voltage and leaving headroom above that figure.
Fusing and settings
Fuse the controller-to-battery connection close to the battery, exactly as you would any other DC feed. Then set the charge profile to match your battery chemistry. This is the step that quietly ruins performance: a lithium bank charged on a lead acid profile never quite fills, and a flooded bank charged on a lithium profile is not doing itself any favors either. If lithium is in your plans, our guide to switching an RV to lithium batteries covers what changes across the whole charging system.

Stage 5: Connecting in the Right Order
Order matters here more than in most RV jobs, and getting it wrong can damage a controller.
- Cover the panels. Cardboard, a moving blanket, anything opaque. Panels produce voltage in any daylight, and there is no switch on the back.
- Open the battery disconnect and remove jewelry. Standard precautions for anything touching battery posts.
- Connect the controller to the battery first. Negative then positive, with the fuse still out. Most controllers need to see battery voltage to detect system voltage correctly.
- Fit the fuse. The controller should now wake up and display battery voltage.
- Set the battery type. Do this before any solar current arrives, following the battery manufacturer’s recommended voltages.
- Connect the panel input. Panels are still covered at this point.
- Uncover the panels. Charging current should appear within seconds. Watch the display for a few minutes to confirm the numbers look sensible.
- Check again at midday. A sunny midday reading tells you far more about the install than an evening test does.
Reverse the order for any future service: panels covered or disconnected first, battery last.
What This Install Does Not Include
A solar install stays entirely on the 12 volt side of your coach, which is why it is DIY-friendly in the first place. Panels, controller, and battery all live at DC voltages, and nothing in the sequence above touches an AC circuit.
The moment you want household outlets running from that stored energy, you are adding an inverter, and that is a different conversation. Its DC cabling is owner work, but hardwiring the output into the coach’s 120 volt distribution, adding a transfer switch, or any change to bonding is a certified RV technician’s job. See how to wire an RV inverter for exactly where that boundary sits. If your roof also carries an air conditioner you hope to run off-grid, read running an RV air conditioner on batteries and solar before sizing anything, because that goal changes the whole system.
Common Mistakes to Avoid
- Connecting panels before the battery. Many controllers need battery voltage first to set themselves up correctly.
- Mounting the controller on the roof or far from the bank. Long, thin cable between controller and battery costs output and can confuse the charge logic.
- Leaving the charge profile on the default. A lithium bank on a lead acid profile is the most common reason a new system underperforms.
- Skipping the fuse between controller and battery. Every DC feed from the bank needs protection, no exceptions.
- Sealing with the wrong product. Roof material and sealant have to match, and self-leveling products are not interchangeable with non-sag ones.
- Ignoring shade. One shaded corner can cut a panel’s output far more than its share of the area.
- Treating sealant as permanent. Inspect roof penetrations at least once a season and touch them up before they let water in.
Frequently Asked Questions
Can I install RV solar myself? The electrical side is 12 volt work well within reach of most owners. The roof mounting and sealing is the demanding part, and there is no shame in having a shop do the penetrations while you handle the wiring.
Do I have to drill holes in the roof? Not necessarily. Bonded mounts using industrial adhesive tape avoid penetrations, though they require careful surface prep and a compatible roof material. Bolted brackets remain the more traditional choice.
Should I connect the panels or the battery first? Battery first, always. Panels last, and keep them covered until everything else is connected and configured.
Where should the charge controller go? As close to the battery bank as practical, inside the coach or in the battery compartment, so the controller-to-battery cable stays short.
Does solar charge my batteries while I drive? Yes, whenever there is light on the panels. Shade from trees and buildings interrupts it, and output in winter is a fraction of summer output.
Will solar run my air conditioner? Not on its own. That requires a large battery bank, a suitably rated inverter, and usually a soft start device, which is a system project rather than a panel purchase.
The Bottom Line
An RV solar install is five stages, and only one of them is genuinely hard: the roof. Plan the layout around shade and structure, seal every penetration with the right product, keep the charge controller close to the battery, and commission the system battery first with the panels covered. Set the charge profile to your battery chemistry before the first sunny day, because that single setting decides how much of your new array you actually get to use.