Last updated: August 14, 2026
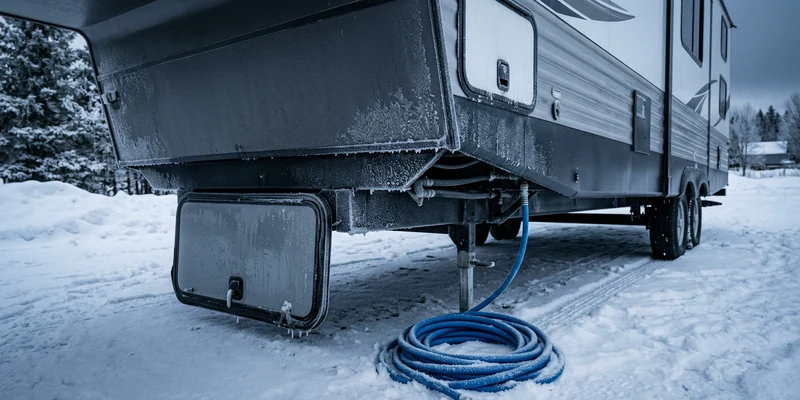
When people worry about RV pipes freezing, they picture the lines under the kitchen sink. In practice, almost none of the damage happens there. The parts that freeze first are the ones sitting outside the heated envelope: the city water hose lying on frozen ground, the low point drains hanging below the floor, the wet bay with its door latched shut, and the water pump bolted into an unheated compartment. Interior lines rarely freeze while the furnace is running, because the same warm air that keeps you comfortable keeps them above freezing.
That changes what you should actually do about it. The most effective steps are free and take five minutes, and they come down to keeping heat where the plumbing is and keeping water out of anything exposed. This guide works outward from those free steps to the gear that genuinely earns its place when you camp in real cold, and it flags the points where the job stops being a driveway project.
This article contains affiliate links. If you buy through them, we may earn a commission at no extra cost to you. Learn more.
Quick Answer
How do you keep RV pipes from freezing?
- Keep heat moving through the plumbing spaces: run the furnace rather than an interior electric heater alone, open cabinet and vanity doors, and leave interior bay access panels ajar.
- Get water out of anything exposed. Disconnect the city hose overnight and run off the fresh tank, and keep the tanks with fluid in them rather than a thin film that freezes on the walls.
- If you camp below freezing regularly, add a heated fresh water hose, tank and pipe heating pads, and insulation or skirting around the underbelly.
Where It Freezes First, and What to Do
Find the part of the rig you are worried about in the left column. The order roughly matches how quickly each one gets into trouble once the temperature drops below freezing and stays there.
| Where | Why it goes first | What to do about it |
|---|---|---|
| City water hose | Thin walled, full of still water, lying on frozen ground | Disconnect and drain it overnight, or use a heated hose rated for potable water |
| Hose spigot and regulator | Small metal parts outside with no heat at all | Disconnect, drain, and store the regulator and filter indoors overnight |
| Wet bay and pump compartment | Outside the heated space, sealed off from cabin air | Open the interior access panel, add a small heat source rated for the space |
| Low point drains | Exposed stubs hanging below the floor | Insulate them, or keep the underbelly enclosed and warm |
| Dump valves and sewer hose | Standing liquid in an unheated valve body | Keep valves closed, dump only when the tanks are reasonably full |
| Fresh tank in an outside bay | Large mass of water with no heat behind it | Tank heating pad, or keep the rig on the tank with the furnace running |
| Lines behind exterior walls | Little air movement, cold on one side | Open cabinet doors so cabin air can reach them |
| Interior lines under sinks | Usually last, and only when the heat is off | Run the furnace rather than a space heater alone |
| Water heater | Full tank sitting in an exterior compartment | Leave it powered, or drain it if the rig will sit unused and cold |
If the rig is going into storage rather than staying in use, none of this applies and you want the other approach entirely: get every drop out and put antifreeze in. That job is covered in winterizing an RV water pump without a blowout kit.
Start With the Steps That Cost Nothing
These six make more difference than any product, and they are what experienced cold weather campers do automatically. None of them takes longer than a minute once you are in the habit.
- Run the furnace, not just an electric heater. This is the big one. RV furnaces are ducted through the floor and the underbelly precisely so warm air reaches the plumbing runs. An electric space heater keeps the cabin comfortable while the bays quietly drop below freezing, which is how people wake up to a split line in a warm rig.
- Open every cabinet and vanity door. Anywhere plumbing runs along an exterior wall, the door in front of it is insulation you do not want. Leave them open overnight.
- Open the interior access to the wet bay. Most rigs have a panel or a floor hatch that lets cabin air into the pump compartment. Cracking it open is often the difference between a working pump in the morning and a cracked one.
- Come off the hose at night. Disconnect the city water, drain the hose, and run off the fresh tank until morning. A tank inside the heated space with a pump feeding it is far more freeze resistant than a hose on the ground.
- Keep the tanks with something in them. A tank holding a decent volume of liquid takes much longer to freeze than one with a thin film coating the walls, and dump valves survive better closed than left cracked open.
- Close the bay doors and latch the covers. Wind moving through a compartment strips heat faster than still cold air does. Blocking obvious drafts around the underbelly with foam board does more than most people expect.
🌡️ Know what the bays are actually doing
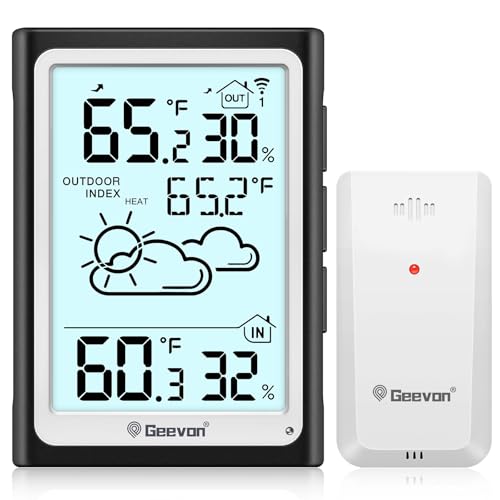
A wireless indoor and outdoor thermometer with a remote sensor you can leave in the wet bay. It turns guesswork into a number, and it tells you whether your current setup is holding the pump compartment above freezing before the split line tells you instead. Owners who camp in cold weather regularly tend to end up with two or three sensors.
The Gear That Actually Earns Its Place
If you camp below freezing more than a night or two a season, three products do most of the work. They are worth buying in this order, because each one covers the failure the previous one leaves open.
A heated fresh water hose
This is the first upgrade for anyone who wants to stay connected to city water in the cold. A heated hose has a heating element running along its length and a thermostat that switches it on near freezing. Buy one rated for potable water and lead free, match the length to your actual site layout rather than buying the longest available, and remember the spigot end and any regulator or filter are still exposed and need their own protection or a nightly disconnect.
🔥 The upgrade that keeps you on city water
A thermostatically controlled heated drinking water hose, lead free and rated for potable use, in the length that matches your usual hookup distance. Check the plug type and the power draw against what your pedestal and your rig can spare, and never coil the unused length tightly or run it under a rug.

Tank and pipe heating pads
Adhesive 12 volt heating pads bond to the underside of a fresh, gray, or black tank and switch on automatically at low temperatures. Many newer rigs come with them fitted from the factory as part of a cold weather package, which is worth checking before you buy anything, since the switch for them is often on the main panel and simply never gets used. On a rig without them, they are a genuine solution for tanks hanging in an open underbelly.
🔋 For tanks hanging in the cold
A 12V adhesive tank heating pad with a built in thermostat, sized to the tank it goes on. Check whether your rig already has a factory tank heater circuit before ordering, and confirm the pad’s amp draw against your battery capacity, since these run for hours at a time and are a real load on a system that is not on shore power.

Insulation, skirting, and pipe wrap
Foam pipe insulation on exposed runs and low point drains is cheap and takes an afternoon. Skirting around the base of the rig is the bigger move, and it makes the largest single difference for anyone parked for the whole season, because it stops wind from stripping heat out of the underbelly and turns the space under the floor into a buffer rather than a wind tunnel.
🧊 The cheap fix for exposed runs
Closed cell foam pipe insulation for the plumbing you can see and reach, plus heat tape only where a manufacturer’s instructions specifically allow it on RV plumbing. Read the tape’s instructions carefully, since many products are rated for metal pipe and not for the PEX used in most rigs, and any heat tape running on 120 volt shore power needs a properly rated circuit and a competent install.

What to Do If a Line Has Already Frozen
The first sign is usually one fixture that gives nothing while the others work, or a pump that runs and runs against a blockage it cannot clear. Switch the pump off immediately. A pump running against a solid plug of ice is a pump grinding itself down for no benefit, and it is a common way to turn a thaw into a replacement.
Then warm the space rather than the pipe. Turn the furnace up, open the cabinet and bay access, and give it time. A hair dryer or a small fan heater aimed into an open cabinet is reasonable and slow, which is what you want. What is not reasonable is any open flame, a torch, or an unvented propane heater used inside a closed rig, and no line is worth that risk.
Checking for damage afterward
When flow returns, leave the pump on and walk the whole system with a flashlight looking for drips, including inside the wet bay, under every sink, and at the water heater connections. Ice usually splits a fitting or a pipe wall at the moment it forms, and the leak only shows once pressure comes back. If the pump will not build pressure or cycles with all taps closed, that is a leak you have not found yet, and our water pump repair guide covers tracking it down.
Where This Stops Being a DIY Job
Cold weather work sits close to two systems that are not owner territory, and it pays to know the boundary before you are cold, tired, and improvising.
- Anything on the propane side of the furnace. If the furnace is not producing heat, that is a diagnosis for a certified RV technician. Gas lines, regulators, valves, and burner adjustment are not driveway work under any circumstances, and a furnace is the appliance you least want to experiment with in freezing weather. Our guide to an RV furnace not working covers the checks that are yours to make and where they stop.
- Carbon monoxide risk. Any appliance that burns fuel, including the furnace, a diesel heater, the cooktop, and a generator, needs a working carbon monoxide alarm in the rig with fresh batteries. Never use a cooktop or an oven as a heat source, and never run an unvented combustion heater in a closed space.
- 120 volt heat tape and heater installs. Wiring a heat tape circuit, adding an outlet in a bay, or anything touching the breaker panel belongs to a certified RV technician or a licensed electrician. Twelve volt work with the battery disconnected is a different matter.
- Water in the structure. A split line inside a wall or above the ceiling leaves stains, soft spots, and a musty smell. Once water has been in the floor or the walls, have the damage assessed rather than dried and forgotten, because subfloor rot has a deadline.
Common Mistakes to Avoid
- Heating the cabin and forgetting the bays. An electric heater keeps you warm while the plumbing spaces freeze. The furnace is what warms the underbelly.
- Leaving the city hose connected overnight. It is the first thing to freeze and the easiest thing to prevent.
- Leaving a dump valve cracked open. A valve with liquid standing in it freezes solid and then does not seal properly afterward.
- Using a torch or an open flame on a frozen line. Warm the space instead. There is no version of this that is worth the risk.
- Running the pump against a frozen line. Switch it off. It cannot clear ice and it will damage itself trying.
- Assuming heated tank pads are already switched on. On rigs that have them, the switch is often on the main panel and rarely touched.
Where to Go From Here
If your plan is to keep camping through the winter rather than just to survive one cold snap, heat management inside the rig matters as much as pipe protection, and the two problems interact. Our guide on staying warm in an RV in freezing weather covers the heating side, and stopping condensation and mold covers the moisture that all that heat produces.
If the rig is going to sit unused instead, do the full job now rather than nursing it through. Winterizing without a blowout kit is the complete procedure, and a sanitize on the way back out in spring is covered in how to sanitize an RV fresh water tank.
Frequently Asked Questions
At what temperature do RV pipes freeze? Exposed hoses and unheated bay plumbing can start freezing once the air holds below the freezing point for several hours, and wind makes it happen faster. Interior lines usually survive far longer, as long as the furnace is running.
Should I leave a faucet dripping like at home? A slow drip helps a little on a line fed from a pressurized supply, but it drains your fresh tank and fills the gray tank overnight. Warming the plumbing spaces is the more reliable approach in an RV.
Is a heated water hose enough on its own? Only for the hose itself. The spigot, the regulator, and the filter are still exposed, and the bay plumbing still needs heat, so most owners combine a heated hose with a warm underbelly.
Can I use an electric space heater instead of the furnace? For cabin comfort, yes. For pipe protection, no. The furnace is ducted through the floor and underbelly, which is exactly where the vulnerable plumbing sits.
What do I do if a pipe is already frozen? Switch the pump off, warm the whole compartment with the furnace and an open cabinet door, and wait. Never use an open flame, and check carefully for leaks once flow returns.
Do I still need to winterize if I use heated hoses and tank pads? If the rig will sit unused and unpowered in the cold, yes. Heating gear only protects a rig that is occupied, powered, and being monitored.
The Bottom Line
Freezing damage happens outside the heated envelope, so keep warm air moving into the bays and cabinets, run the furnace rather than an electric heater alone, and get water out of the hose and the exposed fittings overnight. Add a heated potable hose, tank heating pads, and insulation or skirting if you camp in the cold regularly. If a line does freeze, shut the pump off and warm the space slowly, never with a flame, and leave anything touching propane or 120 volt wiring to a certified technician.