Last updated: August 14, 2026
Most lithium upgrades stall on the same part, and it is not the battery. The battery drops in, the terminals line up, and everything looks finished until the bank never quite reaches full. The reason is almost always the charger built into your rig, so the first question in any lithium swap is whether you have an RV converter for lithium batteries or a lead acid converter that will keep your expensive new bank sitting at partial charge for years.
The rest of the job is smaller than the forum threads make it sound. A drop in LiFePO4 battery replaces a lead acid battery in the same tray, with the same cables. What changes is how it gets charged, from shore power, from the alternator, and from solar, plus a few things about cold weather and fusing that owners find out the hard way.
This article contains affiliate links. If you buy through them, we may earn a commission at no extra cost to you. Learn more.
Quick Answer
What do you actually have to change when you switch an RV to lithium?
- The converter or charger is the main item. A lead acid profile with a long float stage will not fully charge a lithium bank, so you either need a lithium mode or a lithium ready replacement unit.
- Charging while driving usually needs a DC to DC charger, because a stock alternator was never designed to feed a battery that will accept everything it can deliver.
- Cables, fuses, and a shunt based monitor round out the job. Most drop in batteries block their own charging below freezing, which is a feature, not a fault.
What Changes and What Stays: The Whole Job in One Table
Work down this list before you buy anything. Roughly half of a lithium conversion is confirming that parts you already own can stay, and the other half is a short shopping list that depends entirely on how you charge.
| Component | Does it have to change? | What to do |
|---|---|---|
| Converter or charger | Usually yes | Check the label for a lithium mode. If there is none, plan on a lithium ready converter or a separate charger |
| Battery tray and box | Almost never | Drop in LiFePO4 uses standard case sizes and weighs far less, so the tray is rarely the problem |
| Main cables | Sometimes | Keep them if they are sized for the current you already pull. Upsize if you are also adding a large inverter |
| Main fuse | Usually yes | Lithium can deliver very high short circuit current, so a properly rated fuse close to the positive terminal matters more than before |
| Alternator charging | Usually yes | Add a DC to DC charger so the alternator sees a controlled load instead of a bank that pulls everything it can |
| Solar charge controller | Often just a setting | Most modern controllers have a LiFePO4 profile. Older PWM units may only offer a fixed lead acid curve |
| Inverter | Usually no | Check the low voltage cutoff, since a lithium bank stays near its nominal voltage until it is nearly empty |
| Battery monitor | Recommended | Voltage alone tells you very little on lithium. A shunt that counts amp hours is the honest gauge |
If your converter turns out to be the only weak link, that is the cheapest possible outcome, and it is also the most common one. Our roundup of the best RV converters for lithium batteries covers the replacement units that bolt into the same distribution panel opening.
Why the Converter Is the Real Bottleneck
A converter charges your house bank on a curve designed for the chemistry it expects. Lead acid wants a long absorption stage and then a low, permanent float voltage to fight self discharge. Lithium wants a fairly quick climb to a target voltage and then essentially nothing, because it does not self discharge in any meaningful way.
Point a lead acid curve at a lithium bank and two things go wrong. The float stage, commonly around 13.2 to 13.6 volts, sits below what a LiFePO4 bank needs to top off, so the last stretch of capacity never fills. And equalization, which some converters run automatically for flooded batteries, pushes a voltage a lithium battery management system will simply refuse, cutting the bank off mid charge with no warning.
How to tell what you have
Read the label on the converter or the power center door. Units sold in the last several years often list a lithium or LiFePO4 mode, selected by a button, a jumper, or a plug in charge wizard module. If the label lists only flooded, gel, and AGM, assume lead acid only, and confirm with a multimeter using our guide on how to test an RV converter. If it is not charging at all, that is a separate fault, covered in RV converter not charging the battery. The replacement is a like for like swap in most rigs: same footprint, same DC studs, same 120V input.
🔌 The part that makes the rest work
A lithium ready converter charger sized to your existing unit, typically in the 45 to 60 amp class for a mid size trailer, with a selectable LiFePO4 profile. Progressive Dynamics and WFCO both build direct replacements for the common power center openings.

Where the line is: the DC side of that swap is standard 12V work. The 120V input side is not, so a hard wired converter or anything requiring the breaker panel goes to a certified RV technician.
The Free Checks to Run Before You Order Anything
Four things cost nothing to verify and each one can change the shopping list. Do them in one pass with a flashlight and your phone camera before the first box arrives.
- Photograph the converter label. Model number, amperage, and supported battery types. This single photo decides most of the budget.
- Find where the batteries live. A tongue mounted box outside is exposed to freezing temperatures, which matters far more on lithium than on lead acid.
- Check the cable size and the main fuse. Note the gauge on the cable jacket and the rating stamped on the fuse or breaker before deciding whether anything gets upsized.
- Count what you actually run. Owners routinely buy twice the bank they need and half the charging they need.
That last point matters because lithium changes the math: you can use nearly all of the rated capacity rather than the roughly half that keeps lead acid healthy, so one lithium battery often replaces two lead acid ones. If solar is part of the plan, size it separately using our guide to how much solar an RV actually needs.
🔋 The battery itself
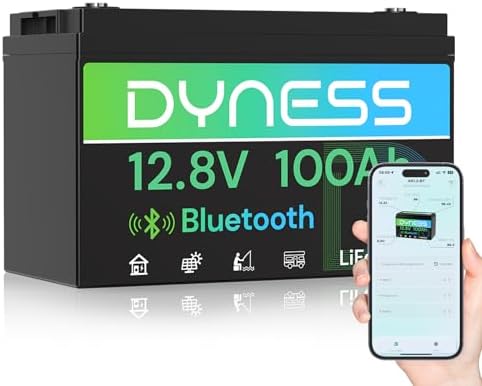
A drop in 12V LiFePO4 battery in a standard Group 27 or Group 31 case with a built in battery management system, commonly 100 amp hours per battery. Battle Born and Renogy both build the sizes that fit existing RV trays without modification.
Charging While You Drive
On a lead acid rig, the alternator trickles charge through the seven pin connector and nobody thinks about it. Lithium changes that relationship, because a LiFePO4 bank will accept close to everything the alternator can produce for as long as it can produce it. On a long drive with a low bank, that is a sustained full output load on a component designed for intermittent duty.
A DC to DC charger sits between the two batteries, caps that current at a set figure commonly in the 20 to 60 amp range, and converts the alternator output to a proper lithium curve. On rigs with a smart or variable voltage alternator it also fixes the opposite problem, where the house bank barely charges because the alternator never raises its output voltage.
🚚 For charging on the road
A DC to DC charger rated for your run length and wire gauge, with a LiFePO4 profile and an ignition trigger input. Renogy and Victron both make units in the 20 to 50 amp range that suit a travel trailer or a van conversion.

Solar, Inverters, and the Settings You Should Change
Solar is usually the easy part. Nearly every MPPT controller made in the last several years includes a LiFePO4 profile, and switching to it is a menu change rather than a purchase. Older PWM controllers with a fixed lead acid curve are the exception, and those are worth replacing anyway if the array is more than a panel or two. Wiring layout is covered in our RV solar panel installation walkthrough.
Inverters generally carry over untouched. The one setting to look at is the low voltage disconnect, because a lithium bank holds a nearly flat voltage until it is close to empty, so a cutoff tuned for lead acid may never trigger before the battery management system shuts the bank down itself. If you are adding inverter capacity too, our guide to the best RV inverters covers sizing and inverter vs converter untangles the two devices.
Get a real gauge while you are in there
The panel light gauge in most RVs reads voltage on a lead acid scale, which makes it close to useless on lithium. A shunt based monitor counts amps in and out and reports an actual state of charge.
📟 For knowing where you stand
A shunt based battery monitor with a display or a phone app, wired on the negative side of the bank. Victron and Renogy both offer versions that read state of charge, current draw, and time remaining.

Cold Weather Is the Part That Surprises People
LiFePO4 cells can be discharged in the cold but should not be charged below freezing, and the battery management system enforces that by blocking charge current when cell temperature drops to roughly 32 F. The battery is not broken when this happens. It is doing the one job that keeps it from being permanently damaged.
The consequences depend on where your batteries live. Inside a heated compartment this rarely comes up; in an exposed tongue box in winter it comes up constantly, and the answers are a heated battery model, an insulated and gently warmed box, or storing the batteries indoors off season. Lithium tolerates long storage well, though most makers suggest storing at a partial state of charge. Our guide to keeping RV batteries charged in winter storage covers the seasonal routine.
Wiring, Fusing, and Where This Stops Being a DIY Job
Twelve volt battery work is within reach for most owners, and the safety routine is short: disconnect the negative cable first, pull the main fuse, remove rings and watches, and never lay a wrench across both terminals. Reconnect in reverse order, and torque terminal hardware snugly rather than aggressively, since the posts on drop in batteries are threaded inserts and they strip.
Fusing deserves real attention here. A LiFePO4 bank can deliver an enormous short circuit current, well beyond what a comparable lead acid battery manages, so fit a fuse with an interrupt rating suited to lithium, mounted as close to the positive post as the layout allows.
Call a technician for these
Anything on the 120V side of the converter, including hard wired connections, breaker panel work, and shore power inlets, is work for a certified RV technician or licensed electrician, as is any inverter that ties into the AC distribution panel through a transfer switch. If your rig has a factory lithium package with a proprietary battery management network, changes there should go through a dealer. And if the existing converter is already misbehaving, diagnose that first in our RV converter repair guide.
Common Mistakes to Avoid
- Buying the battery first and the charging last. The converter decides whether the upgrade works.
- Assuming the alternator will sort itself out. Long drives with a depleted bank and no DC to DC charger are how alternators get cooked.
- Judging state of charge by voltage. A lithium bank reads nearly the same at three quarters full as at one quarter. Use a shunt.
- Leaving the equalize setting active. Turn off any automatic equalization cycle before the lithium bank goes in.
- Reusing an undersized main fuse. A fuse adequate for lead acid may not have the interrupt rating lithium calls for.
- Charging in freezing weather and blaming the battery. A blocked charge below about 32 F is the protection working.
Where to Go From Here
If the converter is your next purchase, compare the direct replacements in our lithium converter roundup, and confirm your current unit’s behavior first with the multimeter test, since that one measurement decides whether you are replacing a unit or changing a setting. If the point of the upgrade is running more on battery power, size the charging side with how much solar an RV actually needs and the loads with our inverter buying guide.
Frequently Asked Questions
Do I really need a new converter for lithium batteries? If your converter has a lithium or LiFePO4 setting, no. If it only offers flooded, gel, and AGM modes, its float voltage will leave the bank short of full, and a lithium ready unit is the fix.
Can I mix lithium and lead acid batteries in the same bank? No. The chemistries charge and discharge at different voltages, so the lithium bank ends up doing the work while the lead acid battery stays undercharged. Replace the bank as a set.
What happens if I charge lithium below freezing? The battery management system blocks the charge current to protect the cells. You lose charging until the battery warms, which is why heated models or an insulated compartment matter for winter use.
How many lithium batteries replace my two lead acid ones? Often one, because you can use nearly all of a lithium battery’s rated capacity while lead acid is best kept above roughly half. Count your actual daily amp hours rather than matching battery for battery.
Does the alternator charge lithium fine on its own? Sometimes, briefly, but the combination of high sustained current and the wrong charge profile is hard on the alternator. A DC to DC charger limits the current and delivers the right curve.
The Bottom Line
A lithium upgrade is mostly a charging upgrade. Confirm whether your converter has a LiFePO4 mode, add a DC to DC charger if you charge while driving, switch the solar controller to its lithium profile, and fit a shunt monitor so you can actually see what the bank is doing. Keep the 12V work in your own hands and hand the 120V side to a certified technician.