Last updated: August 14, 2026
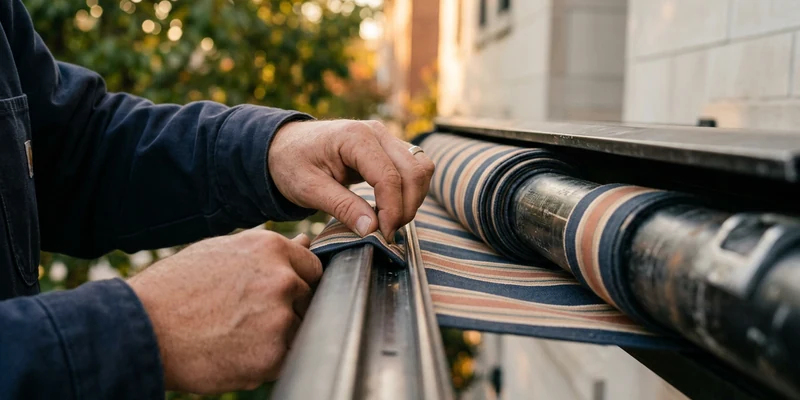
If the arms move properly and the roller tube is straight, working out how to replace rv awning material is a realistic weekend job rather than a shop visit. The canopy slides out of two channels, one in the roller tube and one in the wall rail, and the new one slides back in the same way. What makes or breaks it is controlling the torsion spring inside the tube.
That spring is preloaded at all times, it is what pulls the awning back in, and it has to be relieved or locked per the manufacturer’s instructions before an end cap comes off. This walkthrough covers the sequence: measuring the tube and the polycord, choosing between vinyl and acrylic, removing and refeeding with a helper, and resetting the tension afterward.
This article contains affiliate links. If you buy through them, we may earn a commission at no extra cost to you. Learn more.
Quick Answer
How do you replace RV awning fabric?
- Measure the roller tube and the polycord diameter, then order fabric to the tube rather than to the awning’s advertised size.
- With two people on a dry, windless day, clamp the arms, relieve and lock the spring tension per the manufacturer’s instructions, then slide the old canopy out of the tube and the rail together.
- Feed the new fabric in with a little soap solution as a lubricant, reassemble, reset the spring tension to specification, and test before you trust it. If the spring step is unclear, hire an RV technician.
Replacing the Canopy, Step by Step
Read the whole sequence before you start, then work through it with a helper. The awkward parts are the spring and the sliding, and both go better when two people know what happens next.
- Measure and order the right material. Measure the roller tube, check the polycord diameter on both edges of the old canopy, and note whether your unit uses the same cord size at the tube and the rail. Have the supplier confirm the fit.
- Pick the day and the crew. Dry, calm, out of direct midday sun. Two people, two stable ladders on firm level ground, gloves, and clamps within reach. Never alone, never in wind.
- Roll the awning fully out. With the canopy extended, the fabric edges are accessible at both channels and the assembly sits where the instructions expect it.
- Clamp the arms so nothing can move. Vise grips or C clamps on the arm sliders, as the instructions describe, keep the assembly from retracting while your hands are in it.
- Relieve and lock the spring tension. Follow the manufacturer’s procedure to take the preload out of the torsion spring and pin or clamp the tube so it cannot unwind. Keep your face and hands clear of the tube ends, and treat it as loaded until the procedure proves otherwise.
- Remove the end cap and free the spring assembly. With tension controlled, take off the end cap and release the spring end according to the sheet, supporting the tube throughout. Photograph everything you remove.
- Slide the old canopy out. One person pulls the fabric out of the tube channel and the wall rail from one end while the other guides it square. A steady pull beats a hard one.
- Clean both channels and the rail. Grit and dried adhesive in the groove will fight the new canopy. Wipe out the tube channel and the wall rail, and check the rail for spread or damage.
- Feed the new fabric in. Start both cord edges into their channels at the same end, use a little soapy water on the cord, and have your helper feed while you pull steadily. A canopy that starts crooked stays crooked.
- Reassemble the spring and end cap. Refit the spring assembly and end cap exactly as they came apart, using your photos, with every fastener back in its own hole.
- Reset the spring tension to specification. Wind the preload back in following the manufacturer’s instructions for turns and locking method. Too little and the awning will not retract, too much and you overload the assembly.
- Test, adjust, and recheck. Remove the clamps with both people ready, run the awning in and out several times, set the pitch so water drains off a corner, confirm the travel lock engages, and recheck fasteners after the first short drive.
The Spring Is the Dangerous Part of This Job
Everything else here can be redone if it goes wrong. The torsion spring inside the roller tube cannot. It is wound under preload so the awning retracts, and it holds that energy whether the awning is out or in. If an end cap comes off, a pin is pulled, or the tube slips out of an arm with the spring still loaded, the tube can spin hard or come loose entirely, and the injuries that follow are why technicians respect this step.
So do it the safe way, every time. Two people, so nobody supports a loaded tube alone. Clamps on the arms before you begin. The manufacturer’s exact procedure for relieving, locking, and later resetting the tension. Hands and face away from the tube ends. A dry, windless day with ladders on firm level ground. If the instruction sheet is missing, the mechanism looks different, or the tension feels unpredictable, an RV technician is the sensible call.
Vinyl or Acrylic: Which Fits Your Camping
Replacement canopies come in two families, and neither is better across the board. Vinyl is coated, effectively waterproof, and easy to wipe clean, but it does not breathe, so mildew grows on the dirt film if it is rolled up damp. Acrylic is woven and breathable, dries faster, and resists fading, but it passes water in sustained rain and needs its repellency renewed.
| Property | Vinyl | Acrylic |
|---|---|---|
| Water resistance | Waterproof while the coating is intact | Sheds light rain, wets through in sustained rain |
| Breathability | None, traps moisture when rolled up damp | Woven and breathable, dries quickly |
| Mildew | Grows on the dirt film if stored damp | More resistant, but still needs to dry |
| UV and color | Coating chalks and goes tacky with age | Solution dyed acrylics hold color well |
| Maintenance | Wipes clean, no reproofing needed | Cleaning plus an occasional repellent treatment |
| Who it suits | Wet climates, rain shelter, easy cleaning | Hot sunny camping, shade, quick drying |
🌧️ The straightforward replacement
Replacement vinyl RV awning fabric with polycord edges, ordered to the roller tube you already own. It is the direct swap for most factory awnings and wipes clean easily. Confirm both cord diameters with the supplier first.

☀️ For hot, sunny camping
Replacement acrylic RV awning fabric for a breathable canopy that dries fast and holds color in strong sun. Expect it to pass water in sustained rain and to want a repellent treatment periodically.

Sizing and Polycord: Where Orders Go Wrong
The fabric size follows the roller tube, not the number the awning was sold as. A patio awning’s advertised size is the tip to tip dimension across the whole assembly, and the canopy is noticeably narrower because the arms and end castings occupy space at both ends. Ordering to the advertised size is the most common reason a replacement does not fit.
The second reason is the cord. The bead sewn into each edge, usually called polycord or rope, has to fit the groove in the roller tube on one edge and the wall rail channel on the other. Cord diameters differ between manufacturers, and some units use a different size at each edge. Measure the old cord, or send the supplier your awning brand and model with the tube measurement, and get the fit confirmed.
Making the New Canopy Last
A new canopy fails the same way the old one did unless the habits change. Pitch the awning so water drains off a corner, roll it in when the wind comes up rather than after something has flexed, and never store it rolled up wet. The fourth habit is catching damage early: a pinhole taped the week it appears stays a pinhole, while the same hole left through a summer becomes a tear no patch will hold. The washing routine is in how to clean an RV awning without damage.
🩹 Catch tears the week they appear
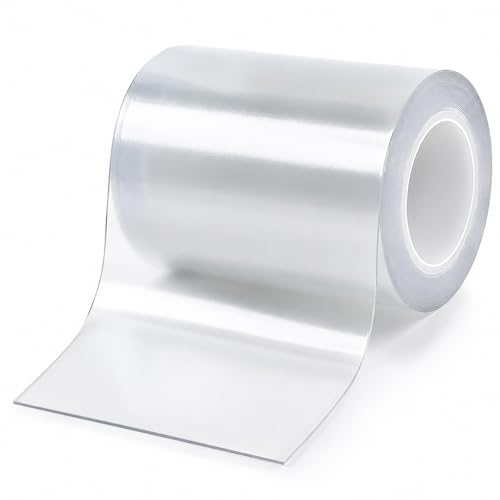
Clear vinyl RV awning repair tape, kept in the rig rather than bought after the fact. Applied to both sides of a small tear on clean, dry fabric, it stops the run from spreading. See our comparison of tape and patch kits.
🧴 Clean gently, then protect
An RV awning fabric cleaner paired with a water repellent protectant spray. The cleaner lifts dirt film and mildew staining without stripping the material, and the protectant renews repellency on acrylic canopies. Check the label matches your material.

Where This Stops Being a DIY Job
Fabric replacement is one of the more satisfying RV jobs when it goes well. These are the situations where it should not be your job at all.
- Spring tension you cannot control or reset. If the procedure is missing or unclear, stop and call an RV technician. A loaded tube that gets away from you causes serious injuries.
- Working alone or at height in poor conditions. Two people, two ladders, firm ground, no wind. Any of those missing means the job waits.
- Powered awnings. Motors, limit switches, and wiring are technician work, and power should be disconnected first.
- Bent arms or a bowed roller tube. New fabric on damaged hardware tears again, which calls for the complete unit in how to replace an RV awning yourself.
- A damaged rail or sidewall. A spread rail, pulled screws, or a musty smell means the structure needs assessment first.
Common Mistakes to Avoid
- Ordering to the advertised size. The fabric follows the roller tube and is narrower than the nominal figure.
- Ignoring the polycord diameter. A cord that is too large will not enter the groove, and one that is too small pulls out under load.
- Opening the end cap with the spring still loaded. This is the error that causes the injuries. Tension first, hardware second.
- Working without clamps or a helper. Clamped arms and a second person turn the awkward steps into ordinary ones.
- Feeding the fabric in dry and crooked. A little soapy water and a square start save a lot of pulling.
- Guessing the spring turns on reassembly. Too little and it will not retract, too much and you overload the assembly.
Where to Go From Here
If your inspection turned up a bent arm, a bowed tube, or a spring that no longer retracts the awning, the fabric is not the real problem, and the complete swap in how to replace an RV awning yourself is the better use of the day. If you are still working out what your awning is telling you, the symptom table in our hub guide to RV awning repair sorts sag, pooling, and stuck arms into causes and first actions. Then keep repair tape aboard so the next pinhole never becomes a tear.
Frequently Asked Questions
Can you replace RV awning fabric yourself? Yes, when the arms and roller tube are in good order and you have a helper. The step that decides everything is relieving and later resetting the spring tension exactly as the manufacturer specifies.
What size fabric do I need for my RV awning? The fabric follows the roller tube, not the advertised size, which is a tip to tip measurement across the assembly. Measure the tube, check both polycord diameters, and confirm with the supplier.
Is vinyl or acrylic awning fabric better? Vinyl is waterproof and easy to wipe clean but does not breathe. Acrylic is breathable and holds color well, but it passes water in sustained rain and needs its repellency renewed.
How long does replacing awning fabric take? With two people and everything on hand, most owners describe it as a morning job. Cleaning the channels and starting the fabric square take longer than expected.
Do I need to remove the awning to replace the fabric? Usually not. On most patio awnings the canopy slides out of the tube and the wall rail with the assembly still mounted, which is why fabric only is the shorter job.
What is polycord on an RV awning? It is the cord sewn into each edge of the canopy that rides in the groove of the roller tube and the wall rail. The diameter varies by manufacturer.
The Bottom Line
Fabric replacement is the right job when the arms, tube, and spring are healthy, and it comes down to two things: ordering to the roller tube and the polycord rather than the advertised size, and controlling the torsion spring from start to finish. Work with two people on a dry, windless day, clamp the arms, follow the manufacturer’s procedure for relieving and resetting tension, and feed the canopy in square with a little lubricant. If the spring procedure is unclear, hand it to an RV technician.