Last updated: August 14, 2026
Knowing how to test an RV converter takes about ten minutes and one inexpensive tool, and it answers the question that decides everything else: is the converter still pushing charge into the house battery, or is the battery quietly doing all the work? Everything else in converter troubleshooting flows from that single comparison.
The whole test happens on the 12V side, which is the side an owner can safely work on. You will not open the distribution panel and you will not probe anything at 120V, because that half of the system belongs to a certified technician. What you will do is take four DC voltage readings and read what they mean.
This article contains affiliate links. If you buy through them, we may earn a commission at no extra cost to you. Learn more.
Quick Answer
How do you test an RV converter with a multimeter?
- Set the meter to DC volts, measure at the house battery terminals with shore power disconnected, then measure again with shore power connected.
- A healthy lead acid battery at rest usually reads around 12.6 to 12.8 volts, and a working converter typically lifts that into roughly the 13.2 to 14.4 volt range.
- If the reading does not rise, measure at the converter’s own DC output next. Voltage there but not at the battery means a fuse, cable, or ground problem rather than a dead converter.
What Each Reading Means
Voltage numbers are only useful with context, so keep this table open while you work. All values are for a 12V lead acid house battery and are typical ranges rather than exact rules, since temperature, battery chemistry, and charge stage all shift them.
| Reading | Condition | What it tells you |
|---|---|---|
| 12.6 to 12.8 volts | Shore power off, rested | Battery is essentially full, a normal starting point |
| 12.1 to 12.3 volts | Shore power off, rested | Roughly half discharged, charge it before judging the converter |
| Below about 12 volts | Shore power off, rested | Deeply discharged, and some converters behave oddly at this level |
| 13.2 to 14.4 volts | Shore power on | Converter is working and in one of its charge stages |
| No change when plugged in | Shore power on | No charge current is reaching the battery, keep testing |
| Above roughly 15 volts | Shore power on | Overcharging, disconnect and have the unit checked |
| Converter terminals high, battery low | Shore power on | Voltage is being lost in fuses, cables, or the ground path |
If your reading falls in the last three rows, the symptom by symptom breakdown in RV converter problems narrows it down further.
What You Need Before You Start
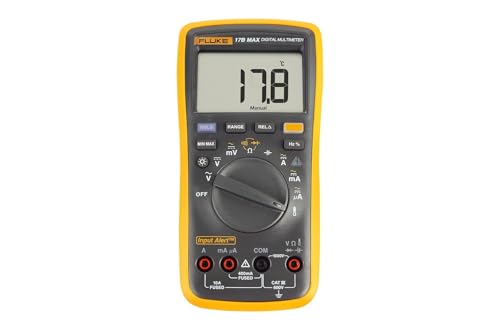
A basic digital multimeter that reads DC volts is the only essential tool. Auto ranging models are easier because you do not have to pick a scale, but any meter with a 20V DC setting works fine. Add safety glasses, a wire brush for corroded terminals, and a wrench for the battery lugs.
Two habits keep this safe. Batteries can vent hydrogen, so no smoking, no sparks, and good ventilation around the compartment. And large 12V banks can deliver serious short circuit current, so remove rings and watches and never let a wrench bridge a positive post to bare metal.
If you do not own a meter yet, this is the tool that pays for itself the first time it saves you a service appointment, because the same meter tests fuses, finds parasitic drains, and checks your battery before a trip.
The Test, Step by Step
Work through these in order. Do not skip the resting reading, because without it the second measurement means nothing.
- Unplug shore power and turn off the generator. Let the RV sit for at least an hour if you can, longer is better, so surface charge dissipates and the resting reading is honest.
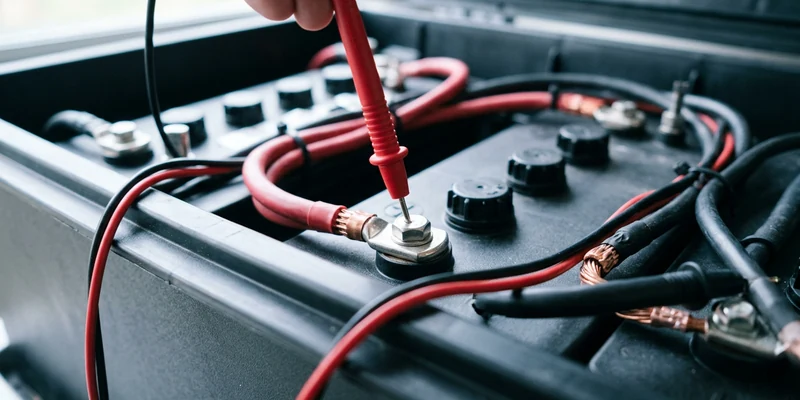
- Set the meter to DC volts. Use the 20V range on a manual meter. Red probe to the battery positive post, black probe to the negative post.
- Record the resting voltage. Compare it to the table above. If the battery is below roughly 12 volts, charge it first, because a deeply discharged battery muddies every reading that follows.
- Plug in shore power. Leave the probes on the same terminals and watch the number. A working converter usually raises it within seconds into the 13.2 to 14.4 volt band.
- If nothing changed, check the easy things. Reset the 120V breaker labeled converter at the handle, confirm the battery disconnect is closed, and inspect the pair of DC blade fuses on the converter that provide reverse polarity protection.
- Measure at the converter’s DC output terminals. Same meter setting, probes on the converter’s own positive and negative output. Voltage here but not at the battery isolates the fault to the path between them.
- Do a voltage drop check. With a load running, such as several lights and the water pump, note the converter reading and the battery reading at the same time. A gap larger than roughly half a volt on a typical 12V run points at undersized cable, a loose lug, or a corroded ground.
- Load test the output. Switch on a real load and watch whether voltage holds. A converter that reads fine unloaded but collapses under a modest load is not delivering usable current.
One optional extra: disconnect the battery entirely and measure the converter output with no battery attached. Some units read slightly higher this way, which confirms the converter is alive even when a failing battery is dragging the system down. Do this only briefly and with the shore power on, and reconnect promptly.
Reading the Results
Three outcomes cover almost every test. Understanding which one you got saves you from replacing the wrong part.
Voltage rises normally and holds under load, so the converter is fine. If the battery still dies overnight, look at a parasitic drain or a battery near the end of its life, and our guide on finding a parasitic battery drain covers that hunt. Voltage does not rise at the battery but the converter terminals read healthy, so the converter works and the problem is in fuses, cables, connections, or the ground path. Voltage does not rise anywhere and the breaker, disconnect, and fuses all check out, so the converter itself has failed.
Testing a Converter With Lithium Batteries
Lithium changes the numbers, so do not use the lead acid table above to judge a lithium bank. A lithium battery holds a much flatter voltage curve, commonly sitting in the 13.2 to 13.4 volt range for most of its usable capacity, which makes resting voltage a poor state of charge indicator.
The practical test is different: check whether the converter climbs into the range your battery manufacturer specifies for bulk charging, often somewhere around 14.2 to 14.6 volts, and whether it stays there long enough to fill the bank. A converter that tops out near 13.6 volts is not broken, it is a lead acid charger doing exactly what it was designed to do. Details are in switching an RV to lithium batteries.
Where the Testing Stops
Everything described here is DC work at the battery and at the converter’s low voltage terminals, which is reasonable owner territory with the precautions above. Testing the 120V input is not. Probing live AC inside a distribution panel, checking breakers under load, or opening the power center to reach the converter’s input side is work for a certified RV technician or a licensed electrician.
Stop testing entirely if you find a burning smell, discolored plastic, melted insulation, or a converter that is too hot to touch. Unplug shore power first and have it inspected. Also stop if the converter breaker trips as soon as you reset it, because that is a fault report, not a fluke.
If the Test Says the Converter Is Dead
When the fuses are intact, the breaker holds, the connections are clean, and the converter output terminals still show nothing useful, replacement is the normal outcome. RV converters are not repaired at home, and board level service is rarely worth the labor.
Note three things off the existing unit before ordering: output amperage, physical dimensions if it slides into a power center, and whether your batteries need a lead acid or lithium profile. Progressive Dynamics and WFCO are the brands most commonly found in North American RVs, and both offer multi stage replacements in typical factory amperage ranges.

The replacement decision, including when the AC side means calling a technician, is covered in our hub on RV converter repair.
Common Mistakes to Avoid
- Measuring immediately after unplugging. Surface charge inflates the resting reading. Give it time.
- Probing a 12V socket instead of the battery posts. Every connection between adds voltage drop and hides the real number.
- Testing on a dead battery. Charge it first, or the converter’s behavior will mislead you.
- Ignoring the negative side. A corroded ground produces the same readings as a failing converter.
- Skipping the load test. Plenty of converters look fine with no load and fail the moment current is asked for.
- Using the panel monitor as evidence. Built in RV gauges are indicators, not instruments.
Frequently Asked Questions
What voltage should an RV converter put out? Typically somewhere in the 13.2 to 14.4 volt range at the battery on a 12V lead acid system, depending on which charge stage it is in. A steady reading above roughly 15 volts suggests overcharging and needs attention.
Can I test the converter without a multimeter? Only roughly. You can check whether 12V lights stay bright on shore power with the battery disconnect open, but that is an indicator, not a measurement. A meter is what turns guessing into diagnosis.
Should the battery be connected while testing? Yes for the main comparison, since you want to see what actually reaches the battery. A brief disconnected reading can confirm the converter is alive if a failing battery is dragging the system down.
My converter reads 13.6 volts and never goes higher. Is it broken? Probably not. That is a normal float voltage for lead acid. It only becomes a problem when the battery is discharged and the unit refuses to enter a higher bulk stage, or when the bank is lithium.
Do I need to test the 120V side too? Not as an owner. Confirm the breaker is on and the pedestal is live, then leave any live AC testing inside the panel to a certified RV technician.
The Bottom Line
The whole test is one comparison: house battery voltage with shore power off against the same terminals with shore power on. No rise means the charge path is broken, and measuring at the converter’s own output tells you whether the fault is the unit or the wiring between. Load test before you conclude anything, use the lithium numbers if your bank is lithium, and keep all live 120V work with a certified technician.