Last updated: August 14, 2026
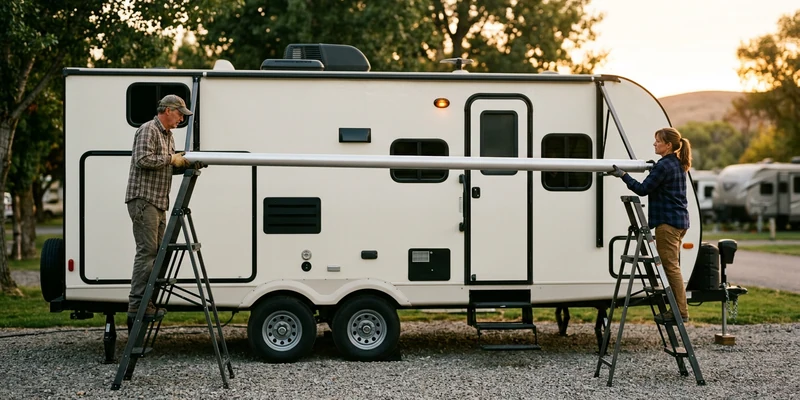
Before you work out how to replace a rv awning, settle one question, because it decides everything else: are you replacing the complete unit, arms and roller tube included, or only the fabric on a healthy frame? Fabric only is the shorter job. A complete unit is a half day project for two people, it means remounting brackets on the sidewall, and every fastener you disturb has to be resealed.
Both jobs run into the same hazard: the torsion spring inside the roller tube of a manual awning. That spring is preloaded whether the awning is out or in, and it has to be relieved or locked according to the manufacturer’s instructions before anything comes apart. Where a number matters below, the instruction sheet in your box is the authority.
This article contains affiliate links. If you buy through them, we may earn a commission at no extra cost to you. Learn more.
Quick Answer
How do you replace an RV awning?
- Decide first: fabric only if the arms, roller tube, and spring are sound, or a complete unit if two or more are tired.
- Measure the rail length and the tip to tip dimension, note the arm type and mounting height, then order a unit that matches rather than one that is close.
- Plan two people, two ladders, a dry and windless day, and relieve or lock the torsion spring per the manufacturer’s instructions before removing anything. If that step is unclear, hire an RV technician.
Replacing a Complete RV Awning, Step by Step
Work through these in order with a helper. Allow most of a day for a first attempt, since measuring, sealing, and adjusting take longer than the unbolting does.
- Measure before you shop. You need the rail length, the tip to tip dimension across the assembly from one arm casting to the other, the arm style, and the mounting height. Photograph all four brackets, since bracket style is what most mismatches come down to.
- Order a unit that matches. The nominal size is not the fabric width, so have the supplier confirm that the tip to tip figure, bracket type, and operation style all match. Staying in the original brand family, whether Carefree, Dometic, Lippert, or Solera, keeps the geometry closest.
- Pick the day and the crew. Dry, calm, out of direct midday sun, since warm vinyl stretches and cold vinyl fights you. Two people, two stable ladders on firm level ground, gloves. Never alone, never in wind.
- Roll the awning out partway. Most instructions have you deploy partially so the arms sit in a workable position. Support the roller tube before anything is loosened.
- Relieve and lock the spring tension. This is the step that hurts people. Follow the manufacturer’s procedure to take the preload out of the torsion spring and pin or clamp the tube so it cannot unwind, with your face and hands away from the tube ends.
- Free the bottom brackets. With the tube supported and the spring controlled, release the lower arm brackets while your helper holds the assembly, then lower the arms rather than letting them swing.
- Remove the top brackets. One person carries the tube while the other removes the upper hardware. Do not free the last bracket until you are both ready to take the assembly down together.
- Slide the fabric out of the rail. The canopy edge rides in a channel on the sidewall rail. Slide it out from one end while your helper guides it, then clean the channel.
- Mount the new unit in reverse order. Rail, top brackets, bottom brackets, checking that both arms sit at equal height and the assembly is square before anything is fully tightened. Torque to the manufacturer specification.
- Seal every penetration correctly. Vertical walls take a non sag sealant so it stays where you tool it, while roof penetrations take a self leveling lap sealant. Self leveling product on a sidewall simply runs.
- Adjust, test, and recheck. Set the pitch so the canopy drains off a corner, run it in and out several times, confirm the travel lock engages, and recheck every fastener after the first short drive.
🚐 If the whole assembly is going
A complete manual RV patio awning replacement kit that ships with arms, roller tube, and vinyl fabric in one box, so the bracket geometry, the spring, and the canopy all match each other. Confirm the tip to tip size and bracket style against your photos before ordering.

Read This Before You Touch the Roller Tube
A manual patio awning rolls itself up because a torsion spring inside the roller tube is wound under preload. That spring stores real energy at all times, including when the awning is retracted and looks completely inert. If an end cap, a retaining pin, or a bracket releases while the spring is still loaded, the tube can spin violently or come free, and people are seriously injured this way every season.
So do it the safe way. Two people, so nobody supports a loaded tube alone. The manufacturer’s exact procedure for relieving and locking the tension, not an improvised substitute. Hands and head clear of the tube ends. A dry, windless day, ladders on firm level ground. If the instructions are missing or the mechanism does not match the sheet, stop and call an RV technician.
When Only the Fabric Needs Replacing
If the arms move smoothly, the tube is straight, and the awning still retracts with authority, you do not need a new unit. Fabric only leaves the brackets and sidewall sealant untouched, which matters, since every screw you do not remove is a leak you cannot create. Sight along both arms for a bend and along the tube for a bow, and work the sliders through their travel. If two or more are questionable, do the complete unit while you are up there; if they all pass, follow how to replace RV awning fabric.
🧵 If the frame is healthy and only the canopy is finished
Replacement vinyl RV awning fabric, ordered to fit the roller tube you already own rather than the advertised awning size. Note the polycord diameter at both edges and have the supplier confirm the fit.

Manual Versus Electric: What Changes
The two families look similar on the wall and are not similar to work on. A manual awning is mechanical throughout, which makes it approachable once the spring is controlled. A powered awning adds a motor, limit switches, and wiring, which move the job across the line.
| Aspect | Manual awning | Electric awning |
|---|---|---|
| Mounting | Rail plus top and bottom brackets, all mechanical | Same brackets, plus wiring through the sidewall |
| Spring | Preloaded torsion spring in the roller tube | Often a spring assist as well, plus motor torque |
| Motor and switches | None | Motor, limit switches, and a control circuit to set up |
| Cost of a mistake | Spring injury risk, plus leaks if sealing is skipped | The same, plus a motor that can drive past its stops |
| Who should do it | Two capable owners with the instructions in hand | An RV technician for motor, switches, and harness |
If yours is powered and the fault is electrical, the owner side is the 12 volt supply: the fuse, the switch, and battery voltage under load, normally around 12.6 to 12.8 volts at rest on a healthy battery. Beyond that, disconnect power and hand the rest over. The full diagnostic path is in our hub guide to RV awning repair.
Measuring and Ordering Without Guesswork
Awning sizing confuses almost everyone the first time, because the number on the box is not a number you can measure anywhere on the rig. The industry standard is the tip to tip dimension, measured across the assembly from the outside of one arm casting to the other, and that is the figure suppliers ask for.
The fabric itself is narrower than that nominal size, because the arms and end castings take up space at both ends. That is why ordering fabric to the advertised size produces a canopy that does not fit. Measure the tube, take the rail length, photograph the brackets, and have the supplier confirm the match.
What to have ready before the box arrives
This job also consumes sealant and hardware. Plan on removing old sealant cleanly from every penetration, applying fresh sealant of the right type in the right place, and having spare mounting hardware on hand.
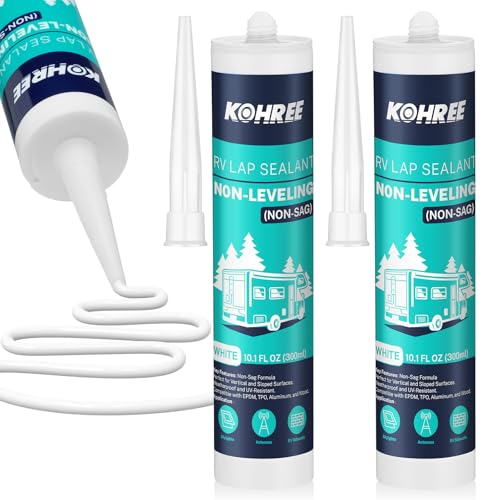
🧪 Two sealants, and they are not interchangeable
An RV non sag sealant for vertical sidewall penetrations, which stays where you tool it, plus a self leveling lap sealant for anything you disturb on the roof. Self leveling product on a wall is a classic mistake.
🔩 Fresh hardware beats reused hardware
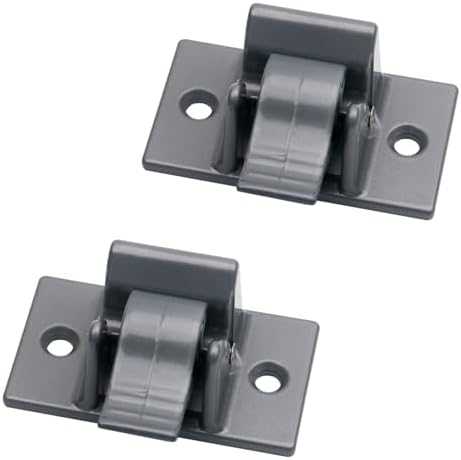
An RV awning hardware set with replacement arm brackets and mounting screws, so you are not reusing fasteners that spent years working loose in a sidewall. Match the bracket style to the photos you took.
Where This Stops Being a DIY Job
A complete awning swap is within reach of two careful owners. These parts of it are not.
- Spring tension you cannot control. If the procedure is missing or does not match your mechanism, stop. A loaded roller tube that gets away from you causes serious injuries.
- Working at height without a second person. Two ladders, two people, firm ground, no wind. Any of those missing means the job waits.
- Motors, limit switches, and harnesses. Powered awnings need the maker’s setup procedure, and a mis-set limit drives the awning into its stops.
- A sidewall that is not sound. Pulled screws, a spread rail, or soft spots mean the structure needs assessment before anything is remounted.
- Signs of water intrusion. Stains, a musty smell, or soft paneling near the rail mean water has been getting in behind the mounting.
Common Mistakes to Avoid
- Ordering by the advertised awning size. The nominal size is not the fabric width.
- Removing brackets before the spring is locked. This is the sequence error that causes injuries. Tension first, hardware second.
- Doing it alone. The tube is long, awkward, and heavier than it looks, and both ends need attention at once.
- Skipping the sealant, or using the wrong one. Every screw through a sidewall is a leak path, and self leveling sealant belongs on the roof.
- Mounting the arms at unequal height. Uneven arms mean the canopy never tensions or drains properly.
- Never rechecking after the first drive. Fresh hardware settles, and a short recheck prevents the failures owners describe most often.
Where to Go From Here
If your inspection says the frame is fine, take the shorter path in how to replace RV awning fabric. If you are still diagnosing, the symptom table in our hub guide to RV awning repair sorts sag, pooling, stuck arms, and electrical faults into causes and first actions. Once the new awning is up, wash it using this cleaning walkthrough, keep awning repair tape aboard, and apply the same recheck habit to your slide-out.
Frequently Asked Questions
How long does it take to replace an RV awning? Plan on most of a day for a first complete swap with two people, including measuring, removal, sealing, and adjustment. Fabric only is shorter.
Can one person replace an RV awning? It should not be attempted alone. The roller tube holds a preloaded spring, the assembly is long and awkward, and both ends need attention at once.
How do I measure my RV awning for a replacement? Take the tip to tip dimension from one arm casting to the other, plus the rail length and mounting height, and photograph the brackets. Have the supplier confirm the match.
Do I need to reseal after replacing an awning? Yes. Every fastener through the sidewall is a potential leak. Use a non sag sealant on vertical walls and self leveling lap sealant only on roof penetrations.
Is it cheaper to replace the fabric or the whole awning? Fabric only is the smaller job when the arms, tube, and spring are sound. Once two or more are questionable, a complete unit makes more sense. See the fabric guide.
Can I replace an electric awning myself? The mechanical mounting can be owner work, but the motor, limit switches, and wiring belong with an RV technician, and power should be disconnected first.
The Bottom Line
Decide fabric or full unit before you order anything, because that choice sets the length of the job. Measure tip to tip, confirm the bracket style with the supplier, and plan for two people, two ladders, and a dry windless day. Relieve and lock the torsion spring exactly as the manufacturer specifies before a bracket comes loose, seal every sidewall penetration with a non sag product, and recheck the hardware after the first drive. If the spring procedure is unclear, call an RV technician.