Last updated: August 14, 2026
Finding the best RV converter for lithium batteries comes down to one specification that most product pages bury: the charge profile. A converter built for flooded and AGM batteries finishes its work at a float voltage that leaves a lithium bank permanently short of full, which is why owners who spend heavily on lithium and keep the factory converter often report the bank never reaching 100 percent.
The fix is not complicated, but it is specific. You need a unit that either has a dedicated lithium mode or is programmable to a lithium profile, and you need enough output amperage to actually use the charge acceptance lithium offers. This guide sorts the field by those two things, covers the deck versus standalone question that decides what physically fits, and is clear about which half of the install is owner work.
This article contains affiliate links. If you buy through them, we may earn a commission at no extra cost to you. Learn more.
Quick Answer
Which RV converter should you use with lithium batteries?
- Choose a converter with a selectable or programmable lithium profile. Lithium banks generally want a higher, flatter charge, commonly in the 14.2 to 14.6 volt range, with little or no long float stage.
- Size the output amperage to the bank. A converter in the 45 to 60 amp range suits most single or double battery lithium setups, and bigger banks justify more.
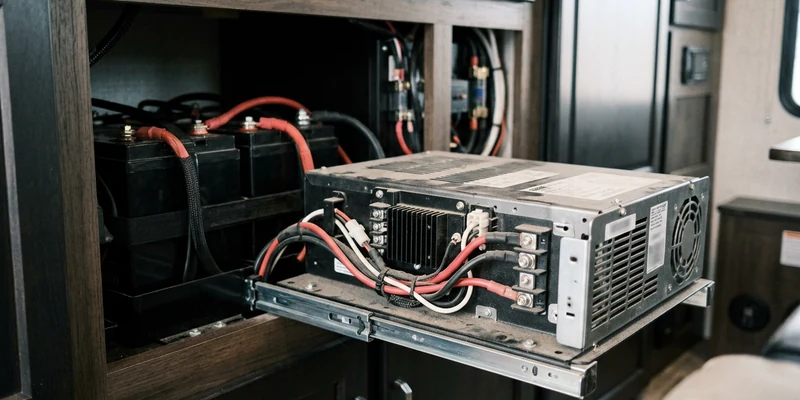
- Check the physical format first. Power center decks and standalone units are not interchangeable, and the opening in your existing panel decides which one you can fit.
What Separates a Lithium Ready Converter From a Frustrating One
Six specifications decide whether a converter suits a lithium bank. Brand recognition is not among them, and neither is the marketing phrase on the front of the box.
| What to check | Why it matters | What to look for |
|---|---|---|
| Charge profile | A lead acid profile leaves lithium chronically short of full | A stated lithium mode or a programmable output voltage |
| Absorption voltage | This is the number that decides whether the bank actually fills | Commonly in the 14.2 to 14.6 volt range for lithium iron phosphate |
| Float behavior | Lithium does not want to sit at an elevated voltage for days | A low float, a storage mode, or the ability to stop charging |
| Output amperage | Lithium accepts charge far faster than lead acid, so a small converter wastes that | 45 to 60 amps for typical banks, more for large ones |
| Physical format | A deck will not fit where a standalone lives, and the reverse | Measure the opening in the power center before ordering |
| Cooling and mounting | Converters shed real heat and are often buried in a cabinet | A fan with thermal control, plus clearance around the unit |
If your current unit is simply not charging at all, that is a fault rather than a compatibility problem. Work through RV converter repair and confirm with a multimeter test before replacing anything.
Why Lead Acid Converters Undercharge Lithium
The two chemistries want different things from a charger. A lead acid profile uses a higher bulk voltage to refill the battery, then drops to a float voltage, commonly somewhere around 13.2 to 13.6 volts, and holds it there indefinitely. That float is deliberately gentle, because holding a flooded battery high boils off electrolyte.
Lithium iron phosphate has a much flatter voltage curve, and the last portion of its capacity sits above where a lead acid float lands. Park a lithium bank on 13.4 volts and it will settle at a state of charge that looks nearly full on the display and is not, which is exactly the complaint owners describe after an upgrade. It is not a fault, and no amount of leaving it plugged in longer fixes it.
What changes with a lithium profile
A lithium capable converter raises the absorption voltage into the range the chemistry actually needs, then either drops to a low holding voltage or stops. Some units do this through a dedicated switch or jumper, others through a small selector on the face, and programmable units let you set the numbers directly. All three work. What does not work is a lead acid unit with a resistor trick from a forum post, because you lose the manufacturer’s protection behavior along with the profile. The full context for the upgrade is in switching an RV to lithium batteries.
Our Top Picks at a Glance
How we chose: we compared widely available RV converters on charge profile flexibility, output amperage, physical format, cooling, and the themes that repeat across owner feedback and technician recommendations. Our assessment rests on published specifications and that feedback rather than any hands on trial of our own. Two practical notes before the list: confirm the opening dimensions in your power center before ordering, and confirm your battery manufacturer’s recommended charge voltage, because it is the authority over any general figure.
🏆 Best Overall
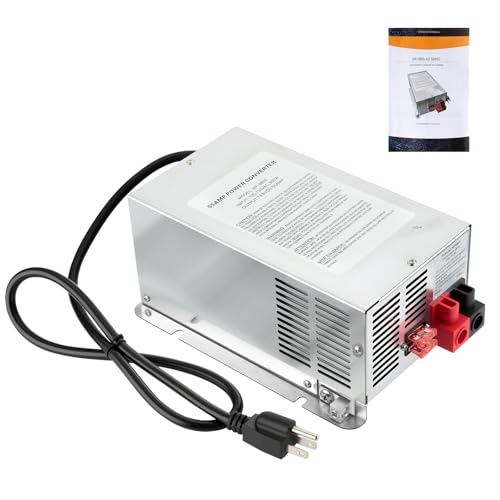
A 60 amp deck style converter charger with a selectable lithium profile, from Progressive Dynamics. It drops into the common power center opening, so the existing breakers and fuse panel stay put, and 60 amps is enough to make real use of what a lithium bank will accept. The mode selection is the part that matters, and having it built in beats any workaround.

💰 Best Budget Pick
A 45 to 55 amp lithium compatible converter from WFCO, sized for a single or double battery bank rather than a large one. WFCO units are extremely common as factory equipment, so the replacement often matches the existing opening exactly, which removes the fabrication step that makes these jobs expensive. Sensible where the bank is modest and the budget is real.
⚡ Upgrade Pick
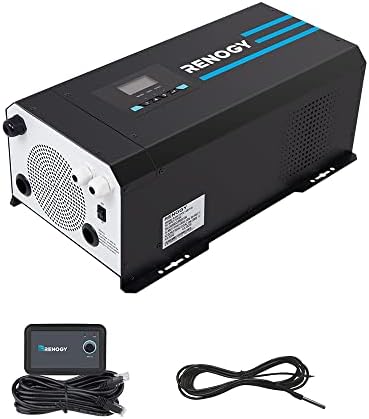
An inverter charger with a programmable lithium charge profile and a built in transfer switch, which replaces the converter and adds 120 volt output from the bank in one box. Xantrex and Victron both build units used in RV installs. It is the right answer when a lithium upgrade and an inverter project are happening together, and overkill when they are not.
Which Setup Fits Your Rig?
Bank size and physical layout predict the right answer better than any spec comparison. Find yourself below before shopping.
One or two lithium batteries in a travel trailer
A 45 to 60 amp lithium capable converter is comfortably enough, and the deck format usually applies because trailers overwhelmingly use a power center. The practical gain is that the bank fills properly on a single evening of shore power instead of never quite finishing.
A larger bank in a fifth wheel or class A
Here the converter is often no longer the main charging source, because solar and alternator charging carry more of the load. A 60 amp unit still makes sense for shore power days, but the money may be better spent on the solar side. That tradeoff is worked through in how much solar an RV actually needs.
A van or small camper with a standalone converter
Space rules everything, and many vans have no power center at all, just a converter bolted to a bulkhead. A compact standalone unit in the 30 to 45 amp range is the fit, and the mounting location needs airflow rather than a sealed cabinet.
Three More Picks for Specific Situations
The three above cover most owners. These fill the gaps that appear once the bank gets smaller, the install gets more involved, or you want to see what the charging is actually doing.
🚐 For a Van or Small Camper
A compact standalone lithium capable converter in the 30 to 45 amp range, mounted where it can breathe. Smaller banks do not need 60 amps, and the reduced size and heat output matter far more in a van conversion than the last few amps of charge rate.
🔧 For Keeping the Existing Power Center
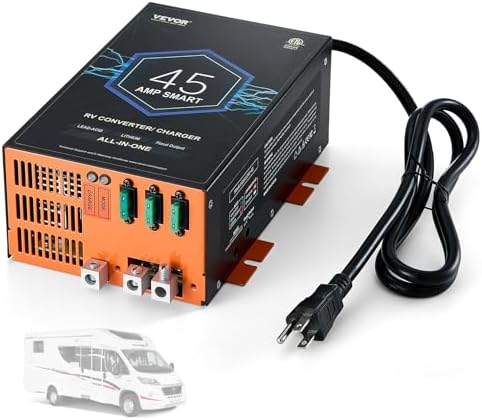
A replacement converter deck sized to the opening you already have, rather than a whole new distribution panel. This is the cheapest path when the breakers and fuse panel are fine and only the charging section needs to change, and it avoids touching the AC wiring beyond the connection a technician makes.

📊 The Part People Forget
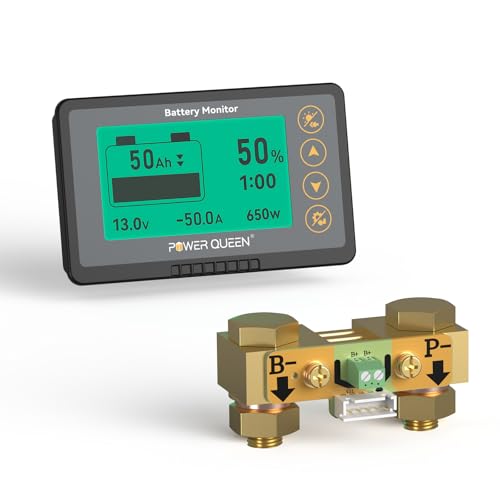
A battery monitor with a shunt on the negative cable, showing current in, current out, and true state of charge. On lithium this is close to essential, because the flat voltage curve makes a voltmeter a poor guide to how full the bank actually is, and it is how you confirm the new converter is doing what you paid for.
Installing It Without Creating a Problem
Three things go wrong most often, and none of them involve the converter itself. Cable size is the first: lithium accepts high current, and a 60 amp converter feeding a bank through undersized cable produces heat and voltage drop rather than a fast charge. The second is fusing, since the DC output needs protection at the correct rating and the main battery cable needs its own fuse close to the terminal. The third is ventilation, because converters are routinely buried behind stored gear and a unit that cannot shed heat reduces its output.
On the DC side, the standard precautions cover you: disconnect the negative cable first, pull the main fuse, take off rings and a watch, and torque the terminal hardware properly. A loose lug carrying 60 amps is a fire risk rather than an inconvenience. Blade fuse sizing on the output is covered in our guide to the RV converter fuse.
Where the line is
Wiring a converter into the RV’s 120 volt distribution panel is not a DIY job. The converter sits exactly where shore power meets the 12 volt system, and the AC input side, the panel, and any breaker work belong to a certified RV technician or a licensed electrician. Sliding a deck out and back in sounds simple and still involves AC connections behind it. The reasonable owner split is to do the DC side, the battery cabling, and the monitor yourself, and to have the AC connection made professionally.
Common Mistakes to Avoid
- Keeping the lead acid converter and blaming the batteries. A bank that stalls near full is usually being charged on the wrong profile, not failing.
- Buying amperage the bank cannot use. A single 100 amp hour battery does not need the largest converter on the shelf, and the manufacturer’s charge current limit still applies.
- Ignoring the physical format. Deck and standalone units are not interchangeable, and discovering that after delivery costs a weekend.
- Trusting voltage as a fuel gauge. Lithium’s flat curve makes a voltmeter a poor state of charge indicator. Use a shunt based monitor.
- Forgetting the low temperature rule. Most lithium batteries must not be charged below freezing without a built in cutoff or heater, and a converter has no idea how cold the cells are.
- Leaving the ventilation blocked. Storage stacked against a converter is one of the most common causes of reduced output and early failure.
Where to Go From Here
If the batteries are still on the shopping list rather than already fitted, do that project as a whole rather than one component at a time. Cable, fusing, the converter profile, and often the alternator charging path all move together, and our walkthrough on switching an RV to lithium batteries sequences them.
If the converter you already have is behaving oddly rather than simply charging to the wrong voltage, diagnose before buying. Our guide to common RV converter problems covers the symptom patterns, and a converter not charging the battery covers the specific case where nothing arrives at all. And once the rig is stored for the season, lithium changes the storage rules too, which is covered in keeping RV batteries charged in winter storage.
Frequently Asked Questions
Do I really need a new converter for lithium batteries? If your existing unit has no lithium mode, usually yes. A lead acid profile will charge the bank partially and hold it there, which is the most common complaint after an upgrade.
What voltage should a lithium converter charge at? Commonly somewhere in the 14.2 to 14.6 volt range for absorption, with little or no extended float. Your battery manufacturer’s stated figures override any general range.
How many amps should the converter be? A 45 to 60 amp unit suits most single and double battery lithium banks. Larger banks can accept more, but the battery manufacturer’s maximum charge current still applies.
Will a lithium converter damage lead acid batteries? Running a lithium profile on flooded batteries can overcharge them, so use the correct mode. Units with a selector handle both, one setting at a time.
Can I install it myself? The DC side and the battery cabling are owner work with the usual precautions. The 120 volt connection into the distribution panel is for a certified RV technician or licensed electrician.
Does the converter charge lithium in freezing weather? It will try, which is the problem. Most lithium batteries must not be charged below freezing unless the battery management system includes a low temperature cutoff or a heater.
The Bottom Line
Buy the charge profile first and the brand second: a converter with a genuine lithium mode is what allows the bank to reach full, and a lead acid unit never will regardless of how long you leave it plugged in. Forty five to sixty amps covers most banks, the deck versus standalone format decides what physically fits, and a shunt based monitor is what proves the change worked. Do the DC side yourself and hand the 120 volt connection to a certified RV technician.