Last updated: August 14, 2026
When people describe RV slide-out problems, the story is almost always the same: it worked last season, now it groans, stutters, or refuses to move. Before you start pricing motors, know this. The most common cause of a slide that hesitates, jerks, or clicks and stops is low 12 volt power, not a failed mechanism. Slide motors draw hard, and a battery that still lights the coach and runs the pump can sag below what the controller needs the moment the slide takes load.
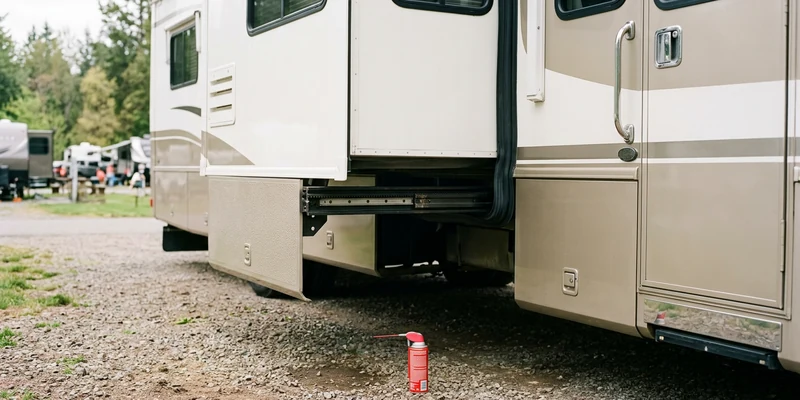
The second most common cause costs nothing either: dry, dirty rails and stiff seals. Grit on a rail and a seal gone tacky in the sun add enough drag to make a healthy system sound sick. This guide works from the free checks up to the parts, and it draws a clear line where the job stops being yours: lubrication, cleaning, fuses, and batteries are driveway work, while motors, controllers, gear racks, cables, and anything hydraulic belong with a certified RV technician.
This article contains affiliate links. If you buy through them, we may earn a commission at no extra cost to you. Learn more.
Quick Answer
Why is your RV slide-out sticking or jerking?
- Start with power. A healthy 12 volt battery usually reads around 12.6 to 12.8 volts at rest, and slides misbehave well before a battery looks dead. Plug into shore power and try again.
- Then reduce drag: level the rig, clear the rails of grit, apply a dry lubricant made for slide mechanisms, and condition the rubber seals.
- Grinding, a slide that walks out crooked and stays crooked, or anything hydraulic that leaks means stop and call a certified RV technician.
Symptoms, Likely Causes, and What to Do
Find your symptom first. The right hand column is deliberately ordered from free to expensive, so start at the top of each cell and work right.
| What you see or hear | What it usually means | What to do |
|---|---|---|
| Click at the switch, nothing moves | Low battery voltage, blown fuse, or a failed switch | Plug into shore power, check battery voltage at rest, check the slide fuse or breaker |
| Slow, groaning, or jerky travel | Dry or gritty rails, stiff seals, marginal voltage | Clean the rails, apply dry slide lubricant, condition seals, recheck voltage under load |
| Slide runs, then stops partway | Obstruction, controller cutting out on load, or low voltage | Check for anything in the path inside and out, retract fully, retry on shore power |
| One side leads, the room goes crooked | Rack and pinion motors out of sync on an in-wall system | Follow the maker’s resync procedure once; if it recurs, book a technician |
| Grinding or metallic crunching | Damaged gear teeth, bent rail, or a jumped track | Stop immediately, do not cycle it again, technician |
| Hydraulic slide slow or dead | Low fluid, pump or valve fault, or a leak | Check the reservoir level and look for wet spots, then technician for anything beyond that |
| Water or draft around the room | Compressed, torn, or dried out seals | Clean and condition the seals, inspect the wipers, replace seals if split |
| Slide only fails on battery, fine on shore power | Charging or battery capacity problem, not the slide | Diagnose the charging system, see the converter guides below |
If the pattern in that last row matches yours, the slide is a messenger. Work through an RV converter that is not charging the battery before you touch the slide mechanism at all.
Start With Power, Because It Is Free
A slide motor is one of the heaviest 12 volt loads in the coach. Voltage that looks fine with nothing running can drop under that load to the point where the controller stalls, reverses, or throws the two motors on an in-wall system out of step with each other.
Check the resting voltage at the battery terminals with a multimeter. As a commonly cited range, a healthy 12 volt lead acid battery sits around 12.6 to 12.8 volts at rest, and readings meaningfully below that mean charge before diagnose. Then plug into shore power, or run the tow vehicle if the trailer charges from it, and try the slide again. Many slides that seemed broken in a storage lot work perfectly on a pedestal, which tells you the fault was never in the slide.
Fuses, breakers, and the switch
Slides normally have their own fuse or auto-reset breaker, often near the battery or in the main 12 volt distribution panel. A blown fuse is the cheapest possible answer and it is worth ruling out early, and if you want the systematic version we cover it in tracing which RV fuse blew and why. Switches fail too, usually as an intermittent that works in one direction only.
Then Reduce the Drag
With power ruled out, the next free win is friction. Grit, dried seals, and a twisted frame all make the motor work harder than it was designed to.
Level the coach first. A rig sitting off level puts the slide opening out of square, and the room binds on one corner as it travels. If the slide only complains at certain campsites, that is the tell, and our walkthrough on using RV leveling blocks correctly covers the sequence. Then clean the rails: brush and wipe the exposed tracks, top and bottom, and check for road grit, pine needles, and dried leaves that ride in on the room.
Lubricate the right thing with the right stuff
Slide mechanisms generally want a dry lubricant on the rails and gears, because oily sprays hold grit and turn into grinding paste. Rubber seals want a rubber conditioner, not silicone spray on the tracks. Technicians commonly recommend doing both at the start and end of the season, and owners who keep to that schedule report far fewer sticking complaints. Check your manufacturer’s guidance before spraying anything, since a few systems specifically ask for no lubrication on the drive gears.
The Supplies This Job Actually Needs
How we chose: we looked at widely available maintenance products that RV technicians commonly recommend for slide mechanisms and seals, plus the one diagnostic tool that turns guessing into measuring. Our assessment rests on manufacturer guidance and recurring owner feedback rather than any hands on trial of our own.
🛢️ For the Rails and Gears
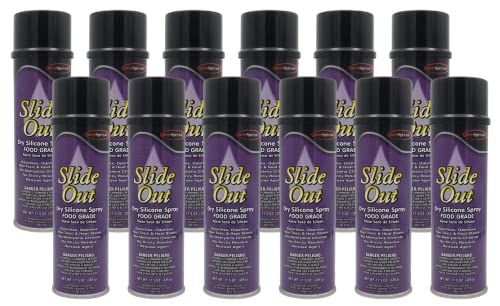
A dry lubricant made for slide-out mechanisms goes on wet, flashes off, and leaves a film that does not attract grit. That last part is the whole point, since general purpose oil on an exposed rail collects sand and accelerates wear. Spray the rails and moving contact points, not the rubber. Confirm your slide maker permits lubrication on your specific system before you start.
🧴 For the Seals
A rubber seal conditioner keeps the wipers and bulb seals pliable so they slide instead of dragging, and it is the cheapest insurance against the leaks and drafts that follow a hardened seal. Clean the seals first, then apply thinly. Owners in hot, sunny climates report the biggest difference here, since UV is what dries the rubber out in the first place.
![3-IN-ONE RVcare Trio Assortment Bundle [3-Pack] | Slide Out 11 OZ...](https://m.media-amazon.com/images/I/51mIrhM0HLL._AC_.jpg)
🔌 For the Diagnosis
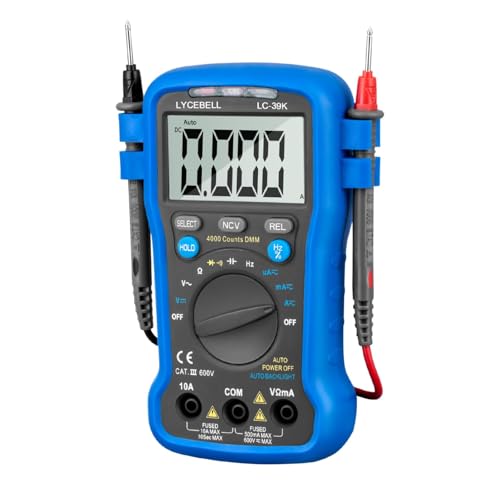
A basic digital multimeter answers the voltage question in thirty seconds and pays for itself the first time it saves a service appointment. It is also the tool behind almost every other 12 volt diagnosis on the coach, from a converter that is not charging to a parasitic drain. Any meter that reads DC volts accurately is enough for this job.
Getting a Stuck Slide Closed So You Can Travel
Almost every slide system has a manual override, and knowing where yours is beats discovering it at checkout time. Electric systems typically use a crank or a motor release; hydraulic systems use a release valve at the pump. The exact location and procedure differ enough between makers that the only correct instruction is the one in your manual, and using the wrong method can damage the drive.
Two rules apply regardless of system. Keep hands, tools, and people out of the slide path while anything is under power or under stored hydraulic pressure. And once a slide is manually retracted for travel, secure it as the manufacturer specifies, then get the underlying fault diagnosed rather than repeating the override every trip.
Where This Stops Being a DIY Job
The dividing line on slide-outs is unusually clean, so it is worth stating plainly. Cleaning, lubricating, conditioning seals, checking fuses, charging or replacing a battery, and reading voltage are all reasonable home jobs with the usual precautions of disconnecting the battery and pulling the fuse before touching wiring.
Everything past that is technician work: replacing a slide motor, programming or replacing a controller, adjusting cable tension, replacing a gear rack, straightening a rail, and any hydraulic work at all, including pumps, valves, lines, and pressurized fluid. Hydraulic systems hold pressure even when everything is switched off, and a line that lets go does real damage. A slide that has jumped its track or shows a bent rail is structural too, since the roof and wall around the opening carry that load, so get a crooked room looked at before something in the wall gets expensive.
Common Mistakes to Avoid
- Cycling a grinding slide to see if it clears. It does not clear. Each cycle takes more teeth off a gear or bends more rail.
- Oiling the rails. Wet lubricant plus road grit equals abrasive paste. Use a dry lubricant made for the job.
- Diagnosing on a weak battery. Half the reported slide faults change behavior once the coach is on shore power. Rule power out first.
- Running slides before leveling. A twisted frame binds the room, and doing it repeatedly wears the mechanism unevenly.
- Ignoring the seals. A dried seal drags, leaks, and eventually lets water into the wall, which is a far bigger repair than a bottle of conditioner. Damp interiors also feed the problems covered in stopping condensation and mold in an RV.
- Forgetting the roof. Leaves and standing water on the slide top ride inside on the next retraction and grind into the seals.
Where to Go From Here
If your slide only misbehaves off shore power, the real project is the charging system. Start with RV converter repair and diagnosis, then work through a converter that is not charging if the battery never seems to come up. If the electrical side checks out and the story is really drag and wear, keep the seasonal habit going: clean, lubricate, condition, and level.
Frequently Asked Questions
Why does my slide-out move slowly or jerk? Usually low 12 volt voltage under load, dry or gritty rails, or stiff seals. Try it on shore power, then clean and lubricate the rails with a dry lubricant before assuming the motor is failing.
Can a weak battery stop an RV slide-out? Yes, and it is the most common cause. Slide motors draw heavily, so a battery that runs lights and a water pump can still sag below what the controller needs when the room takes load.
What lubricant should I use on slide-out rails? A dry lubricant made for slide mechanisms, which leaves a film without attracting grit. Rubber seals get a separate rubber conditioner. Check your slide maker’s guidance first, since a few systems ask for none.
How do I close a stuck slide to get home? Use the manual override for your system, a crank or motor release on electric slides, a release valve on hydraulic ones. The procedure is model specific, so follow your manual and keep everyone clear of the slide path.
Why does my slide come out crooked? On in-wall rack and pinion systems, the two motors can fall out of sync, often after a low voltage event. There is a maker specified resync procedure, and a slide that goes out of sync repeatedly needs a technician.
How often should slide-outs be maintained? Technicians commonly recommend cleaning and treating rails and seals at the start and end of the season, plus a wipe down whenever the slide top has collected debris.
The Bottom Line
Work slide-out problems in this order: power, then drag, then parts. Confirm the battery under load and on shore power, then level the rig, clean the rails, apply a dry lubricant, and condition the seals, because that sequence fixes most sticking and jerking without opening a wallet. Stop at the first sign of grinding, a bent rail, a repeatedly crooked room, or any hydraulic leak, and hand those to a certified RV technician.